Making stickers is seriously THE BEST. A few weeks ago I posted on how to make stickers on the Cricut. It got a great response, but I started to get questions on how I draw my stickers. So here is a step-by-step guide to show you how to draw the stickers, add the white outline border around the stickers, and save them as a file with transparent background.
This transparent background makes it easy to send your stickers to get printed, or to upload them into Cricut Design Space as a print then cut image.
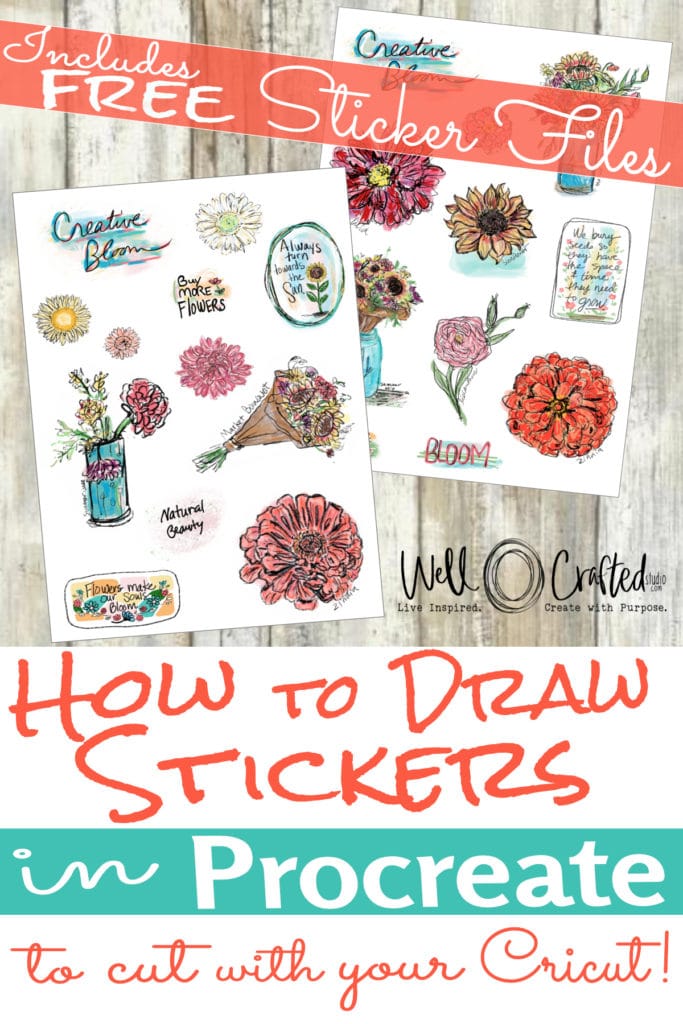
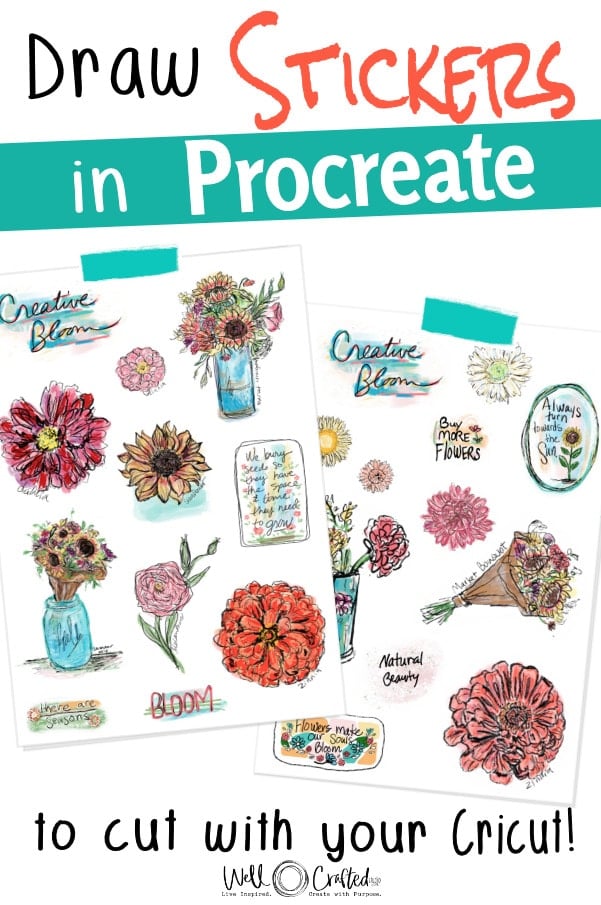
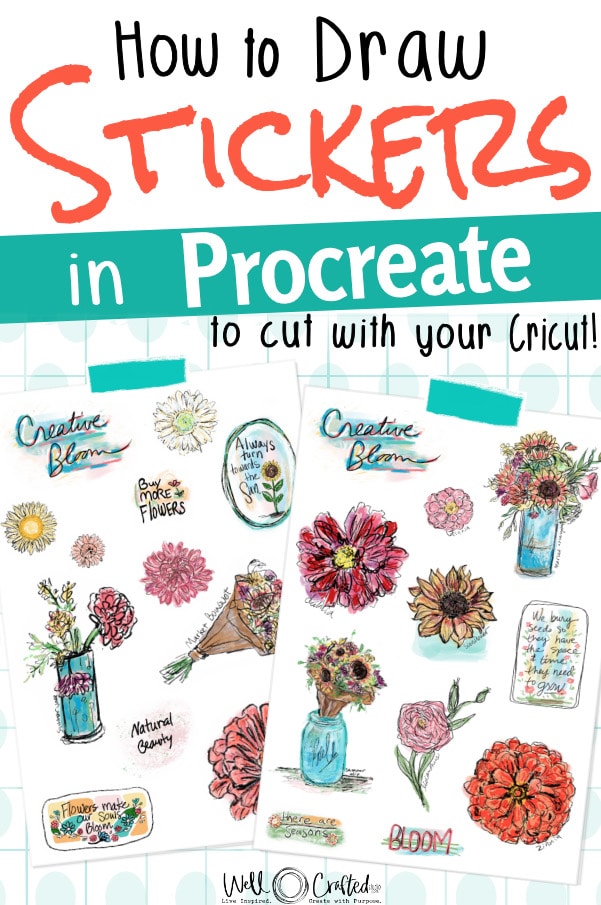
I also give you a free copy of the stickers I make in the video so you can see what the stickers look like as a file. As an extra freebie, I have the Procreate brush I made for creating the white borders around my images, so make sure you grab that too!
Want to Know About Where to Start with Procreate?
I do have a GREAT beginner post, Beginner’s QuickStart Guide to Procreate. This post was written to give you all the basic info you need to get started using Procreate. I also have a Facebook group, Procreate for Cricut + Silhouette Creators that I’ll link to at the bottom of this post!
Get the Free Sticker Sheet Downloads + Procreate Cheat Sheet
As a Sticker DOWNLOAD BONUS- Get the Sunflower Market STICKERS I create for this tutorial when you subscribe to my email list.
Need the password? Just sign up for my email list, and you’ll get the password emailed directly to you!
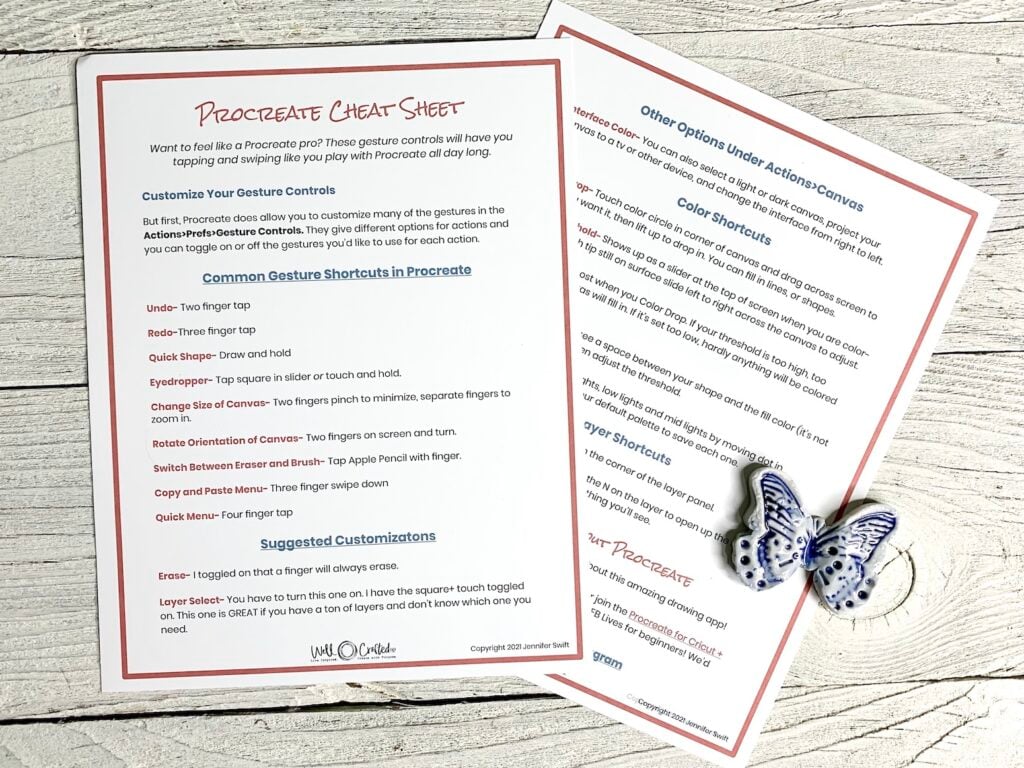
AND you can also download my Procreate Cheat Sheet to Gesture Shortcuts as well!
YouTube Tutorial- How to Draw Stickers In Procreate
How to Draw Stickers With Procreate
This post contains affiliate links. Thank you for supporting my small business.
What You’ll Need
- Procreate App (available from the Apple App Store for iPad)
- iPad– I use the 12.9 iPad Pro but Procreate works with other models of iPads as well.
Optional:

- MY Custom Sticker Outline Procreate Brush– totally optional but it’s the one I created for my own sticker making.
- Free Procreate Stamp Brushset- To help you get started making stickers, I created a free stamp set with a seamless brush as a free download for email subscribers. Subscribing is free and you get the password to my Resource Library where all my freebies are!
- Apple Pencil (or Third-Party Stylus)- Totally not necessary in Procreate but it really does help your sketching feel natural giving you better results!
- Paper-like Screen Protector– this gives the surface of your iPad a little roughness so that your pencil won’t just slide across the screen. It makes it less fatiguing and you may find you get more natural looking strokes as well!
Note: People ask me what sticker papers I recommend all the time. Or they have questions about the difference between clear stickers or laminate, printable vinyl, or matte vs. glossy. To answer these questions, I created a post with ALL my Sticker Paper recommendations, How to Choose the Sticker Paper that’s Right for Your Project.
Directions For Making Stickers in Procreate
Step One: Create a Custom Canvas

The first step is to open the Procreate app on your iPad and tap on the plus sign in the upper right corner of the gallery page.
This drops down a menu that has the canvas sizes.
Create a custom canvas size at the bottom of the menu. Mine is sized at 1571 pixels by 2367 pixels at 300 dpi for a sticker sheet.
Name the custom canvas Stickers and touch done. This will immediately open up a new canvas on your screen.

Step Two: Sketch your Sticker
To select a brush to sketch with, tap on the brush symbol near the top right corner of the screen. This opens up the Brush Library. Under Sketching, you’ll find a selection of brushes to choose from.
Personally, I like using a 6B pencil to start the sketch, and then use a monoline brush (in inking) to go over it for a more refined look to the finished sticker.
To adjust the size of your brush, use the sliding size adjustment on the interface at the left-hand side of the screen. I sketch pretty large then size it down after it’s complete.
About the Different Types of Stickers
Planning to create kiss-cut sticker sheets with a Cricut cutting machine? You could also make a custom canvas 6.75″ x 9.25″ (the max size for Cricut’s Print then Cut feature).
If you are thinking of creating die-cut stickers that you could possibly use for sublimation designs or to create high quality products for Society 6 later, then you’ll want to make your canvas at least 10″ x 10″ @ 300 dpi and draw one sticker per canvas.
You can always group them on a separate canvas later to create a kiss-cut sticker sheet.
Wondering about CMYK or RGB? If you plan to make printable stickers, even if it’s just with a home inkjet printer, then using CMYK as your color profile is a good idea. If you are making digital stickers then RGB or the default P3 works well.
THE DIRECTIONS BELOW ARE THE ENTIRE PROCESS FOR MAKING A STICKER SHEET WITH MULTIPLE STICKERS. For die-cut stickers skip steps 4-7.
In my YouTube video, I give more info on the sketching process, including how to select and move parts of your sketch.
Note: I have the slider interface on the left because I like it there, BUT you can totally customize that. There are a ton of modifications you can make to optimize your Procreate experience! Just look under the wrench icon and preferences!
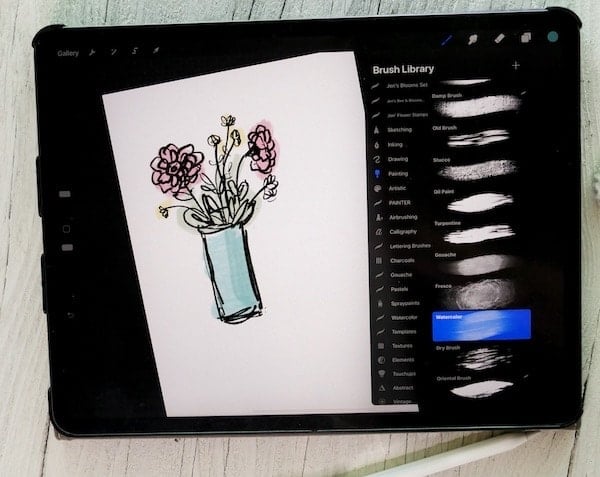
Step Three: Add Color
Open up a new layer by touching the layers icon (overlapping squares) and then the plus sign in the corner. This will create “Layer 2.” You can rename your layers something like “sketch” and “color” or leave them as is.
MOVE THIS 2nd SEPERATE LAYER UNDER your sketch layer by tapping and holding to drag it below Layer 1.
For each sticker design I usually work with multiple layers, and then merge them when I have the result I want. Touch and drag “Layer 2,” so that it is under “Layer 1.”
To Add Color: Under brushes, select a painterly style brush. Usually, I will do a soft wash of color (using the watercolor or gouache brush) behind my sketch and then build up other layers with colored pencil or crayon brushes.

To choose a color, tap the round circle in the top right corner of your screen. This will open the Color Panel. and will allow you to play with palettes and to choose the colors you’d like for your sticker sheets. (I get more in-depth about creating color palettes in the video as well!)
Continue to create Layers as you add different media to your sketch.
Tip: You can get highlights and lowlights for each of your main color choices by moving the center dot around in the center of the circle color palette. Save those shades in the color palette you create for these stickers.
Step Four: Group the Layers
When you feel like you’re satisfied with the colored layers of the sketch, you may choose to merge the layers by tapping on the top layer and selecting “merge down.”
Repeat this until you have a single color layer and a single sketch layer for your sticker design. Select both by sliding left across them and then Group them. Rename the grouped layer. This helps me to keep track of everything and not get overwhelmed by too many layers.
Note: Depending on the amount of memory on your iPad, you may find yourself limited by the number of layers you can have. Merging the layers creates a single layer, but grouping the layers ADDS an additional layer to your canvas. So if you run out of layers, merging is the way to go.

Step Five: Select the Sticker and Move It
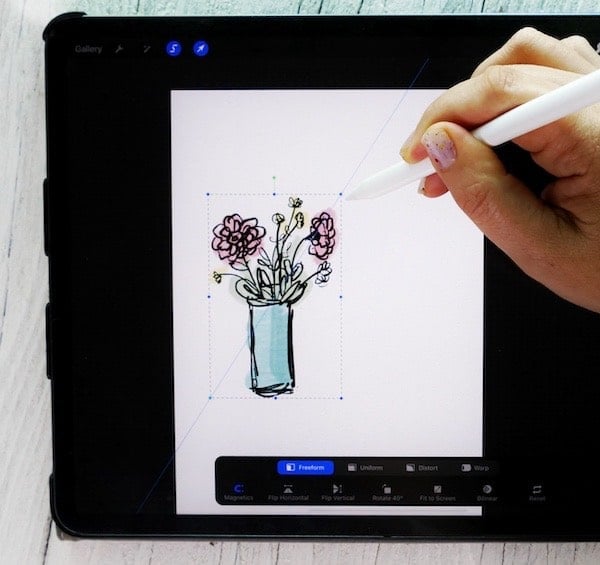
Next, use the “select” icon at the top of your screen. It looks like a ribbon to me. Select Freehand in the selection panel that pops up. This lets you draw around your drawing with a dotted line, select it, and move it around on the screen. It is only moving within this layer. The other layers are not affected. Usually, I will just move it down to one of the corners so that I have space in the center of the screen to draw my next design.
Step Six: Create Your Next Sticker!
Repeat with other designs until you have the sheet filled. Make lots and lots of stickers. And have fun with it!
Step Seven: Arrange the Sticker Sheet
The placement of your images on the sheet is a little like a puzzle. Arranging your final design will also help you see if you have empty spots to fill. How you compose your stickers on the sheet is part of the visual appeal of the final product, so give your composition some thought.

Step Eight: Add the White Sticker Borders
EDITED TO ADD- I have a new post on how to add the borders- How to Make Borders for Stickers Super Fast on Procreate 5x. This updates the process and makes it a lot quicker to add white borders to even the most intricate stickers. It uses Gaussian blur and automatic selection to create custom sticker borders in seconds. So make sure you check it out!
Open up a new final layer and move it beneath all the other layers. In the layers panel, uncheck the box labeled background.
By doing this you’ll have a transparent background, and you’ll really be able to see where your edges are on the images. Select white from your color palette. Use the Sticker Border Brush (a freebie in my Creative Resource Library) or a hard airbrush, lay a nice smooth line around the sketched images.
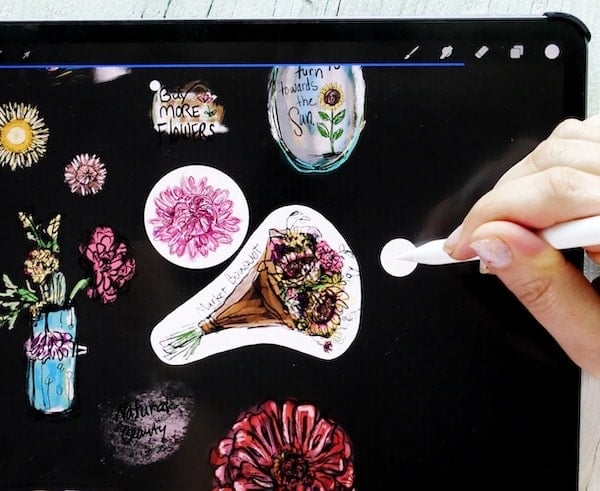
Because this is the bottom layer, it will show up as if it’s underneath your sketched and colored images. Fill the white shapes you just drew (the area behind the drawings) in completely. I usually color drop white into my outline.
BUT, if you see any kind of a line still, this may mean that your color threshold isn’t high enough. To adjust this drop the white into the shape and keep your pencil tip on the screen, and then slide it to the left or right to adjust the threshold.
<script async data-uid="40e92b0043" src="https://well-crafted-studio.ck.page/40e92b0043/index.js"></script>Step Nine: Clean Up Your File
For the final step before exporting, you want to take a minute to clean up the background of your sheet. To do this, tap on the layer with the white basic shapes.
Then in the top toolbar choose the Selection Tool (it looks like a ribbon). This opens up the Selection Panel at the bottom of your screen.
Choose Automatic and tap the background. Use the color threshold trick above to make sure you are tight around your sticker shapes.
Then use a three-finger swipe down to bring up the copy and paste options. Choose Cut and Paste– this will remove anything in your background and place it on a separate layer. Delete that layer.

Step Ten: Export Your File
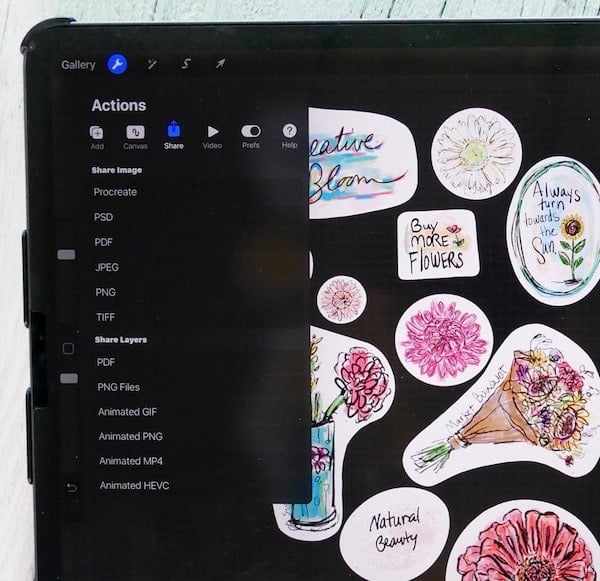
With the background still unchecked in the Layers panel (so it’s transparent), go to the “wrench” symbol at the top left of the page. Select the “share” button and choose “.png” from the drop-down menu.
Choose the “save image” or “save to files.” “Save image” will send it to your photo gallery. You could also choose to airdrop it to your desktop and save it to your hard drive there.
And DONE! Whoo-hoo!!! We drew STICKERS!!!
Next Steps- Cut Stickers with a Cricut!
This is the end of the how-to-draw stickers in Procreate tutorial, but I continue to make stickers in my post, How to Print and Cut Stickers with a Cricut.
This post walks you through the next steps of uploading the image into Cricut’s Design Space, how to size your stickers in your Design Space, and then printing and cutting your stickers. I use a Cricut Maker but you can use a Cricut Explore too!
I hope you really do give this a go. It’s so awesome when you get to hold custom stickers that drew in your hands.
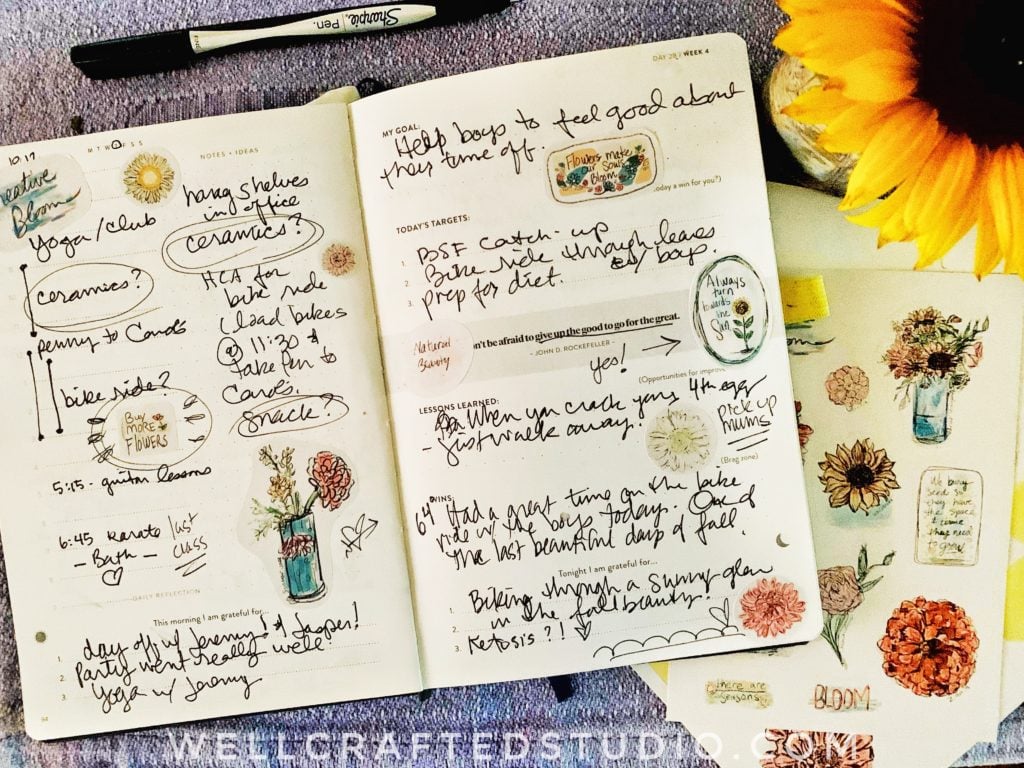
I LOVE playing with my stickers in my planner or sketchbook. Cute stickers are pretty fun to gift too!
Why Procreate is the Best Sticker Making App
I waited a long time for a drawing app that would feel like sketching with a notepad and pencil. Using a drawing app like Procreate is not the same as drawing in life, but it’s similar enough that it feels natural.
It also has features like
- Tap to Undo
- Layers
- Color Palettes
- Hundreds of Procreate Brushes are Free in the Brush Library (so you can draw with one stroke and paint with the next).
- You can create your OWN brushes in the Brush Studio.
Besides these features, Procreate makes it easy to add a white outline to your stickers and to save them as png files with a transparent background. This makes uploading your stickers to either a Print on Demand site or into a program like Cricut Design Space or Silhouette Studio a snap.
(Of course, since you’re designing digitally, it’s also super easy to create your own digital planner stickers to use in apps like Good Notes).
Procreate eliminates the need to learn fancy pro graphic designer software AND Procreate is only $9.99 USD in the Apple App Store. The updates are always free!
The only potential downside to this drawing app is that Procreate is designed as an iPad-only app. This way the designers can take full advantage of Apple’s unique interface and applications to create a really killer digital art app.
If you don’t have an iPad, there are several digital art software for Windows as well. Krita has a great reputation, as does Ibis Paint.
How to Make a Digital App Feel Like a Sketchbook
To get the most realistic experience, I also use the Apple pencil (because it’s weighted like a pencil) and I use a screen protector that adds a paper-like surface to draw on.
Curious about the paper-like screen protector? It’s like a textured sticker for the screen of your iPad that has a slight tooth.
This adds light friction so that your pencil doesn’t fly across the screen. It also lets you hold the pencil more loosely and because of this, your hand may fatigue less. (I notice that because of this, my strokes are looser and more natural. )
Get Free Printable Downloads
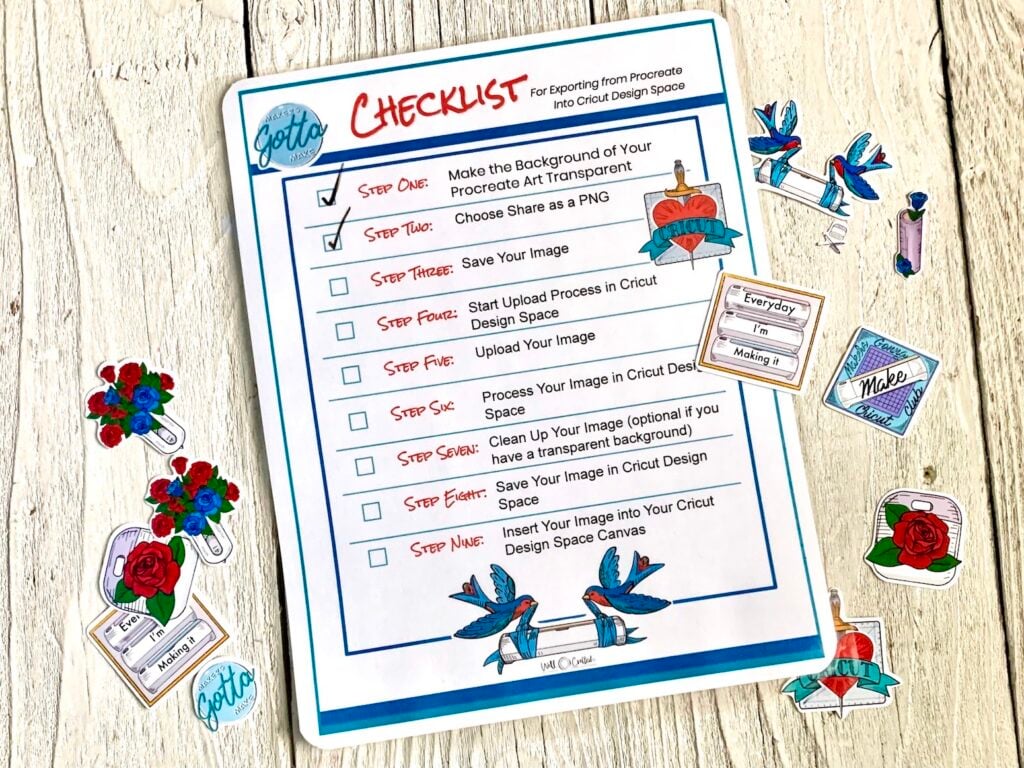
I also have a free checklist- How to Upload from Procreate to Cricut that you can find in my Free Library.
This PDF breaks down the export/import from Procreate into Design Space into easy-to-follow steps.
For More Drawing Inspiration…
If you love the idea of drawing, but you’d like some direction, I recommend a couple of great beginner sketching books, in my post- How-to-Draw Books Adults Love.
There are also some other really great tutorials about using Procreate on YouTube. I just watched this 18 Hacks for Procreate and loved it! AND I have another tutorial, How to Use Photos to Draw Stickers on Procreate. I’d love to have you check out that one as well!
Print this Tutorial
How to Make Stickers in Procreate
Tools
- Procreate- A digital drawing app for iPad
- iPad- Compatible iPad, for a list see link in the post
- Optional- Apple Pencil or Third-Party Stylus
- Optional- Paper Feel Screen Protector
Instructions
- Create a Custom Canvas
- Sketch Your Sticker
- Add Color on a New Layer
- Group the Layers and Name it
- Select the Sticker to Move it
- Repeat until You've Filled Your Sheet with Stickers
- Arrange the Sticker Sheet Composition
- Add the White Sticker Borders
- Hack to Clean Up Your File
- Turn Off the Background Layer
- Export Your File as a PNG and Save
Notes
If you're new to drawing I have a post on tracing photos to make stickers in Procreate. It's super easy and a great way to jumpstart your creativity. AND your sticker making!

Love This? Share it!
AND again, I would LOVE to know if you think you’ll draw some stickers after reading this tutorial, and what kind you’d like to make. The sky really is the limit!
Thanks for reading! And if you found this tutorial helpful I’d be grateful if you would share it either by posting it to social media or by pinning the image below!
Thanks for Reading,
Print this Tutorial
Want to Remember this? Save How to Draw Stickers on Procreate to Cut with Your Cricut to your FAVORITE Pinterest Board!


![How to Draw Snowflakes in Procreate [Symmetry Tool]](https://wellcraftedstudio.com/wp-content/uploads/2019/11/How-to-Draw-Snowflakes-square-1024x1024.jpg)


Just want to thank you ! Fantastic tutorials! So kind if you to share. I just bought a travelers journal and want to make my own stickers.
Yay!!! It is SO FUN!!! I’m just sorry I waited so long to try it. Thank you for taking the time to leave a comment! It really encourages me. I’d love to see your stickers when you make them too!
Thank you SOOO MUCH for this tutorial! I have been banging my head trying to figure this stuff out, one question, how do I create a digital sticker sheet for Goodnotes use that contains individual images on the sheet, so they don’t have to be cropped, copied and pasted?
Hi Elizabeth,
I’m so glad you liked the tutorial. I had a horrible time finding info at first too. Honestly I’m not sure about the GoodNotes thing. But I know I have seen people importing multiples at once. Liz Koehler Brown has a Skillshare video on creating a digital planner for GoodNotes and I know she talks about stickers in it. I’ll see if I can find the info. ❤️
Thank you for this video! I am going to try this right away.Can’t wait to look around your site for more videos. I love learning how to use Procreate and Cricut. Thanks again for taking the time to share your expertise.
Hi Lauri,
Yay!!! I’m so glad you like the site! I have more Procreate/Cricut tutorials coming soon. It’s actually going to be a big focus for me in 2021!
Your amazing! This is everything I was looking for! Looks like I will be launching quicker than I thought.
Oh YAY!!! Are you starting an Etsy shop?
Hi Monica,
I use the RGB primarily (I thought CYMK was for professional commercial printing) but I just did a little research on the Canon Pixma printer I have and it automatically converts from RGB to CYMK. RGB seems to be the norm for art that will remain digital-only.But maybe I should be doing the CYMK profiles for the stickers since I know they’ll be printed.
Here’s what it says in the Procreate handbook-
RGB vs CMYK
Digital art is usually created to suit either screens or printers.
RGB is best for artwork created to be viewed on screens, as it manages color the same way screens do: by seeing each color as a unique combination of red, green, and blue.
CMYK is the best option for artwork destined for print. This sees each color as a mix of cyan, magenta, yellow, and black, matching the four ink colors used by most commercial printers.
By choosing the color space best suited to your artwork destination, you will get the most vivid and accurate colors possible.
Pro Tip
If you’re not sure, leave your Color Profiles on their default settings.
I hope this helps! And thanks for prompting me to look into this! ❤️ Jen
Hi ..awesome tutorial by any chance do you happen to have a video of how to transfer a procreate drawing as a draw and cut file on a cricut…..I am totally new to procreate want to draw doodles and draw and cut on cricut so I can color it and make cards….thanks
Hi Bhavani-
It’s pretty easy as long as you’re doing line drawings.Just export your Procreate drawings as PNG’s with a transparent background (click off the background color layer). Save it to your photos, and then upload as an image into Cricut Design Space. Save it as a cut file and then once you’ve uploaded it into a canvas you want change the Line Type in the top right of the toolbar to Draw. That’s it!
Hello!
I have a question. I added the white back ground and merged all my layers. Saved the image and it looks correct in my gallery. When I upload to DS the white layer is not there. What am I doing wrong. Please help!
Hi Krystal! Hmmm… so Cricut is removing the white? Are you saving it as a PNG with a transparent background? Not a JPEG? And when you export it you’re clicking off the background first correct?
This was such a great post but I am not an artist just a wanna be. Thank you.
Hi Cindy! I get that- and actually I have another tutorial on using photos and tracing them to make stickers. It’s pretty easy!
https://wellcraftedstudio.com/draw-stickers-procreate-cricut-photos/
Thank you so much!
You’re so welcome!!! Thanks for the comment.❤️
Hi
Is a white border necessary if the image is all coloured (no white spaces) to be able to cut on the cricut?
Thanks for the info!
Hi Joy
No- the white background is only there because it creates a border that will tell the Cricut where to cut. I hope that helps!
Jen