It’s crazy how the simplest things can be hurdles to our creativity. Knowing how to export and then upload Procreate designs to Cricut Design Space was a hurdle for me. I didn’t know how to get my digital designs into a place where I could actually create something with them. Digital art is, well, digital. As someone who loves to craft, I want to create handheld items with my digital art. But before you can make anything (like stickers), the first step is to jump that first hurdle of figuring out how to upload from Procreate to Cricut. This means how to export Procreate designs and upload into Cricut Design Space. In this post, I show you step-by- step guide how easy it is!
Table of Contents
Get the Checklist for Uploading Procreate to Cricut Freebie

Subscribe today and get the password to my Freebie Library and grab this Printable PDF Checklist for FREE as well as access to over a hundred other design files like…
- Filled Engraving Designs
- SVG Cut Files
- Print then Cut Projects
- Sticker Designs
5 Things to Know When Exporting Procreate Designs to Upload into Cricut Design Space
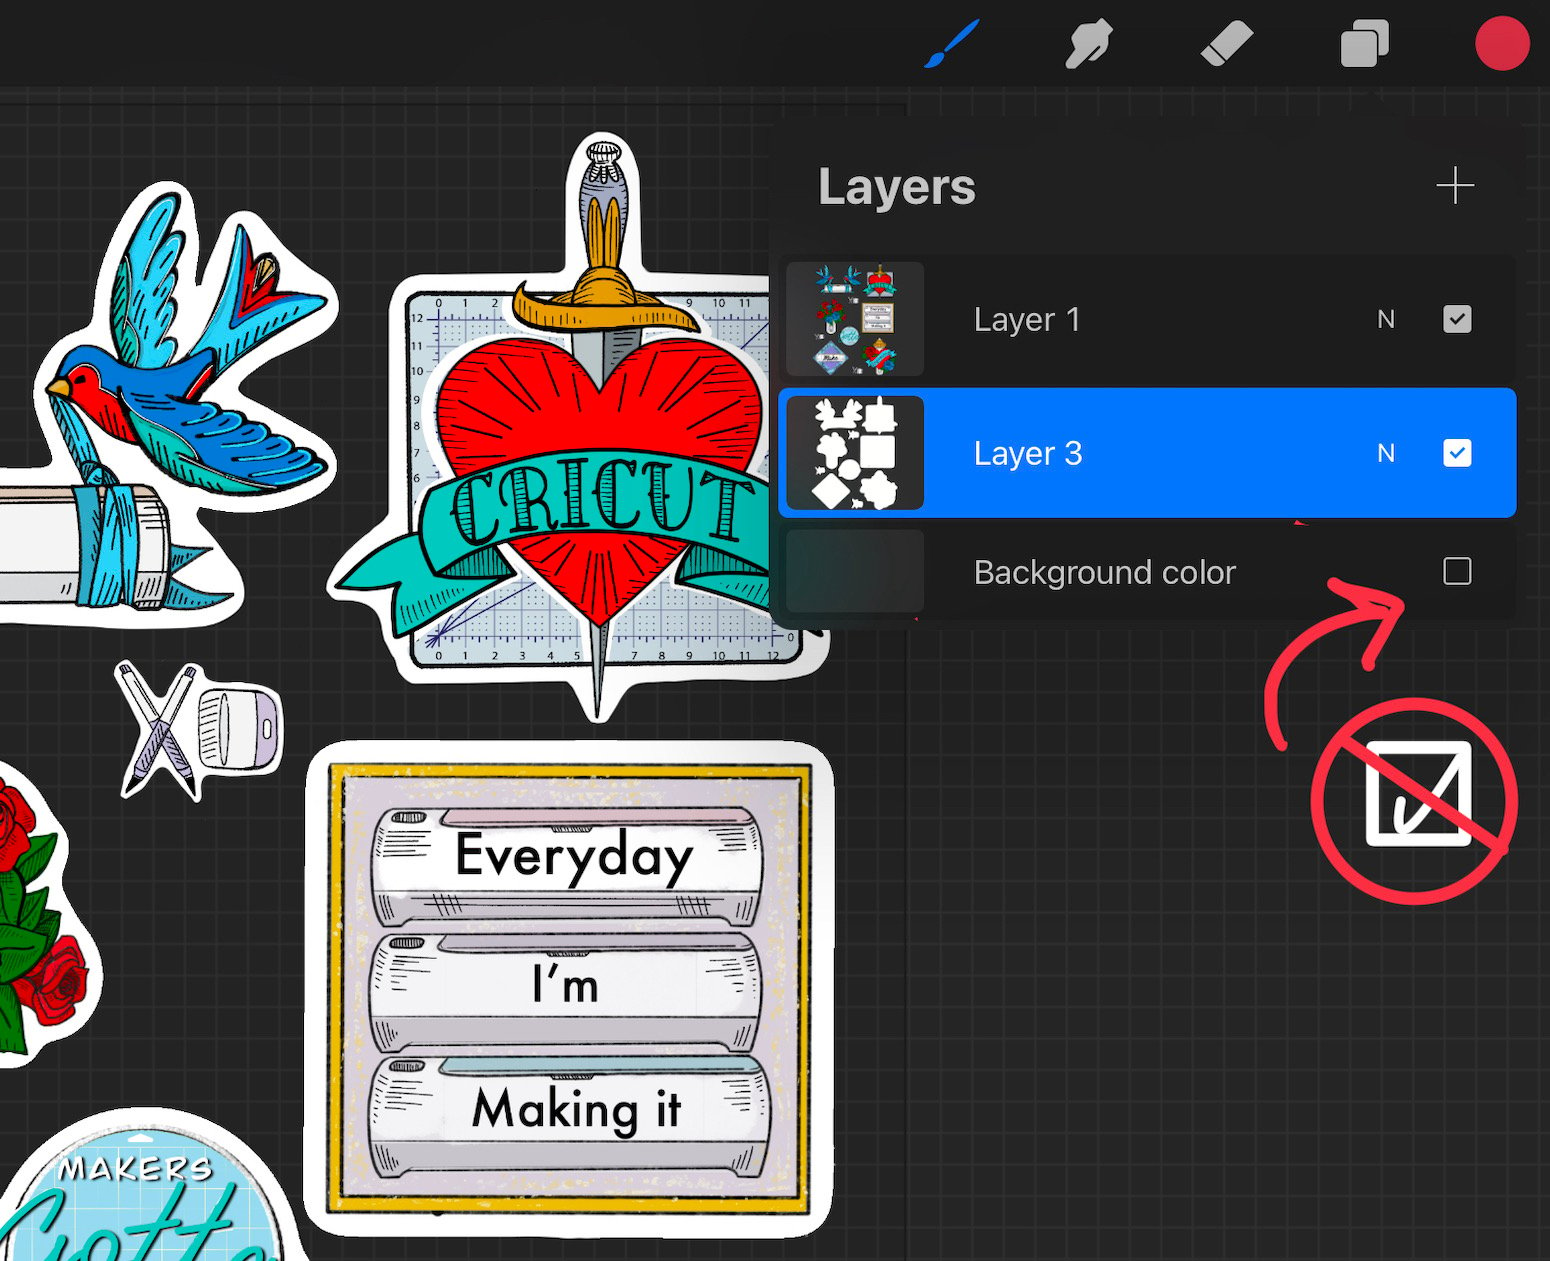
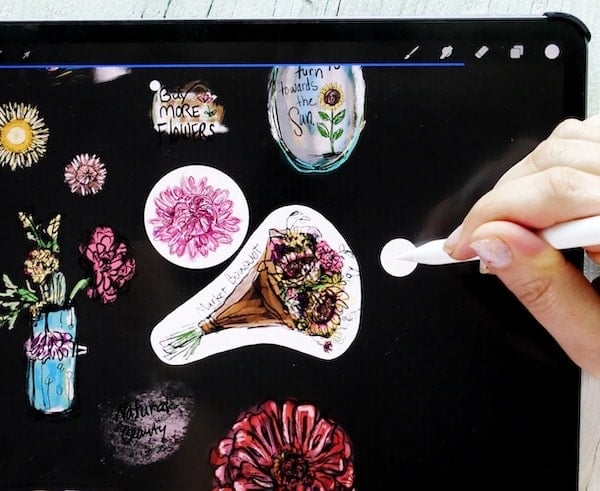
- Make sure Your Background Color Layer is Unchecked. This gives you a transparent background, which means you don’t have to remove the white background in Cricut Design Space. This is KEY if you’re making stickers that have a white border (white outline) and you don’t want to remove it with the background. You’ll find this checkbox in the drop-down menu under the Layers icon (overlapping squares in the top right corner of the screen).
- Save as a PNG file. Cricut Design Space allows us to upload JPEG, PNG, BMP, SVG, GIF, and DXF formats. The PNG format is a raster image and uploads as an image file in Cricut Design Space, but you can convert it to a cut file in Design Space through the Image Upload Process (see tutorial). There is no option for sharing as SVG files in Procreate, but you can use an online converter to change your raster digital image file to a vector file.
- Cricut Design Space Desktop vs. Cricut Design Space App. Desktop gives you the option of processing as a Simple, Moderate, or Complex file. I always choose Complex. In mobile, there’s no choice, and the default seems to be Moderate. Both give great results.
- Have a Backup. If you save your PNG to your camera roll on your iPad, you’ll have a local copy + your original canvas in Procreate. Taking the additional step to save to iCloud files, OneDrive, Google Drive, or Dropbox creates additional copies stored in the cloud. Currently, Cricut Design Space will only let you save a design within Design Space, so don’t keep your only copy within the program.
- Save in Cricut Design Space as a Print then Cut Image. If you’re making stickers or printing a design on printable vinyl, you want to save the original art, not just the outline. You can change the Operation (once you’ve uploaded the design to your canvas) from Cut to actions like Engrave, Deboss, and Score. Or you can revert it to the original art.
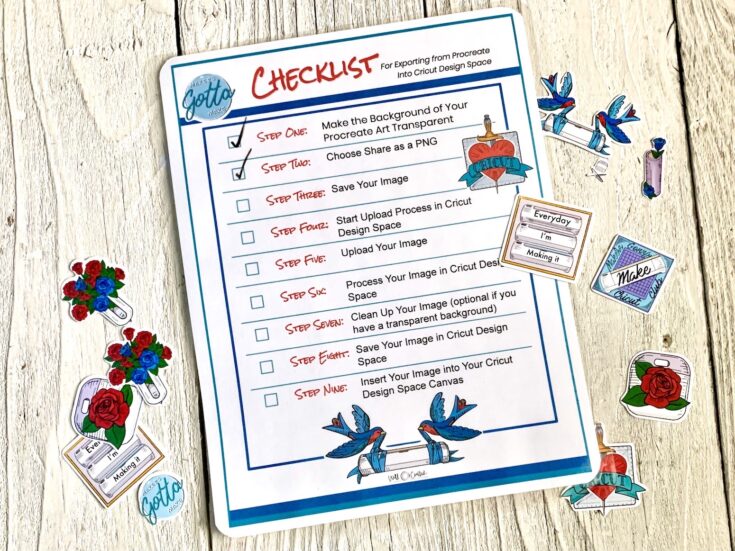
It's easy to use your Procreate designs with your Cricut! In this quick tutorial, I'll show you step-by-step how to export your designs with a transparent background and upload it into Design Space. Once your design is finished in Procreate, in the Layers panel of your canvas make the background transparent by clicking off the checkmark in the checkbox next to that layer. Tap the wrench icon in the upper left corner of your screen. Then choose the Share icon. Under Share Image, select PNG. Export by either choosing Save Image (Photos) or Save to Files if you're using a Mac. If you will be using a PC then you can save to Dropbox, OneDrive, or Google Drive. Open a new canvas in Cricut Design Space. In the bottom left toolbar, click the Upload icon. Then click Upload Image on the next page. Import your Procreate design with Drag and Drop or by clicking Browse. Click on your .png design on your desktop computer. If using mobile, simply grab the design from your Photo Gallery or Files. Choose Complex on the Upload Image page if you plan to use Print then Cut, if you plan to just cut the outline of your image out then you can choose Simple.* Note: This is only an option in Cricut Design Space for Desktop. Cricut Design Space for mobile skips this page and goes right to the cleanup page. *See Step 8 for more on these save options Note: If you are uploading a .jpg or a .png that doesn't have a transparent background then you need to remove the entire background or you'll just see a big black rectangle. Clean up any stray bits by clicking on the background with the magic wand. If you want to remove parts of the image, use the eraser. Then, click Continue when you're satisfied. Save as a Cut Image if you plan to engrave, deboss or cut out your design. If you're making stickers (or another print then cut project) you'll want to choose Save as a Print then Cut Image. From the Image Upload screen, click on your image to select it. Now click the Insert Image button in the lower right corner of the screen. This inserts it into your canvas. And you're done! -You can simplify this process by using Cricut Design Space for mobile on your iPad. But for this post, I want to demo using a desktop because the image processing has a few extra options on the desktop version of Design Space. How to Upload Procreate Designs into Cricut Design Space
Materials
Tools
Instructions
1. Make the Background of Your Procreate Art Transparent
2. Choose Share as a PNG
3. Save Your Image


4. Start Upload Process in Cricut Design Space

5. Upload Your Image into Cricut Design Space

6. Process Your Image in Cricut Design Space

7. Clean Up Your Image (optional if you have a transparent background)

Note: If you are uploading a .jpg or a .png that doesn't have a transparent background then you need to remove the entire background or you'll just see a big black rectangle.8. Save Your Image in Cricut Design Space
Next, Select by clicking on the image. Then click Save to progress to the next page.
9. Insert Your Image into Your Cricut Design Space Canvas

Notes

How to Upload Procreate Designs into Cricut Design Space
- Your Original Procreate Design (or upload these Cricut Tattoo sticker designs from my FREE library for practice!)
Tools
- Procreate iPad app
- iPad tablet 10.2 or 12.9
- Desktop (optional*), I’m using a mac but it works the same
- Cricut Design Space for desktop or mobile
Instructions
1. Make the Background of Your Procreate Art Transparent
Once your design is finished in Procreate, in the Layers panel of your canvas make the background transparent by clicking off the checkmark in the checkbox next to that layer.

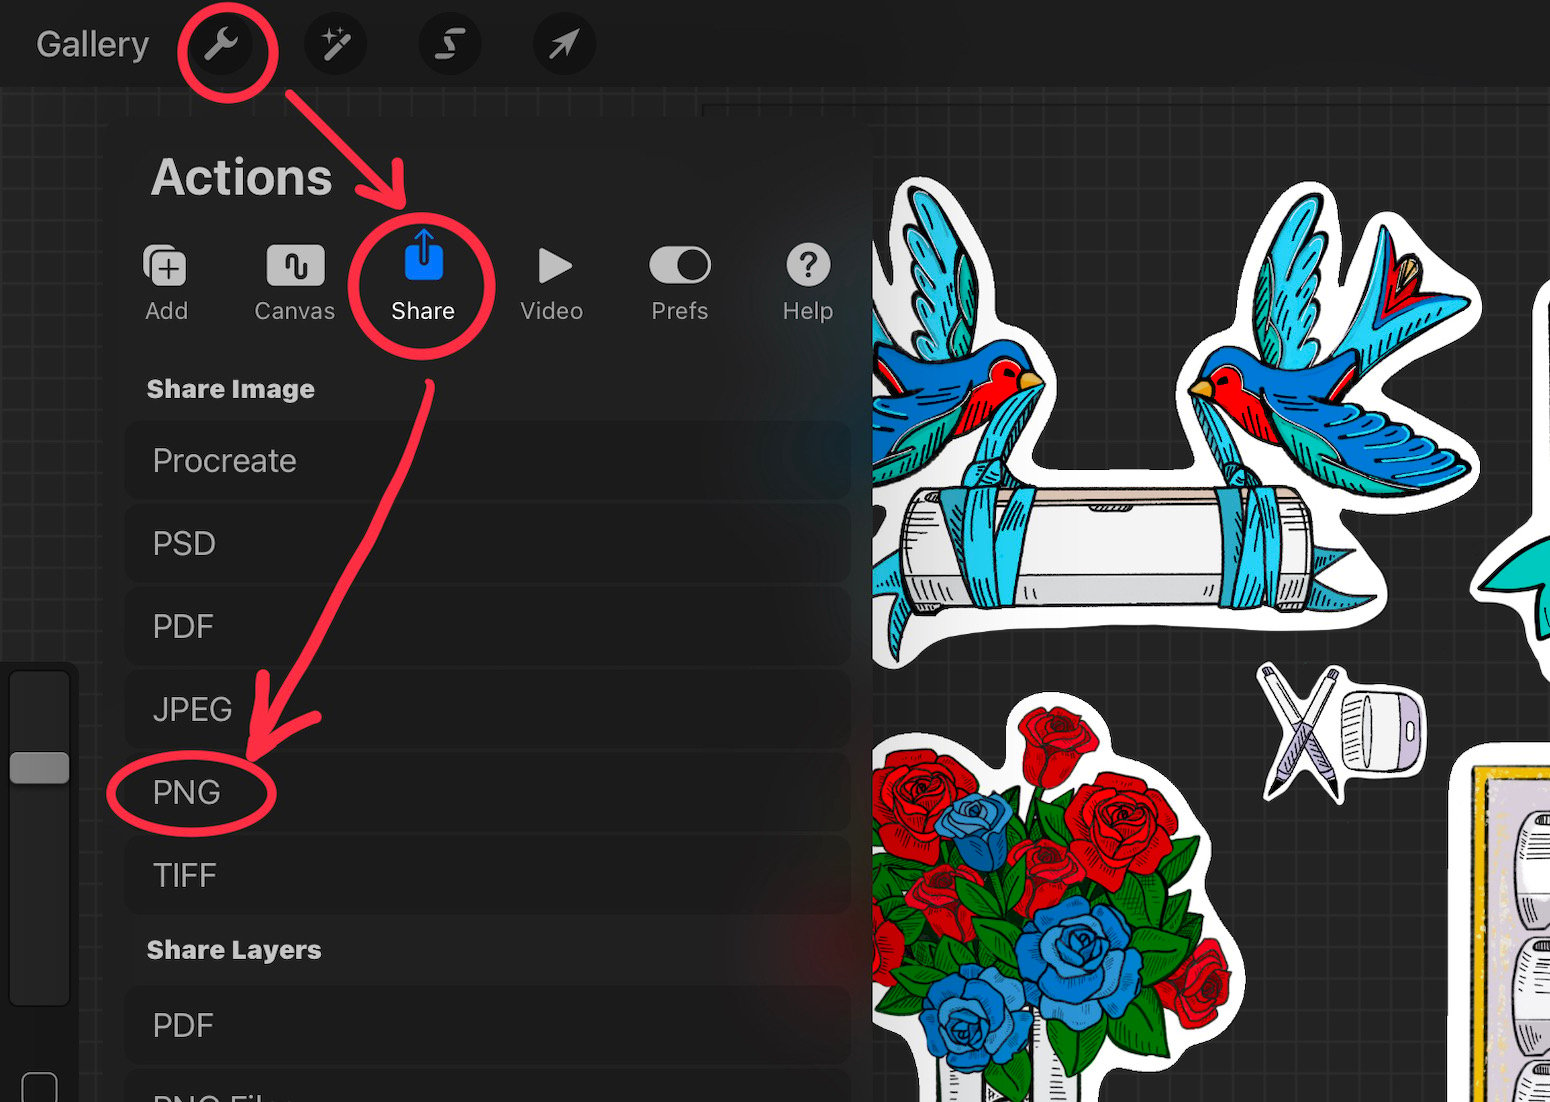
2. Choose Share as a PNG
Tap the wrench icon in the upper left corner of your screen. Then choose the Share icon. Under Share Image, select PNG.

3. Save Your Image
Export by either choosing Save Image (Photos) or Save to Files if you’re using a Mac.

If you will be using a PC then you can save to Dropbox, OneDrive, or Google Drive.

4. Start Upload Process in Cricut Design Space
Open a new canvas in Cricut Design Space. In the bottom left toolbar, click the Upload icon. Then click Upload Image on the next page.

5. Upload Your Image into Cricut Design Space
Import your Procreate design with Drag and Drop or by clicking Browse. Click on your .png design on your desktop computer. If using mobile, simply grab the design from your Photo Gallery or Files.

6. Process Your Image in Cricut Design Space
Choose Complex on the Upload Image page if you plan to use Print then Cut, if you plan to just cut the outline of your image out then you can choose Simple.*

Note: This is only an option in Cricut Design Space for Desktop. Cricut Design Space for mobile skips this page and goes right to the cleanup page.
*See Step 8 for more on these save options
Note: If you are uploading a .jpg or a .png that doesn’t have a transparent background then you need to remove the entire background or you’ll just see a big black rectangle.
7. Clean Up Your Image (optional if you have a transparent background)
Clean up any stray bits by clicking on the background with the magic wand. If you want to remove parts of the image, use the eraser. Then, click Continue when you’re satisfied.

Note: If you are uploading a .jpg or a .png that doesn’t have a transparent background then you need to remove the entire background or you’ll just see a big black rectangle.
8. Save Your Image in Cricut Design Space
Save as a Cut Image if you plan to engrave, deboss or cut out your design. If you’re making stickers (or another print then cut project) you’ll want to choose Save as a Print then Cut Image.
Next, Select by clicking on the image. Then click Save to progress to the next page.

9. Insert Your Image into Your Cricut Design Space Canvas
From the Image Upload screen, click on your image to select it. Now click the Insert Image button in the lower right corner of the screen. This inserts it into your canvas. And you’re done!

Notes
-You can simplify this process by using Cricut Design Space for mobile on your iPad. But for this post, I want to demo using a desktop because the image processing has a few extra options on the desktop version of Design Space.
And that’s it! Your printable images are now exported from Procreate, imported to Cricut Design Space, and uploaded into your canvas. You’re ready to create!
What Can You Make with Procreate & Cricut?
Now that you have an idea of how to export and then upload Procreate designs to Cricut Design Space, you’ll be able to create all kinds of original designs with your Cricut Explore Air2 or Cricut Maker.

- Stickers
- Water Bottles
- Mugs
- Leather Cuffs
- Labels
- T-Shirts
- Engraved Keychains
- Sublimation Designs
- Leather Cuffs
- Bookmarks
- Greeting Cards
- Layered Mandalas
If all you’ve done with your digital art is share it online, then combining Procreate + Cricut will open up a whole new world of creativity for you.
And if you’re a Cricut user who would love to create their own original digital images without a graphic design program (like adobe illustrator), then you definitely want to check out the Procreate app!
Want to Know More About Procreate?
Procreate is less than $10, and you can find it in the Apple app store. I would advise getting the apple pencil if you can; otherwise, a third-party stylus (or even your finger) will work. It really is so fun to play with. I really can’t recommend it enough.
Have Questions About Making Your Own Custom Stickers?
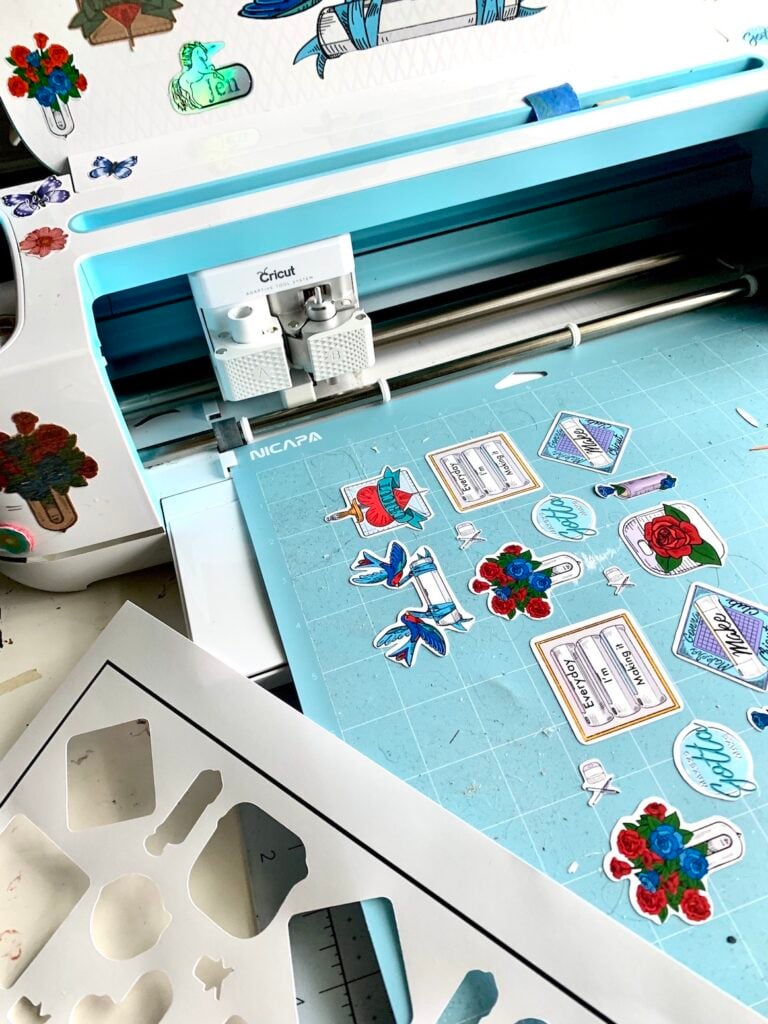
Wondering how to print then cut stickers with a Cricut Cutting Machine once you’ve uploaded your designs? What sticker paper to use for your project? How to waterproof stickers? Or how to use the Cricut Mobile App to make stickers?
I have YouTube video tutorials and posts that answer all of these questions!
AND if you check my Free Library you’ll find more free Procreate brush sets, stamp sets, and color palettes that you can download.
Love this? Please Share It!
If you found this tutorial helpful, then I would LOVE to have you share it on social media! And if you have any questions about uploading Procreate art to use in Cricut Design Space, please leave a comment here, or on my YouTube channel! Or you can email me too.❤️ I LOVE helping people with their creative challenges.
Thanks for Reading,



![How to Draw Snowflakes in Procreate [Symmetry Tool]](https://wellcraftedstudio.com/wp-content/uploads/2019/11/How-to-Draw-Snowflakes-square-1024x1024.jpg)

When I upload to Cricut from procreate my lines are jagged, how do I smooth them out?
Sorry! I saw this on the go and forgot to come back to it right away. One issue you might be having is if your lines in Procreate aren’t hard. So for instance, if you’re using a watercolor brush or gouache that has transparency, or irregular edges. For these, you’d want to put a solid shape behind them (or outline border is another way of putting it). Cricut will ready the background shape.
Something else to look at is your dpi, if you originally created your design smaller and made it bigger before you uploaded it, then you’ll have more pixellated edges as well.
I’d love to chat more if this doesn’t help!
Jen
Hello, I am an artist and do alot of drawing on my ipad in procreate. When I upload them to my circut and print then cut my images are blurry……any advice on how to eliminate them being blurry? Yours look so clear………..
Hi Linda!
Bummer! So there are a few things we can look at, like the dpi that your image is at, or how you send the image from your iPad to CDS. If you’re drawing on your iPad but using email to send your designs to a laptop the email server often reduces the image quality to make it smaller. To keep that from happening I zip my files before I send them. Unless I’m airdropping or saving in iCloud Drive. If the problem is that your canvas has a low dpi, then the fix would be to make sure your canvases are set at 300 dpi. Also, are you saving as a PNG? That helps retain the quality of your image too. Hope this all helps!
-Jen
Thank you SO MUCH for these directions on converting a Procreate drawing into a cut file. I had great success with a drawing that I made to etch onto a glass window. I used the monoline brush and made the drawing at full size, the saved it as 300 dpi before uploading it to Cricut. I can’t say the etching cream process went smoothly, as this was a very ambitions 10×26″ project, and it didn’t help when I broke the first one… But I tweaked the drawing for the second attempt and it looks great in the transom window. This was the easiest way I’ve ever made an SVG, and I’m a retired graphic designer who knows how to use Illustrator.