As someone who does a LOT of engraving with the Cricut (and even wrote the book on it), I’m frequently asked if you can only engrave with the Cricut Maker. And it’s kind of tricky to answer because the Cricut Engraving Tool can only be used with the Cricut Maker or Maker 3. You can purchase a third-party tool that will allow you to engrave with the Cricut Explore and Explore 3. But there’s some risk in using third-party products with your Cricut machine, as it could potentially damage your machine. When I found out there was a third-party engraving tool for the Cricut Joy…. well, you know I like to try things!
It wasn’t long ago that I started to get curious- do you really need the extra force of the Maker to engrave? And if you increase the pressure in the Material Setting, could you engrave with ANY Cricut machine? Can you engrave with the foil tool? Or does it have to be an “engraving” tool?
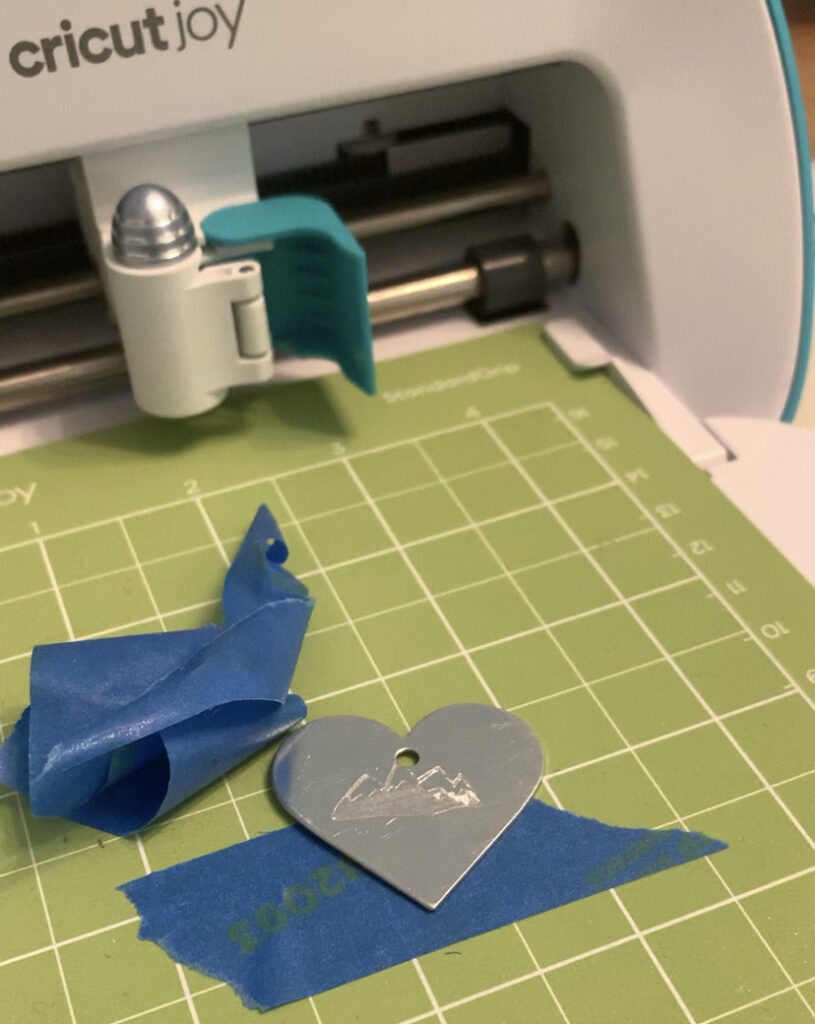
So today’s experiment was my first test using a third-party engraving tool for the Cricut Joy. You can see the results below, and I’ll let you know what I used, how it worked, and my first impressions.
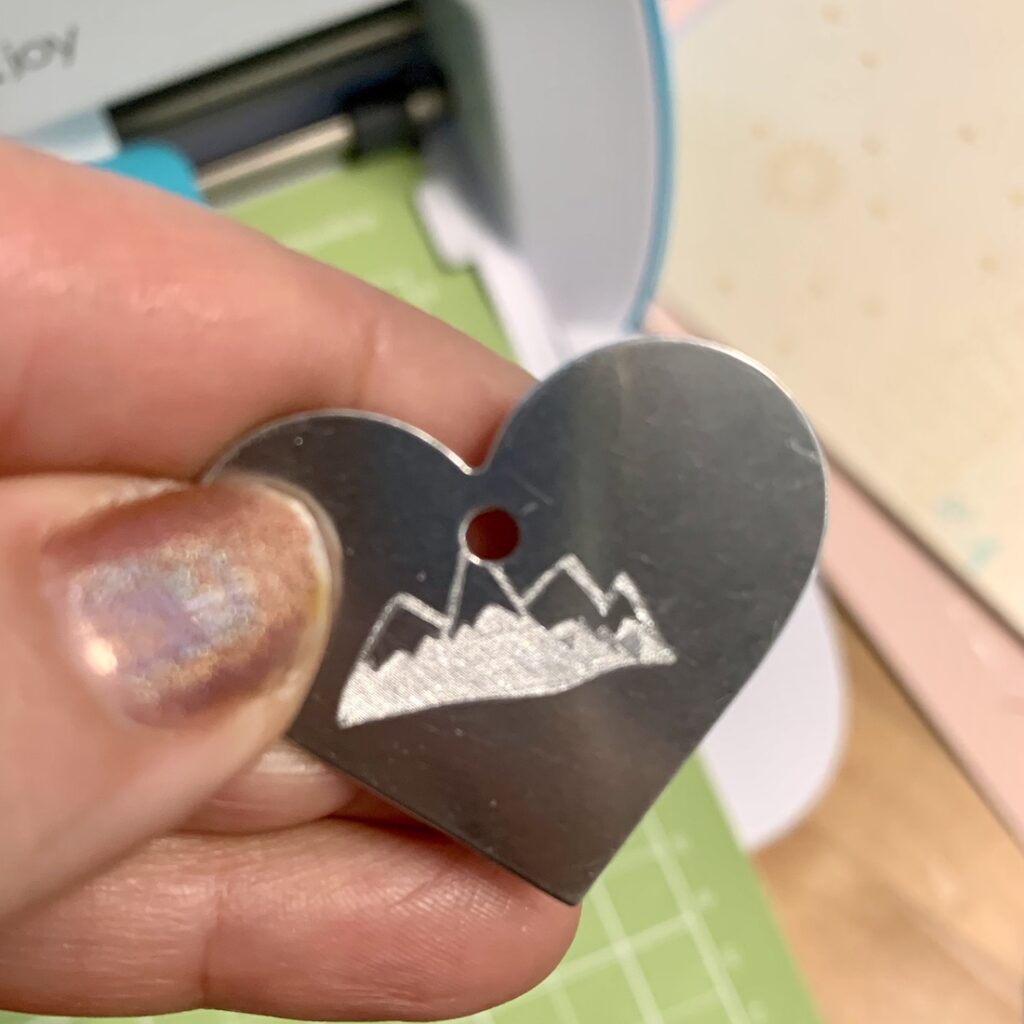
BEFORE You Engrave with the Cricut Joy… A Caution
Again, I would really recommend that you think about this before you decide to try it. I’m not sure that it’s true that if you use a third-party tool with the Cricut you’ll void the warranty, or if it’s just something that we’re cautioned against “just in case.”
Knowing that it’s a possibility, you may want to either put off trying this until your machine is already out of warranty, or understand that you’re taking a chance.
Get Free Engraving Designs!
When you engrave a design in Cricut Design Space, Cricut will create a double line that “outlines” your image.
This also happens with other “Draw” operations like debossing, pen, and foiling. One way to get a more visible engraving is to fill in this outline with a line pattern.
When filled, the design looks like a filled in shape vs. an outlined shape. I have TONS of designs already filled for engraving in my Free Library. ❤️
Need the password? Just sign up for my email list, and you’ll get the password emailed directly to you!
How to Engrave with the Cricut Joy
Tools and Materials
- Filled Engraving Designs*- Get the Password Above.
- Cricut Joy
- Standard Cricut Cutting Mat for the Joy (comes with the Joy)
- Engraving Tool (I used this third-party tool for the Joy from Amazon)
- Aluminum Blanks (the one I used in the test came free with the engraving tool)
- Blue Painter’s Tape
- Brayer (optional)
*You can find many filled engraving designs in the Free Library here at Well Crafted Studio!
This post contains affiliate links. Thank you for supporting my small business.
Directions
Step One: Upload Your Filled Engraving Design
Open a new canvas in Cricut Design Space and upload one of the designs. I used the mountains design from the Craftfest Bonus Collection in the Engraving section of my Free Library. More super simple filled designs like this are in the Engraving section of my Free Library.
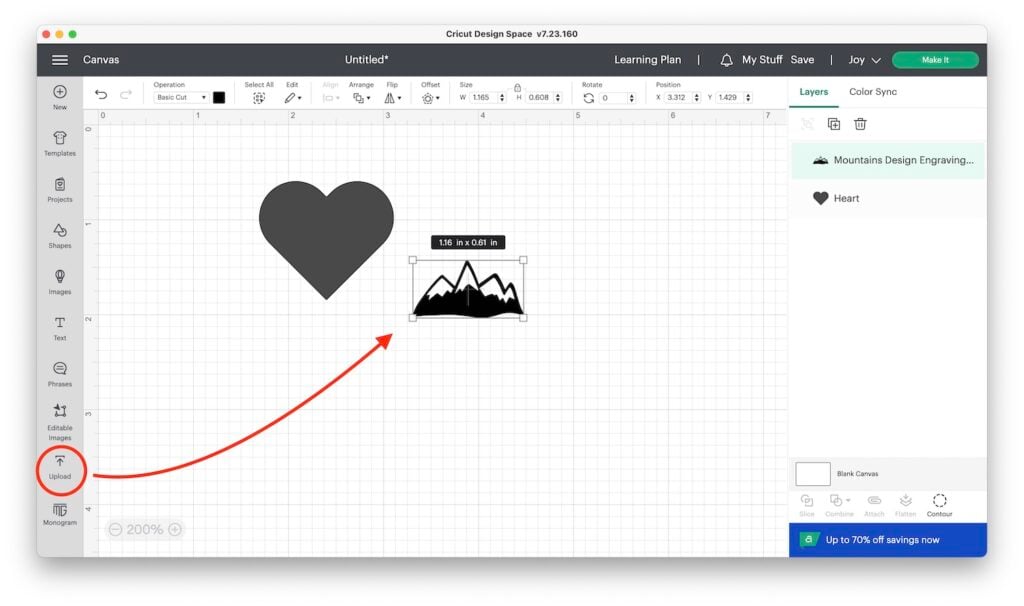
Step Two: Size Your Design to Fit Your Blank + Set Operation as Pen
Measure your aluminum blank (I used the ones that came free with the engraving tool). Then, from the Shapes in the left-side toolbar of your Canvas, choose a heart or star or whatever shape fits your blank and adjust the size to match your blank.
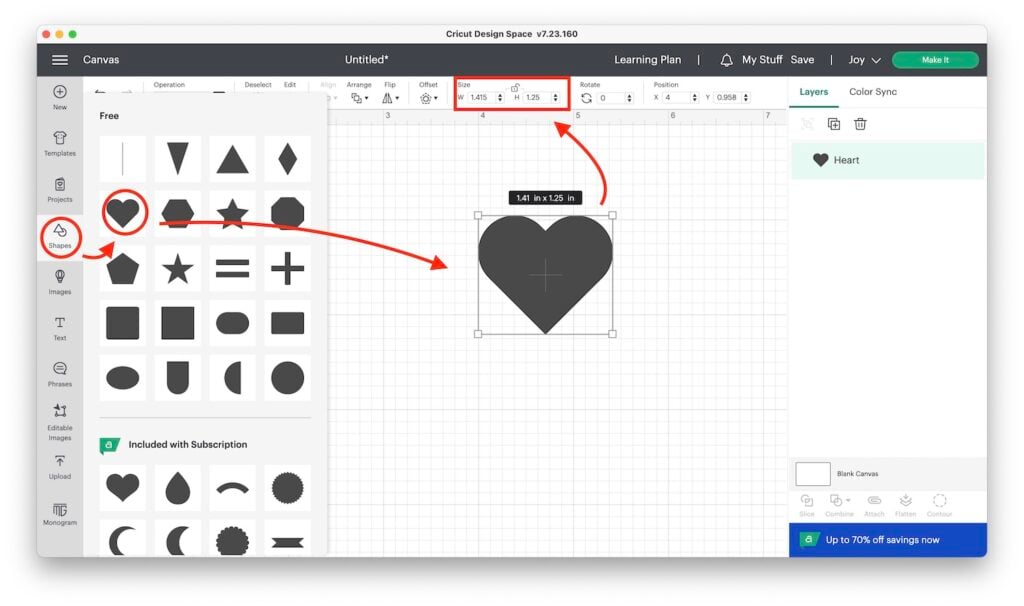
Next, adjust the size of your design to fit into the shape.
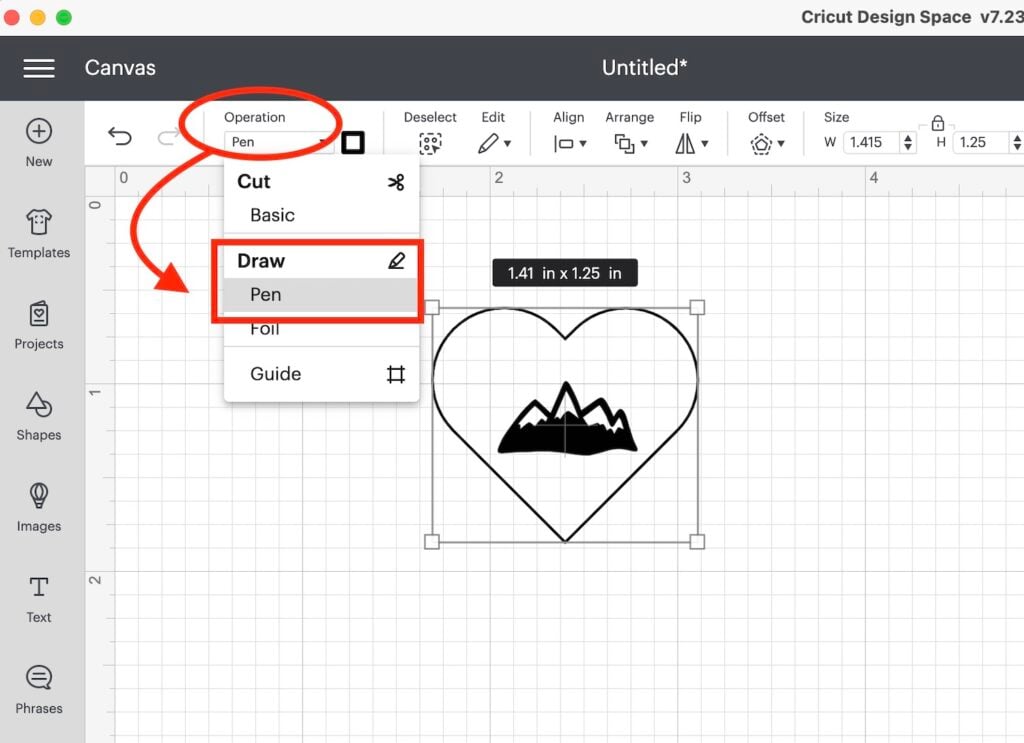
*You can try the Duplicate>Align Center>Attach trick here for a deeper engraving. But, sometimes more visible doesn’t need to be deeper. You just need a contrasting surface (like I created with the infusible ink keychains or the Craftfest pendants) to get the engraving to show up.
Finally, in the top toolbar, change both the design and the shape operations to Pen. Then, press Make it!

Step Three: Prep Your Mat + Prepare to Engrave
Place the aluminum blank on to Cricut Cutting Mat. Press it down well, and then use the blue painter’s tape to tape the edges well. I like to place mine near the center of the mat.
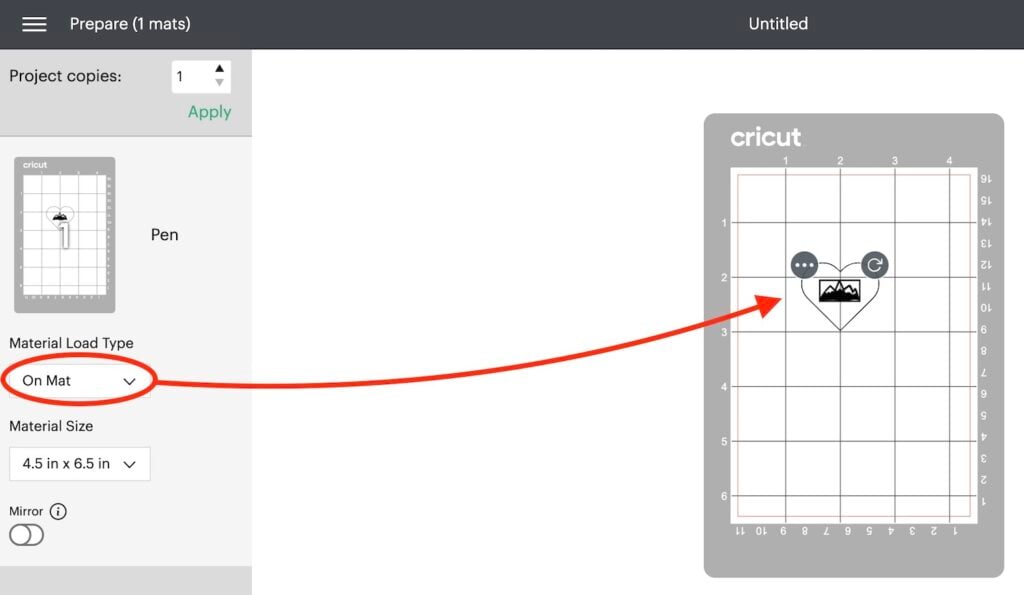
On the Mat Preview Page, move the shape to match the placement of your blank on the mat. Double-check your placement and Press Continue.
Step Four: Create a Custom Material Setting
Time to choose the material setting! And I haven’t played with this much at all. But it made sense to create a custom material setting since the Joy isn’t designed to engrave, but only to cut or draw.
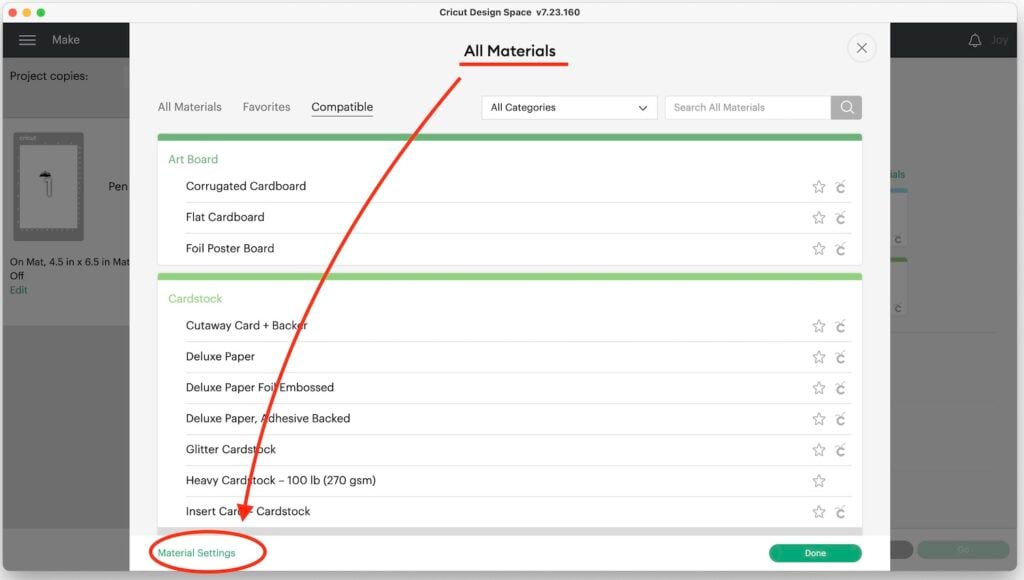
Click Material Settings to open the Materials selections panel.
To create a setting go to the bottom left of the screen and choose Material Settings.
Scroll to the bottom to create a new setting by clicking Add New Material.
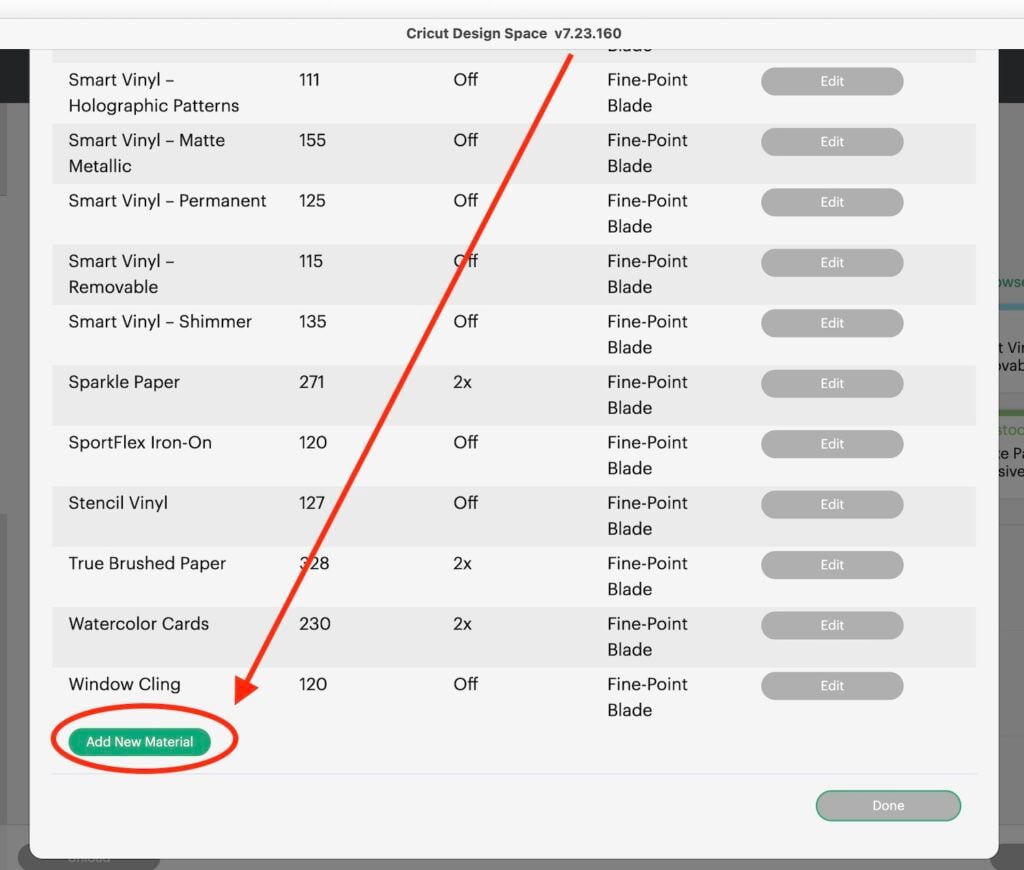
Name the new material setting- Engraving Setting or something like that. When you create a new material setting you can choose the cut pressure, multi-cut, and blade type. Ignore everything but the Cut Pressure.
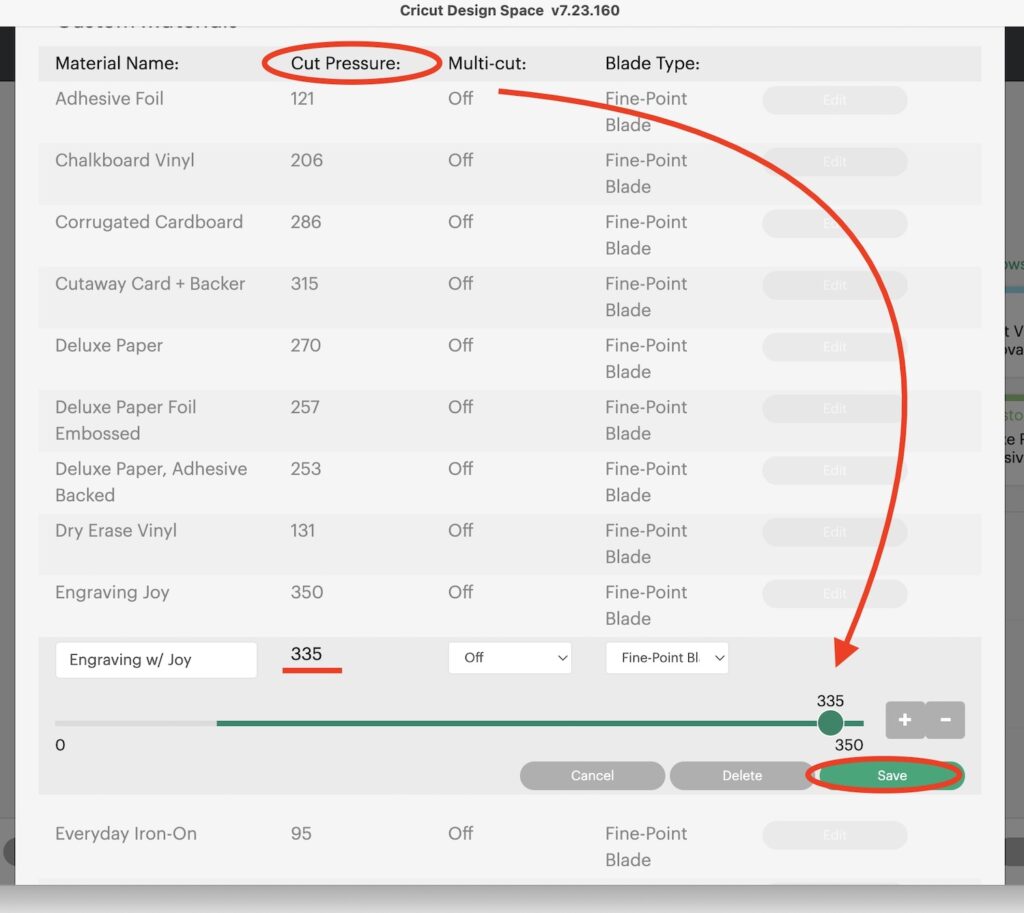
Then change the Cut Pressure to 350 or 335 or so. Then, Save.
Now that you’ve created a custom setting, choose More.
Step Five: Load Your Mat + Go!
Next, make sure your engraving tool is in place and insert the mat into the machine to Load.
Note: If you’re new to the Joy, you’ll find there are no buttons on the Joy- all actions are taken on the Cricut Design Space screen.
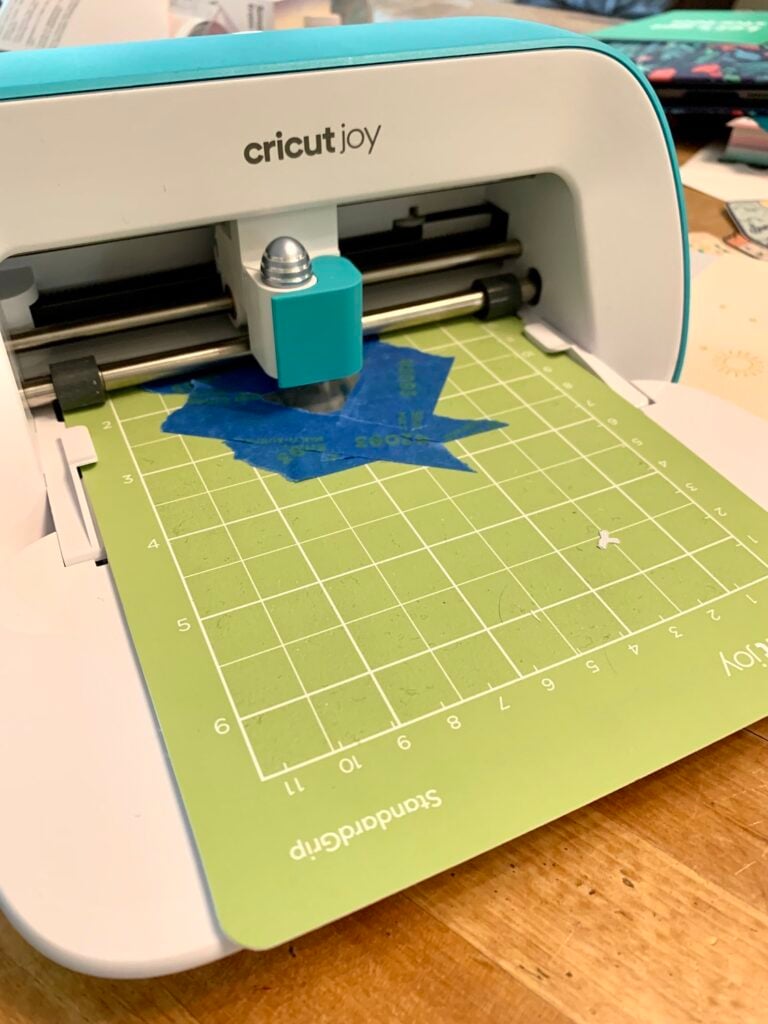
When the mat’s been loaded, it will check to make sure it’s properly aligned. When prompted, click the green Go button on your screen. Then watch it engrave!
Step Six: Rerun the Job then Unload
Once the engraving is done, on the screen you’ll see you have the opportunity to “Rerun” your project or choose “Done.”
Note: You can choose the rerun for a deeper engraving. Although, because sometimes the engraving fill is so tight it takes hours to go once, I tend not to do that with a filled design.
Personally, to get a more visible engraving, I’d rather rely on using a contrast vs. going deeper.
Make More with Infusible Ink + a Cricut!
One thing that many don’t know, is that you can apply Infusible Ink to Cricut’s Aluminum Sheets and then engrave through it. It really helps the engraving stand out and would be a great idea when engraving with the Joy because the engraving isn’t as deep.
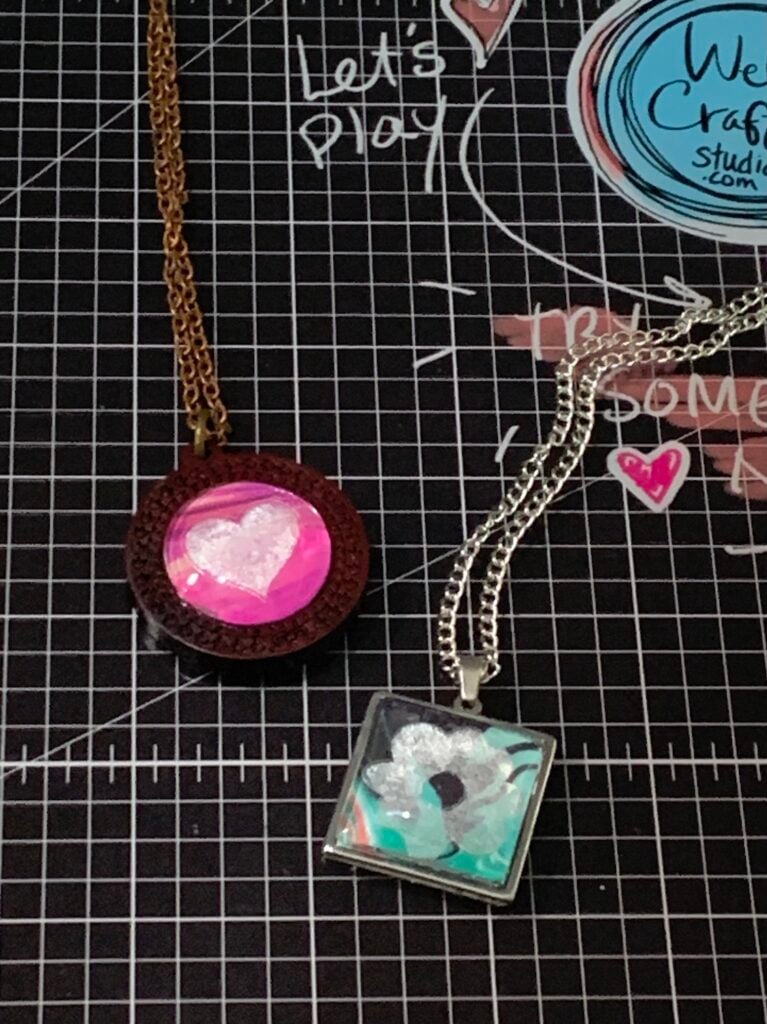
Want to see this? You can get the designs below, and a tutorial on how to combine Infusible Ink and engraving when you get the Free Ticket to Craftfest! AND I have a thank you gift when you purchase the VIP Pass through this link as well!
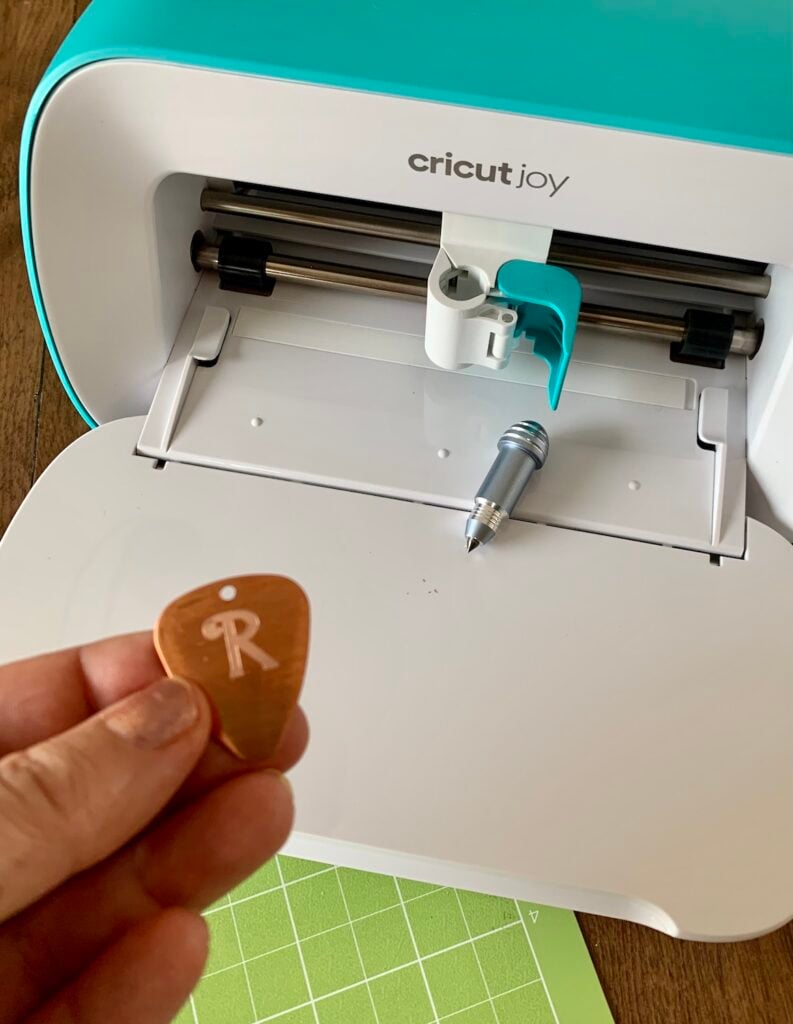
When you purchase the VIP Pass through my affiliate link I’ll also send you an email with a filled set of 26 letters to create monogrammed necklaces. Already have the free ticket but want to upgrade to the VIP? You can do that with this link!
For More Engraving Inspiration!
Crazy excited about all the possibilities of engraving with a Cricut? I have a TON of ideas, tutorials, and more about engraving with a Cricut. To get a general overview, visit my Getting Started with Engraving in 2023!
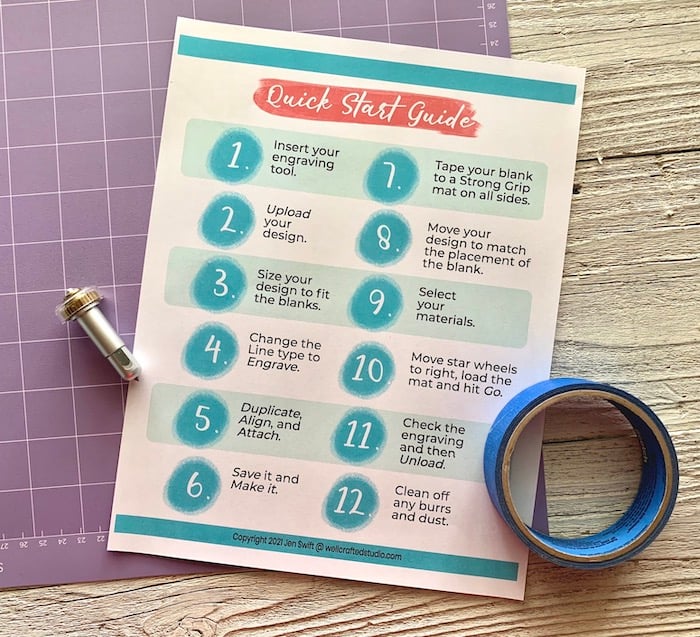
You can also get my QuickStart Guide to Engraving with a Cricut Maker as a free download in this post.
Love this? Share How to Engrave with the Cricut Joy with Others!
If you found this post helpful, I’d love to have you share it with others! You can also save any of the images above to your favorite Pinterest boards and you’ll never forget where you saw this!
And stay in touch by joining my Engraving Metals with Your Cricut Maker and you’ll see all of my engraving experiments as they happen! Remember, this is just the first attempt!
Thanks for Reading,


Can’t wait to learn!
This worked!!! Thank you!