Are you new to Procreate? I like to tell people that like ogres, Procreate has layers. Each time you peel back a layer you learn new and cool things. And one of the first things you may have noticed when you watch tutorials is that there are a lot of hand gestures that you can make with Procreate to simplify your drawing process. In this post, I give you the most common Procreate shortcuts for beginners– that will have you feeling like a Procreate pro.
The Procreate app is an ipad drawing app, and since it is only on the iPad (or iPad Pros), instead of keyboard shortcuts you’ll find gesture shortcuts.
If this is your first-time digital painting you probably feel intimidated- I know I did! Especially, if you’ve watched a video tutorial or two and didn’t know what the heck they were doing with their hands to get a series of actions to happen.
It can be frustrating when you’re just beginning and trying to copy what you see.
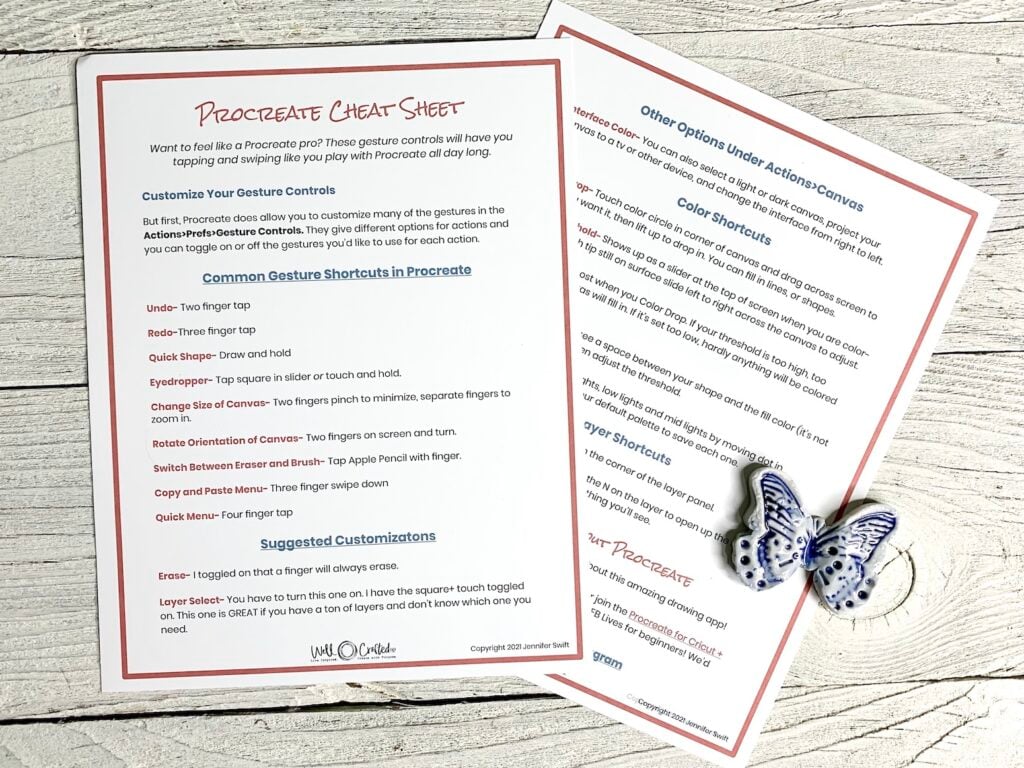
In my last Procreate Live in my Procreate Facebook group, someone suggested a list of Procreate shortcuts that they could print and keep. So that’s what I have for you below!
Customize Your Gesture Controls
Before I give you the most common touch shortcuts in Procreate, I want you to know that you can customize most of these to suit the best ways that you work. Are you left-handed? Have a cramped workspace? Always trying to work with a kid or puppy smooshed up against you? You don’t have to be a creative professional for these fun shortcuts to help!
How to Customize Your Gestures in Preferences
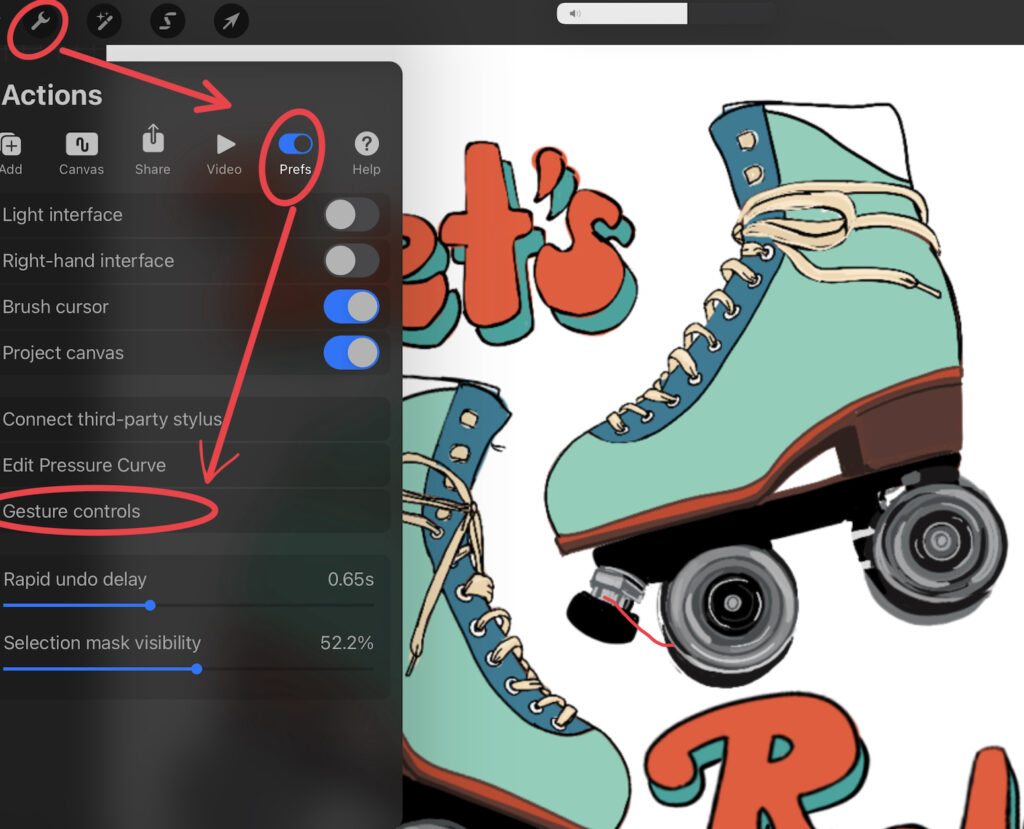
- Go to a new canvas and then up with the general settings on the toolbar, tap actions (the wrench icon). You’ll get a drop-down actions menu where you can choose Prefs.
- Under Prefs, choose Gesture Controls. This will open the gestures control panel.
- Now, on the left, you’ll see a listing of the different gesture options. Tap on each to get suggestions for the possible gestures and a toggle switch to turn each option off or on.
Note: You’ll get a warning if you try to turn on the same gesture for multiple actions. This is super helpful.
Common Touch Shortcuts in Procreate
Rapid Undo- Two fingers tap the screen. Before long you’ll find yourself doing this ALL.THE.TIME. On paper, the table, your laptop…. 😂
Rapid Redo- Three fingers tap the screen.
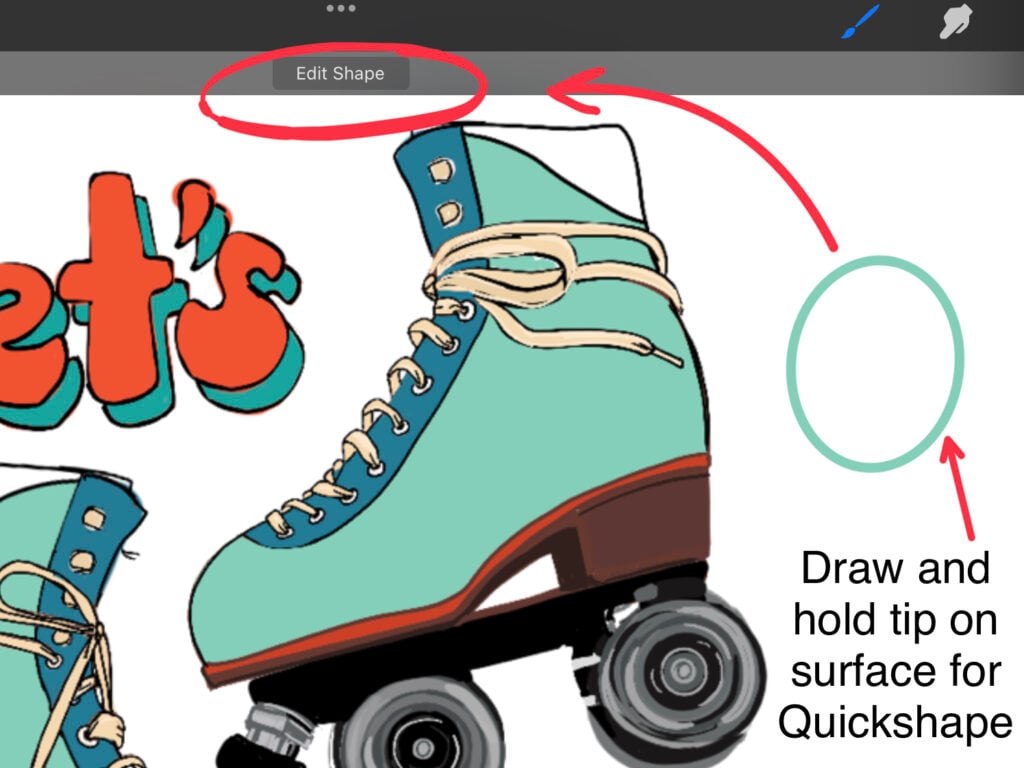
Quick Shape/Straight Lines- Draw and hold the tip of your finger or stylus on the screen. Once you snap into the quick shape you’ll be able access the Edit Shape Mode at the top of the screen.
Perfect Shape- While activating Quick Shape tap the screen with a one finger touch to get a perfect circle, oval, rectangle, etc. Or you can choose your shape in the edit function at the top of the screen.
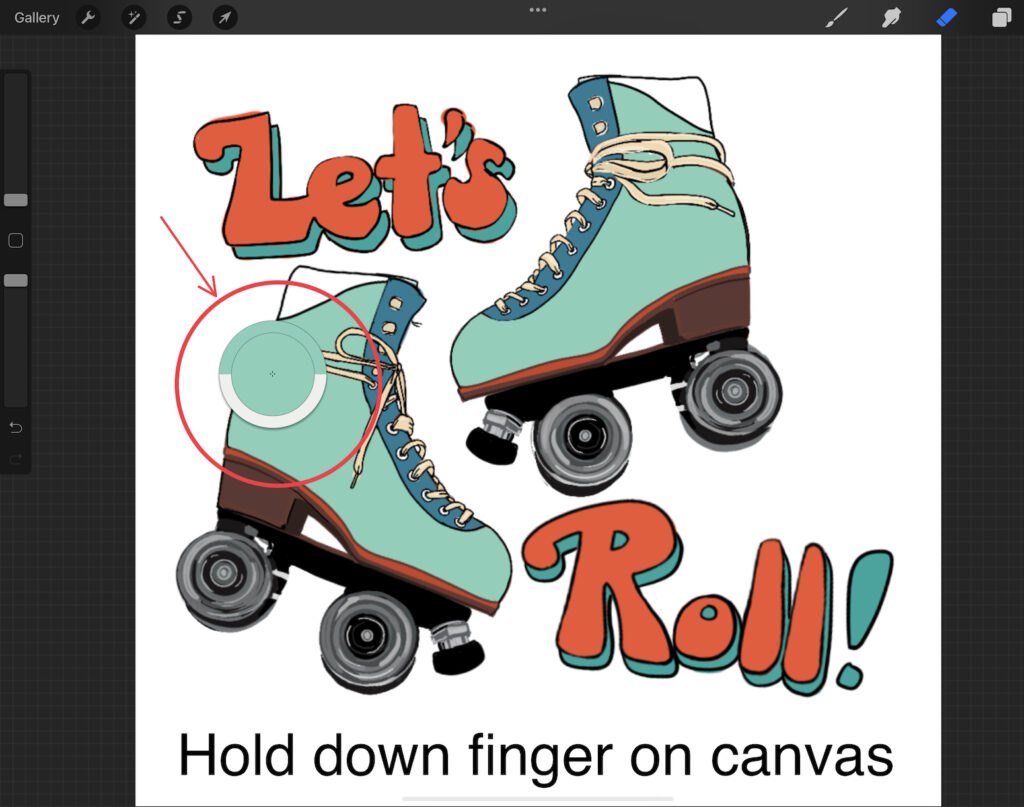
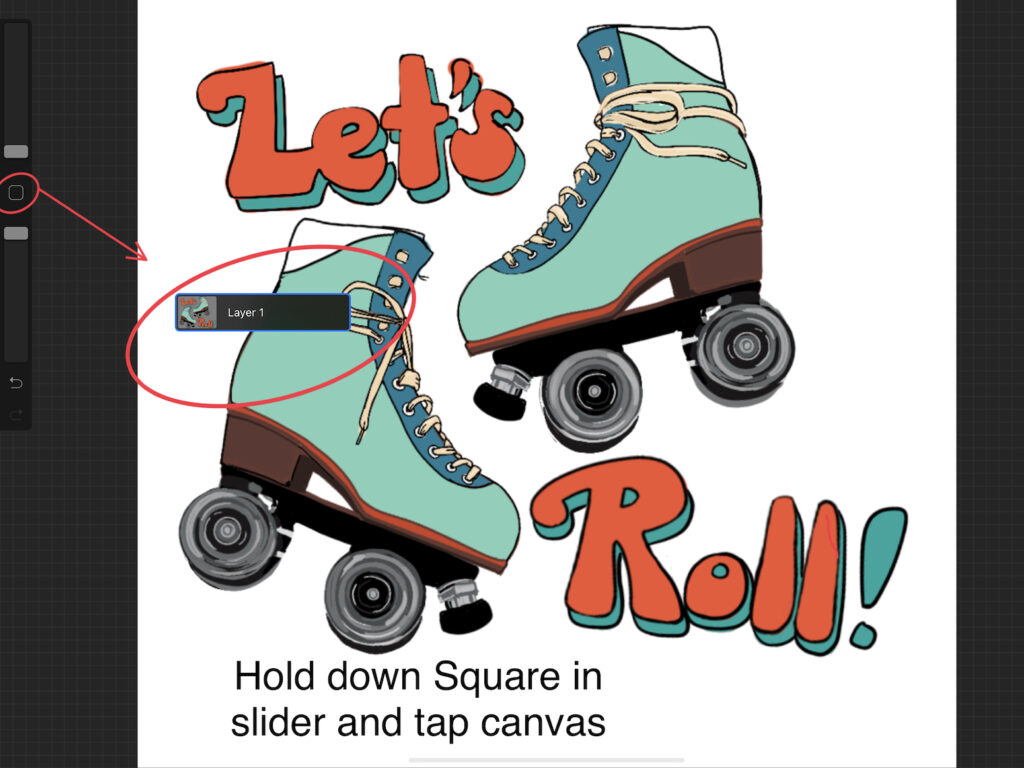
Eyedropper Tool- Tap the square icon in the middle of the brush sliders on the side of your canvas. OR you can touch the color you want on the canvas and hold. Slide eyedropper for the right color selection.
This super handy tool makes it easy to keep working without stopping to open the color palette every time you want to switch to a different color.
Change Size of Canvas- Two fingers pinch to minimize, seperate fingers to zoom in (magnify). This finger pinch is pretty intuitive after a while too!
Rotate Orientation of Canvas- Pinch zoom two fingers on the screen and turn the wrist to allow rotation.
Switch Between Eraser and Brush- Double tap the Apple Pencil to toggle between your brush and the eraser tool.
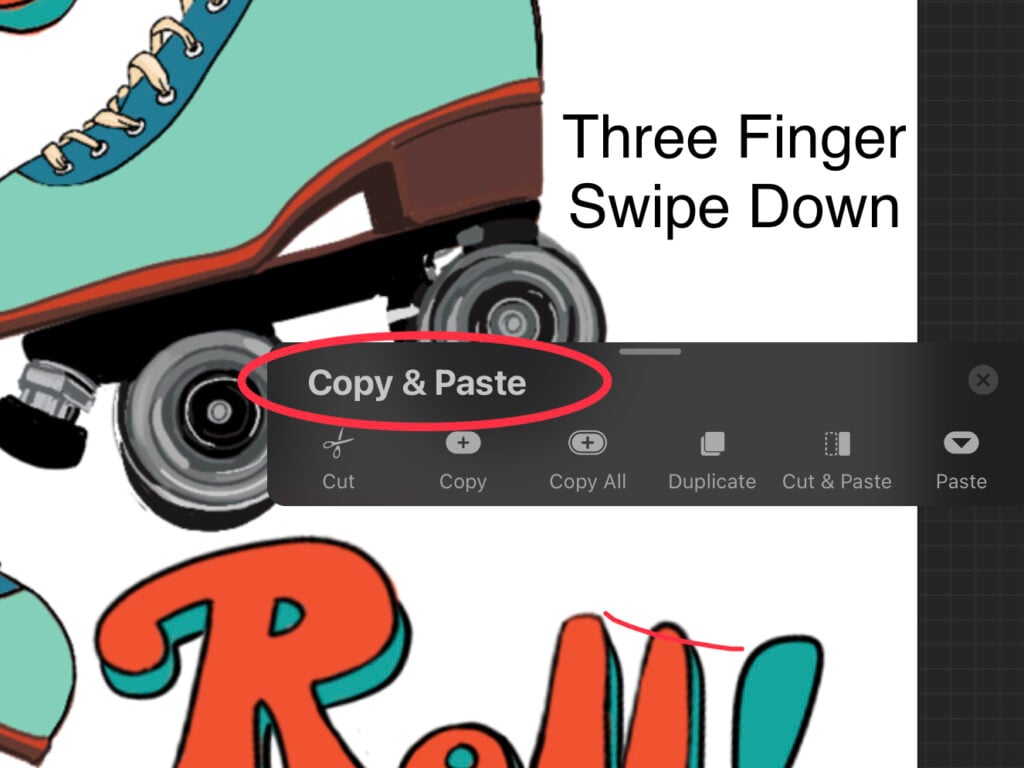
Copy and Paste Options Menu- Three fingers swipe down on the screen and you’ll find paste elements. If you use the cut and paste option you’ll move whatever you select to a new layer. This is great when you accidentally drew on the same layer as something you wanted to keep seperate.
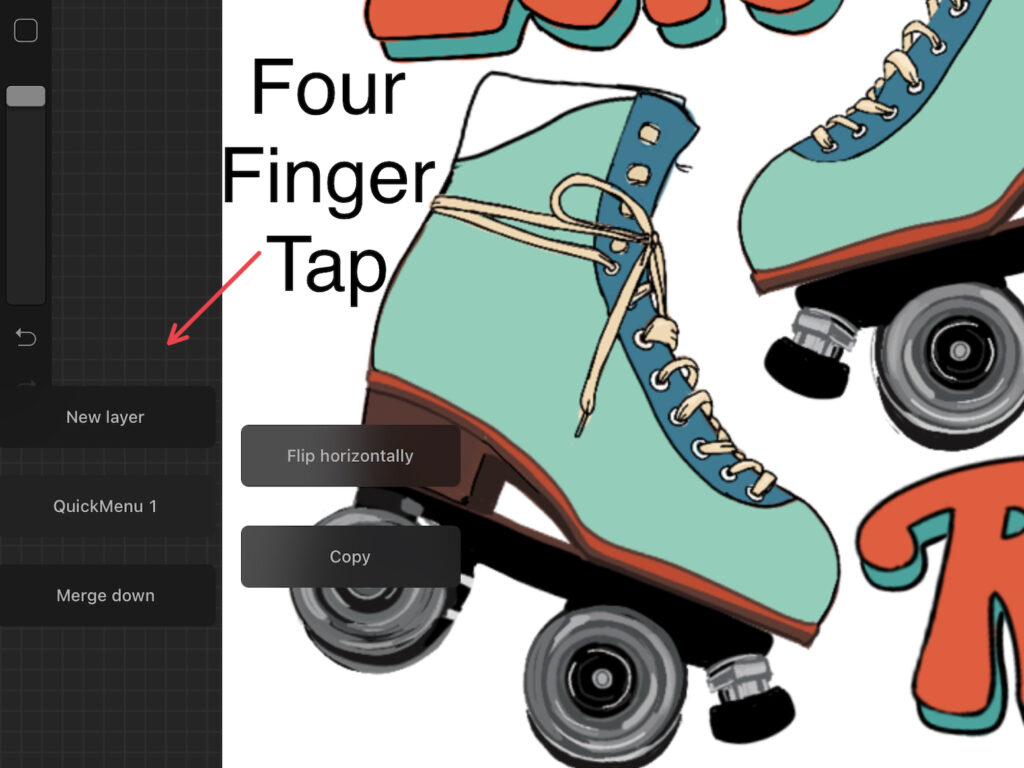
Quick Menu- Four finger tap on the screen. This is basically a shortcuts menu that can be customized.
Suggested Gesture Customizations
You’ll see these next shortcuts as options in the side panel under Actions>Prefs>Gestures. These are what I found worked best for me. The best thing is that you can play with these and customize them to suit your preferences!
Layer Select- Okay, this was my favorite secret Procreate shortcut find EVER!
This is a lifesaver if you’re working on multiple layers and get a stray mark you want to erase. No more turning on and off layers to find it. This also will automatically open layers you select in the layers panel.
I toggled on the action square + touch to turn this magical option on.
Assisted Drawing- Although you can assign a gesture control to this helpful tool, I usually just turn this on using the side menu for each layer.
Erase- I toggled on the use a finger to erase option. But honestly, I forget about this one.
Note: This only works if you’re using a stylus.
Extra Shortcuts for Color, Layers and Your Interface
The following aren’t necessarily gesture shortcuts, but they are shortcuts that I use all the time and aren’t necessarily intuitive. So I’m adding them to this post as shortcuts beginners definitely want to know!
Other Options Under Actions>Canvas
Interface Color- You can also select a light or dark canvas, and move the interface from the left side to the right side of your canvas.
Procreate Color Shortcuts for Beginners
Color Drop- Touch color circle in corner of canvas and drag across the screen to the place you want it, then lift up to color fill in the area. You can fill in lines, or shapes. So if you’d like to change just the outline of your image you can totally do this!
Color Threshold- This shows up as a slider at the top of your screen when you are color-dropping. To adjust, slide the tip of your finger or stylus from left to right across your screen (without lifting up).
Note: Wondering what color threshold is? Basically, if your threshold is too high, too much of the canvas is filled in when you color drop. It’s like a bleed. If it’s set too low, then not enough will be filled in. This is a problem most frequently when you try to color fill in a shape and notice it didn’t flood the entire shape. But left a little space between the outline and the fill.
Color Disc- Choose highlights, low lights, and mid lights by moving the dot in the center of the color wheel up or down. This is my favorite way of getting the right color values for shadows and highlights. Tap a square on your default palette to save your choices!
Layer Shortcuts
Clear Layer- Scrubbing back and forth with three fingers will clear the layer you’re on.
Change the Opacity of a Layer- Touch the N on the layer to open up the layer blend modes in a drop-down menu. The opacity slider is the first thing you see.
Clear Layer- You can do this by sliding left on the layer, or by tapping the layer to bring up another side menu with options. Clear is one of them.
Select Layer- Slide right on the layer to select, or tap layer and use the Select option. But beware, there seems to be a bug if you’re moving the image on your layer after using the Select in the layers option menu. It seems to leave ghosting. A better idea is to swipe right on the layer and then use the selection tool.
Move a Layer’s Position in the Layers Panel- Tap and hold on to a layer to move it up or down in the Layers panel.
Canvas Shortcuts
Copy Layers Canvas to Canvas- Select the layer (or layers) you want and hold the tip of your finger or stylus to the canvas until it sort of pops up and can be moved, with your other hand tap Gallery and then open up the canvas you want to copy to. This looks like it’s removing the layer from your first canvas, but it’s actually copying it. Your original is still there.
Print Out this Procreate Shortcuts for Beginners as a Cheatsheet
Want to keep this info close? I put all the info here into a printable PDF cheat sheet that you can download from my Free Library.
New to Well Crafted Studio? The Free Library is full of hundreds of free resources, including Procreate brushsets, palettes, and more. This is a password-protected bonus for my email subscribers only. SO join today! You can unsubscribe at any time, but I do send out email freebies as well.
Learn More About Procreate
You guys, these are just a couple of layers in that ogre or onion analogy from before. This post is honestly just the beginning of what you can do with Procreate.
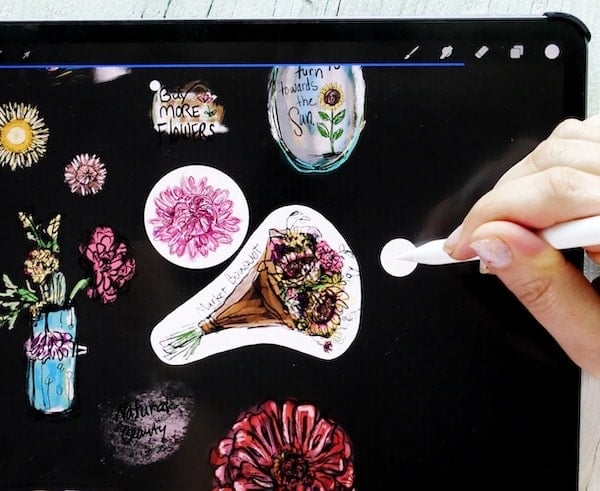
Did you know you can also export your designs to make stickers? Create animations or time-lapse replays? Yup! It’s possible!
This post is for beginners, but if you want more, comment below and I’ll do a second post with tips for using alpha lock, the color palette, drawing assist, reference photos, and more!
There is SO much more to learn and love about this amazing drawing app!
For free tutorials, check the Procreate Playlist on my YouTube channel or the Procreate Tutorial category here on my blog. I love crafting with Procreate + my Cricut and want you to love it too! ❤️
Join the ONLY Procreate + Cricut/Silhouette Facebook Group for Crafters and Creators!
Come see what’s possible when you combine Procreate with your favorite cutting machine. This new community is already going strong with weekly Live Procreate Playdates.
We’re super supportive of beginners, so if you’re new to Procreate and curious, we’d love to have you try us out!
Love this? Share these Procreate Shortcuts for Beginners with Others!
I hope you enjoyed these fun shortcuts! If you found this post helpful you may want to bookmark it for later, share it with others, or pin it so it doesn’t get lost. It’s also a great way to help me continue to create more content like this!
Thanks for Reading,



![How to Draw Snowflakes in Procreate [Symmetry Tool]](https://wellcraftedstudio.com/wp-content/uploads/2019/11/How-to-Draw-Snowflakes-square-1024x1024.jpg)

