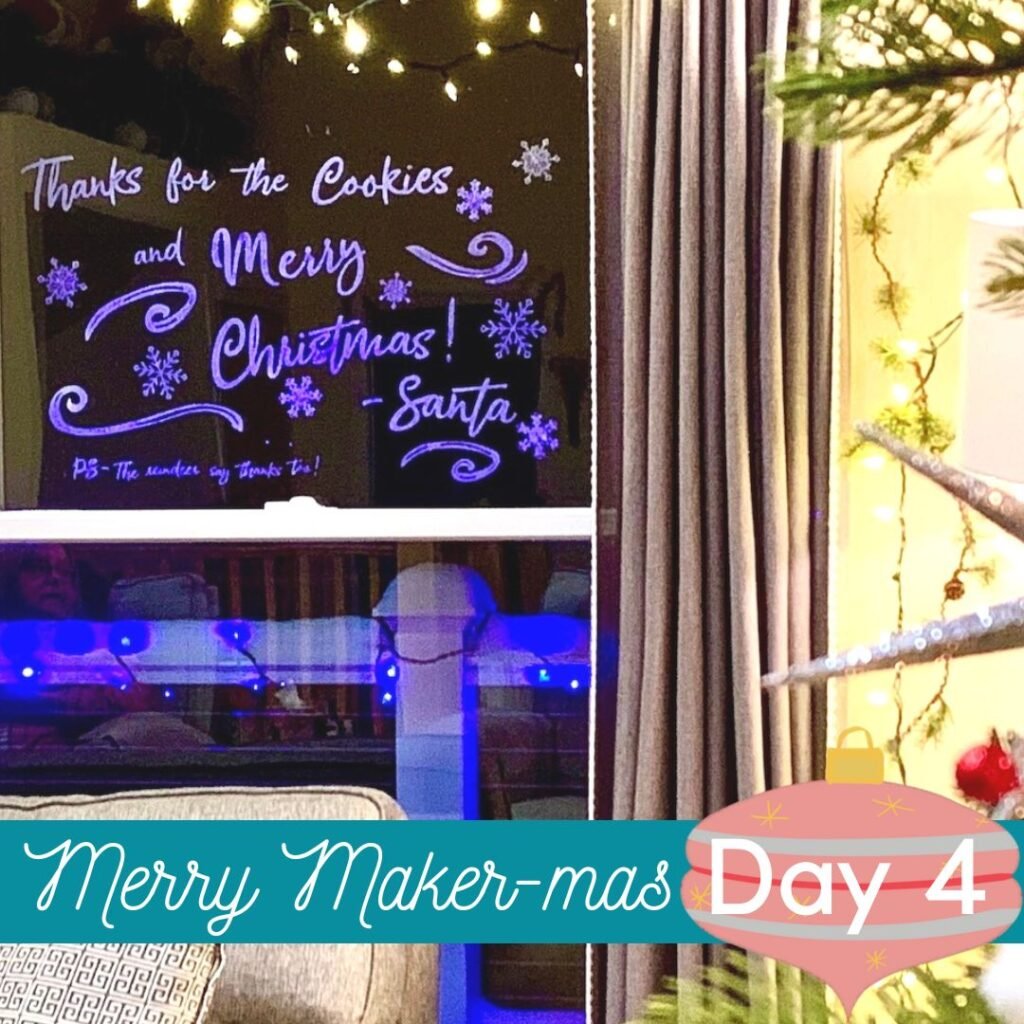
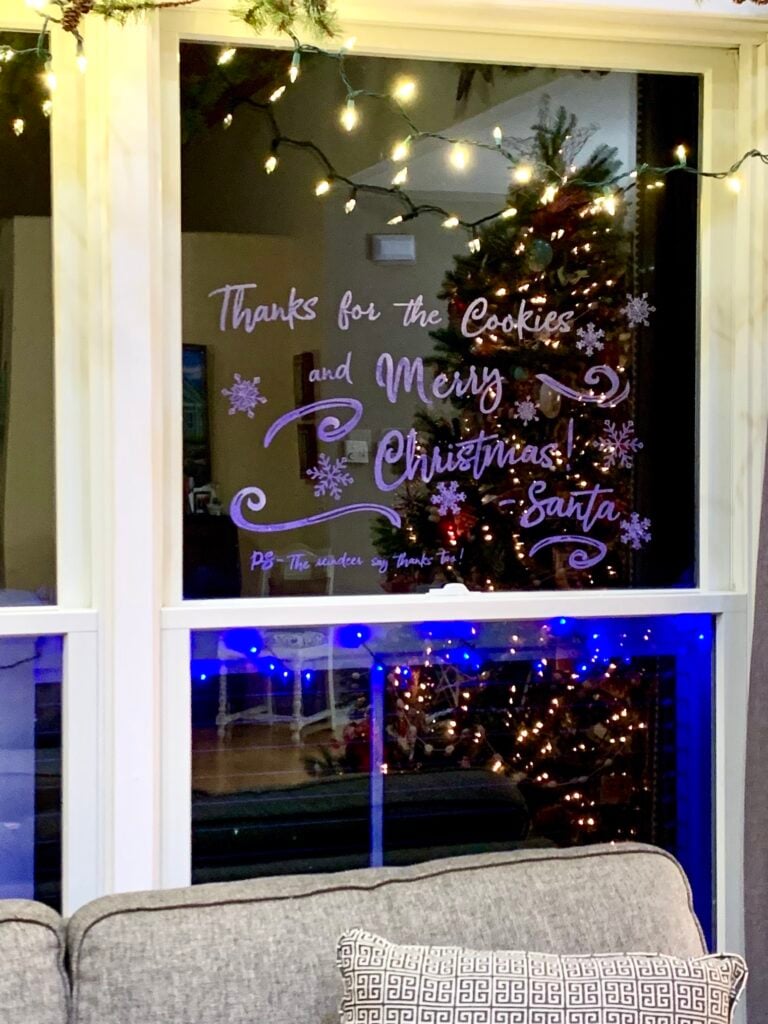
What if when the kids sneak upstairs to open their stockings Christmas morning they find a magical thank you note from Santa and the reindeer on the window? Can you just imagine their reaction? That’s the idea behind this super quick Christmas Cricut project that you can make with just a single roll of Cricut’s frosted window cling. For this much magic, it’s the best investment you’ll make this Christmas. In the tutorial below, I’ll give you step-by-step instructions so you can make this with your Cricut– after the kids are in bed, of course!
Tips for Finding Cricut’s Window Cling
This project uses Cricut’s Window Cling which I found at JoAnn Fabrics. Not every craft store carries it, so if you’d like it in time for Christmas morning, I would look at my local stores online to see if they have it. I live in the suburb of a major metro area so when I looked at Amazon they can get it to me overnight. So check your options, but locating the cling in time for Christmas Eve may be the only hard part of this project.
Free Christmas SVG Files
There are TWO SVG file freebies for this post that you can get from my Free Library if you subscribe to my newsletter. Unsubscribe at any time and keep the password to all the free files.
Need the password? Just sign up for my email list, and you’ll get the password emailed directly to you!
Merry Maker-mas Day 4 + About This Design
This design was originally created in Procreate! A drawing app for the iPad that I LOVE to share about. I have a beginner’s tutorial for Procreate here and more about Procreate below.
The project was made for Merry Maker-mas, which has 11 other projects this year that you will love. To get to ALL the Merry Maker-mas featured holiday projects, and enter to win a Cricut Maker 3, Cricut Mug Press, or Apple Pencil, click the link below! The giveaway is on December 25th!
See the Holiday Projects + Enter to Win the Merry Maker-mas Giveaway!
How to Make a Note From Santa with Cricut Window Cling
Tools and Materials
- Free Note from Santa SVG download from the Free Creative Resource Library (under SVGs)
- Free Snowflakes SVGs from the Free Creative Library
- Cricut Maker, Cricut Explore Air 2, Explore 3, Cricut Maker 3
- 12″ x 24″ Cricut Cutting Mat (any type works), or 2- 12″ x 12″ mats taped together
- Cricut Window Cling, 1 roll
- Weeding Tool
Directions to Make the Note from Santa with Cricut Window Cling
Step One: Download the Free Note from Santa SVG Design and the Snowflakes from the Free Library
You’ll find these designs in my Free Library. This library has hundreds of original designs, all free to subscribers of Well Crafted Studio! Not a subscriber? You can get the link above!
Step Two: Open a New Canvas and Upload the Note from Santa SVG into Cricut Design Space
In Cricut Design Space, choose a new project. This opens up a new canvas. In the left side toolbar, you’ll see an upload icon at the bottom. Click the Upload icon.
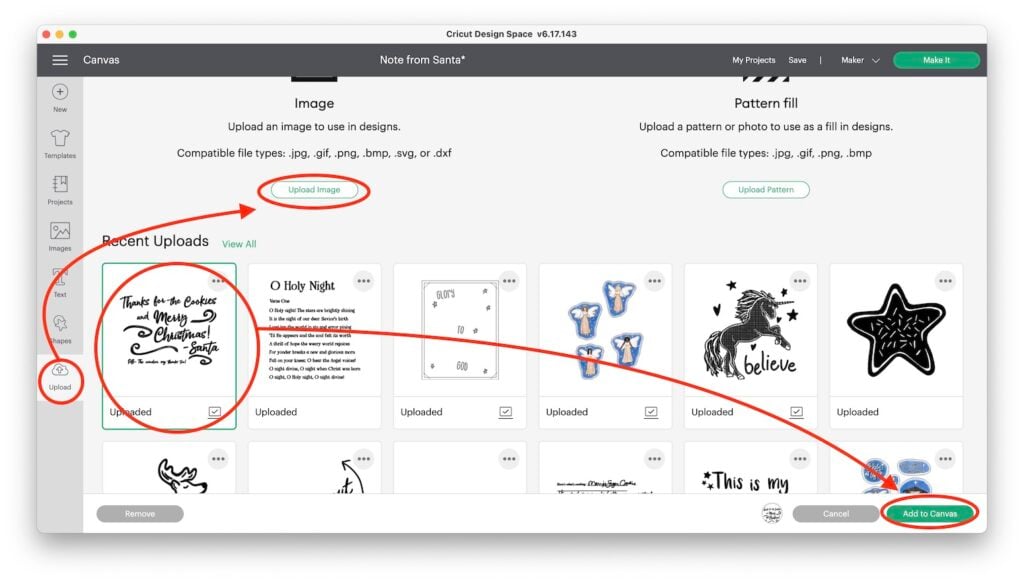
This opens up your Uploaded Images Gallery. Click Upload and then Browse Files to select the download from your files. Click to Upload the Note from Santa SVG into Cricut Design Space. They’ll come in as cut files so all you’ll have to do is save them. Repeat this with the Snowflakes.
Step Three: Add the Designs to Your Canvas
In the Uploaded Images Gallery, click all the designs to Select them. Then hit the Add Images button in the lower right corner. This takes you back to your canvas, where you’ll find your images inserted.
Step Four: Size the Designs to Fit
Select the Note From Santa Group and change the size in the top toolbar. To do this, change the width to 20″ and that will automatically adjust the height to keep the constraints.
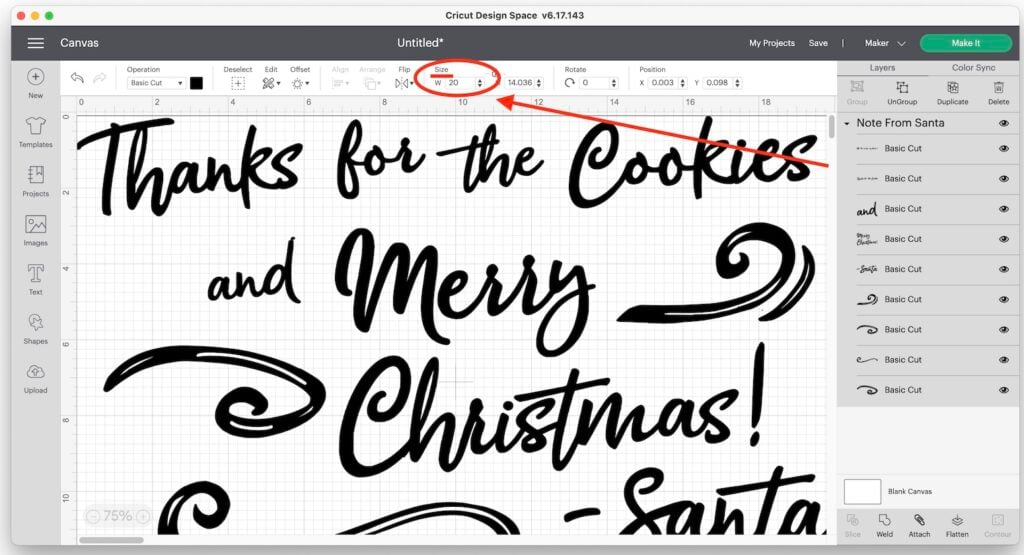
Of course, depending on where you’d like to place your finished design, you may want to make this design smaller or larger to fit your window or door.
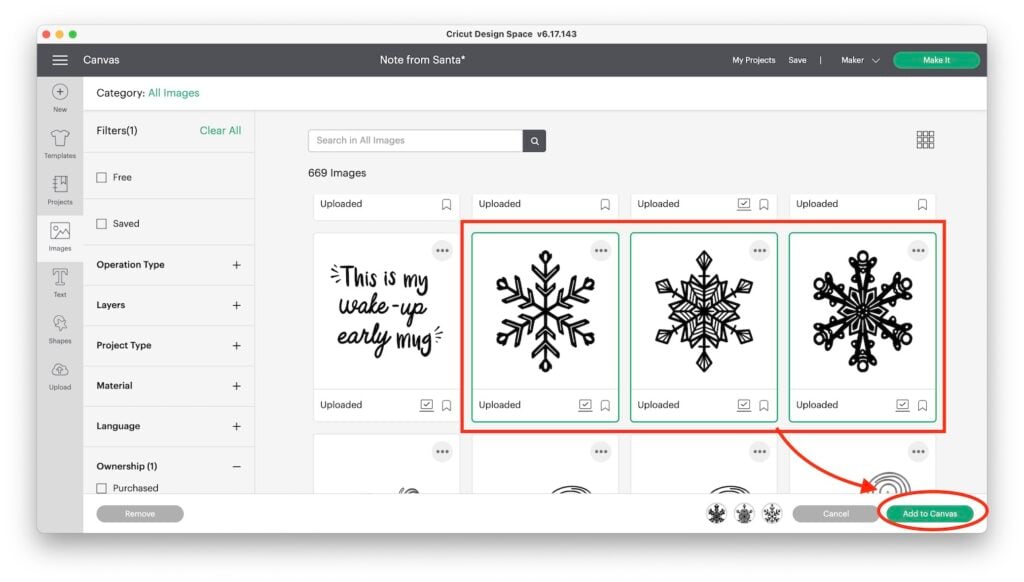
Click on a snowflake and then Duplicate it at the top of the Layers panel. Repeat with the other snowflakes until you have as many as you’d like. Arrange them around the main design.
Change the size of these in the top toolbar as desired.
Or you can click on the little anchor that appears at the bottom-right corner of the selection box and drag in or out to size up or down. You can also Rotate the snowflakes a little by using the anchor point in the top-right corner.
Step Five: Ungroup the Note from Santa Design
Because this design is too high to fit on one mat and keep its placement, you’ll want to split the design into two parts. To do this, we first have to Ungroup the parts of the design that is Grouped.
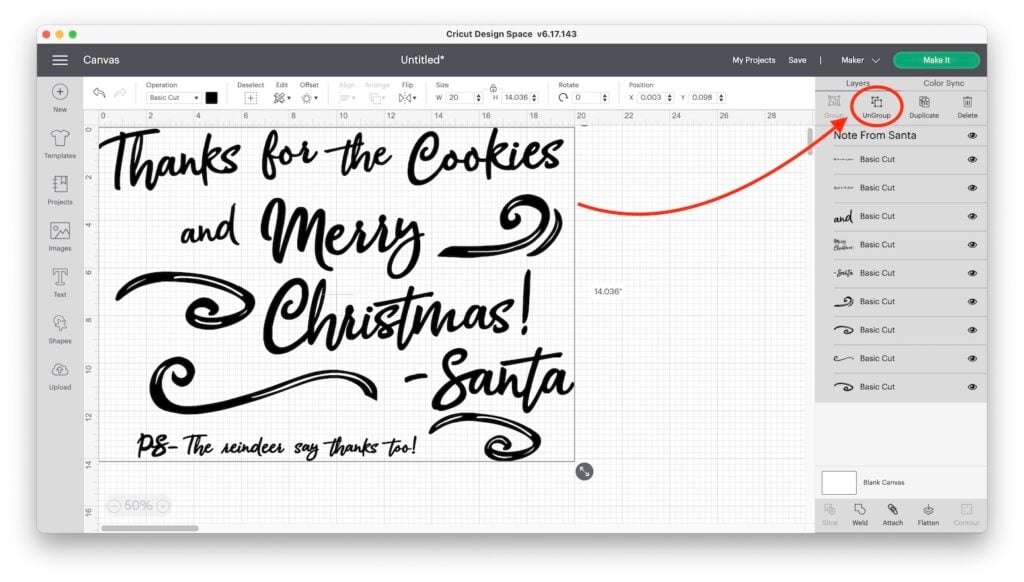
In the Layer panel, Select the Note From Santa Group and then hit the Ungroup button.
Step Six: Attach Design Layers to Fit on Two 12″ x 24″ Mats
Note: You want to keep the placement as much as possible to make it easier for you to be able to tell how to apply the design to the window. You can also reference your canvas in Cricut Design Space. The window cling doesn’t seem to work great with the transfer tape so I hand-applied these to the window. But you can totally try it!
To do this, click on the screen in the top right corner, and with your mouse still depressed, drag a selection box across the screen to Select the top half of the design.
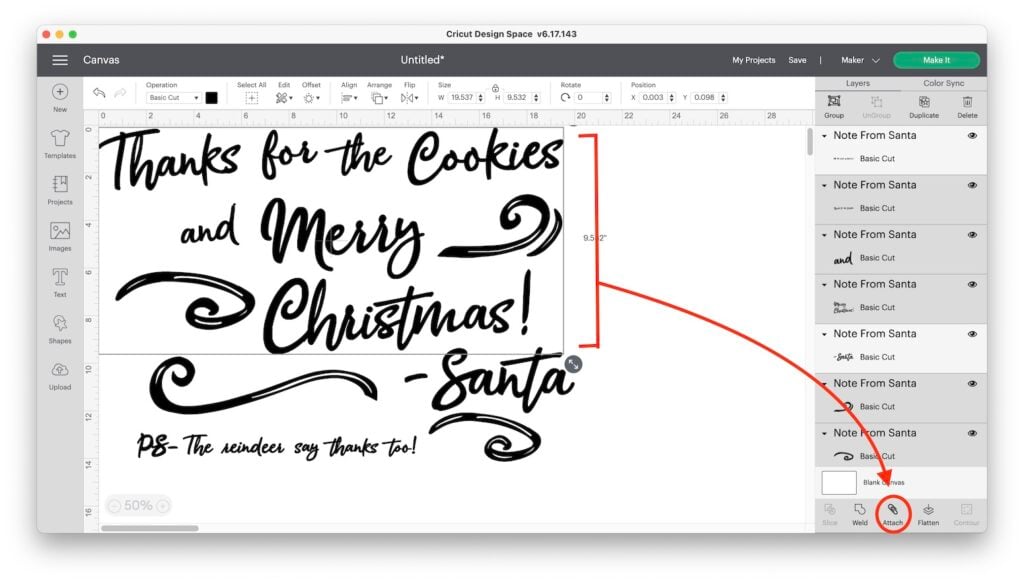
Then, in the bottom right corner of your screen (under the Layers Panel) choose Attach.
Repeat with the bottom half of the design. This should give you two designs, that will fit on a 12″ x 24″ mat.
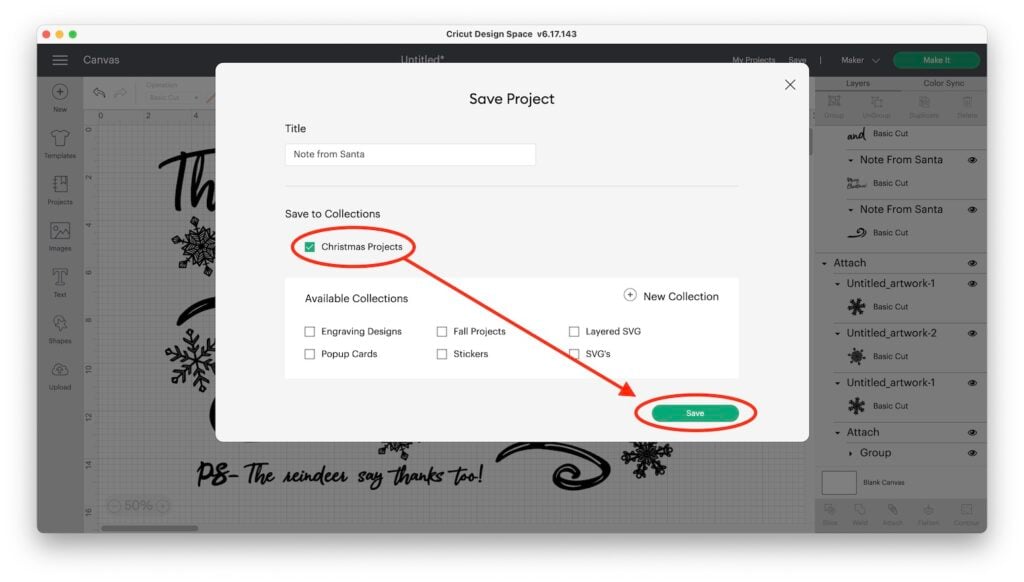
Step Seven: Save and Make It!
In the upper right corner of your screen, you’ll find the Save button, and the Make it Button.
Click the Save button and name your project. Then, if you have a collection for Christmas designs, add it to that collection before you hit Save.
Then click on the green Make It button to the right of the Save. This sends you to the Mat Preview Page.
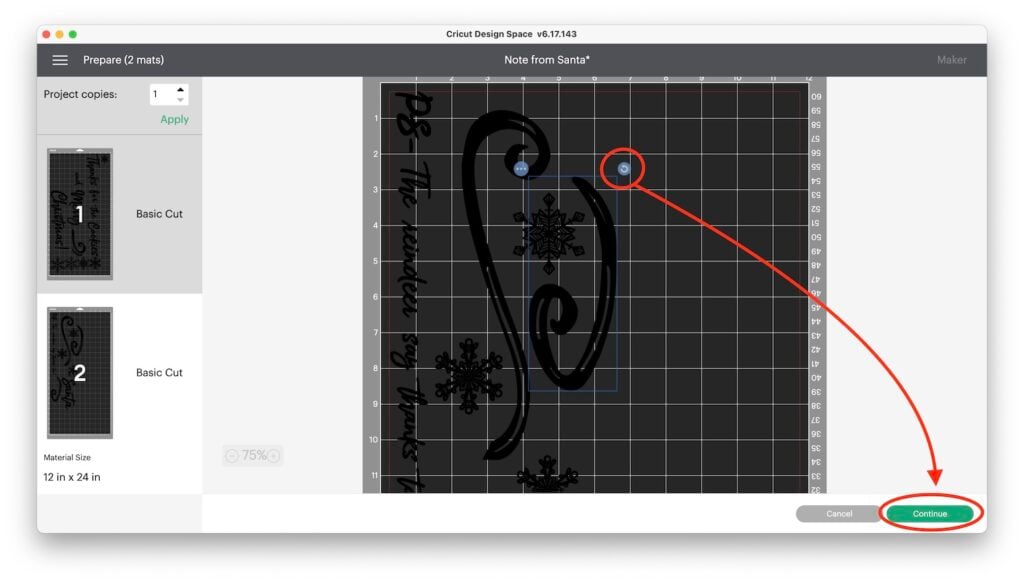
Step Eight: Arrange the Designs on the Mat Preview Page to Conserve Your Materials
Next, on the top of the Mat Preview Page, Cricut will warn you that you’ll need a large mat for this project
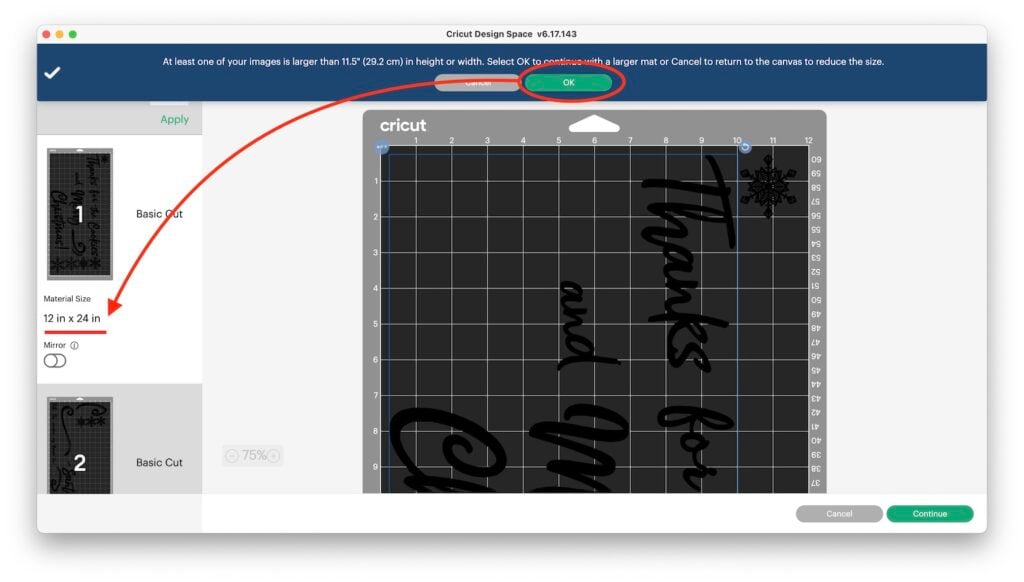
If you don’t have a 12″x 24″ mat, you can tape two 12″ x 12″ mats together for this project. If you do so, you’ll still want to click yes to the large mat warning that will appear at the top of your screen.
You can move your designs once you’re on the Mat Preview Page if you’d like to rotate or shift the designs to conserve your window cling.
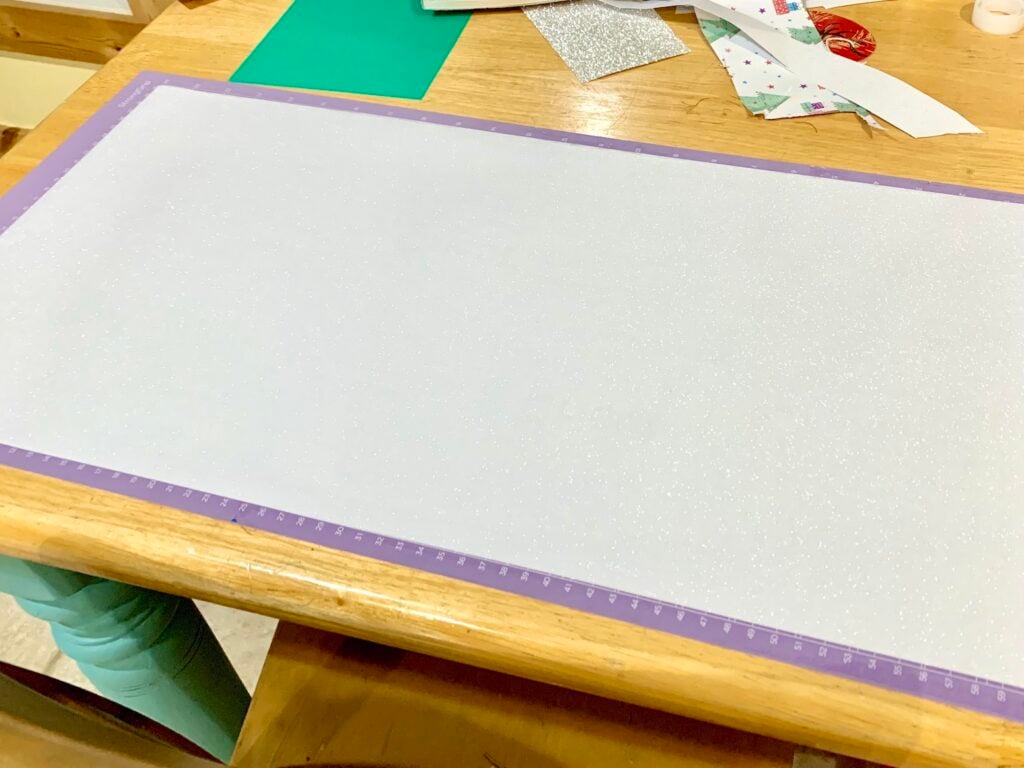
Step Nine: Prep Your Mat
Cut the roll of window cling to match the length shown on the mat preview.
Place on your mat, and press down thoroughly for adhesion. Ideally, you’d want a Standard Grip Cutting Mat for this project.
I was at my parent’s and used the only 12″ x 24″ mat that they had, which was a Strong Grip Mat, and it did come off the mat just fine. Sometimes the backing sheets can stick to the mats though. And, if the only large mat you have is a Light Grip Mat, just be sure to either press down firmly, use a brayer, or use blue painter’s tape along the edges of your material.
Hit Continue.
Step Ten: Select your Materials
On the Actions Page, select Window Cling as your material. Leave the default pressure.
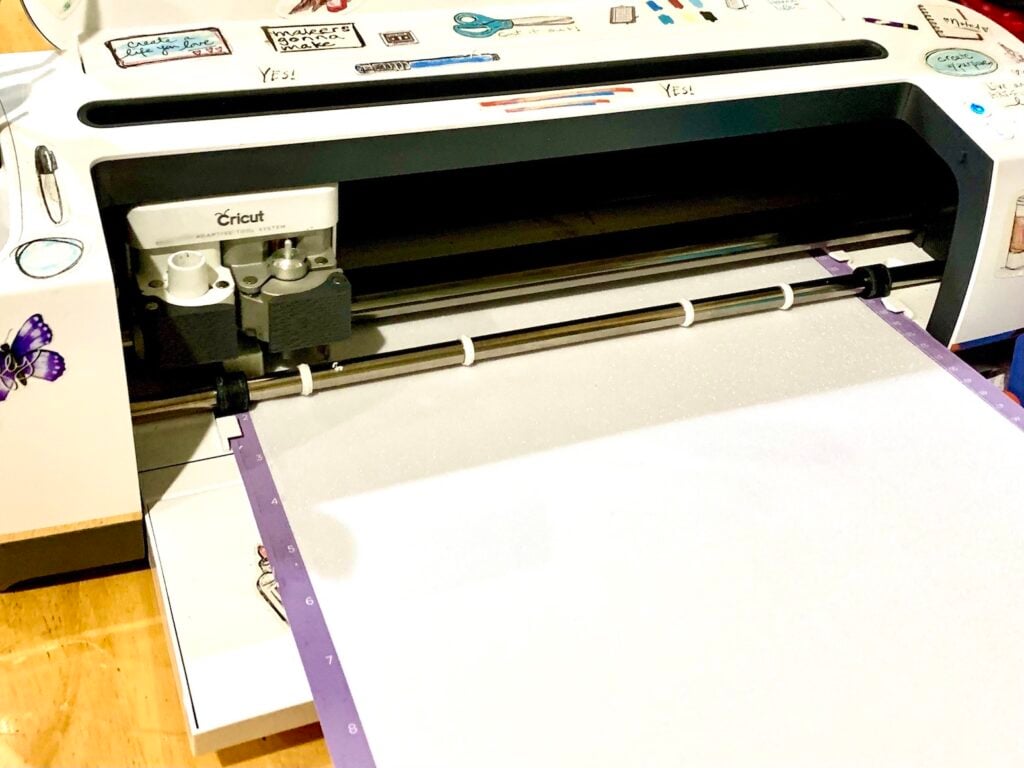
Step Eleven: Load Your Mat and Cut the Design
Place your mat in your machine and press the Load button on your machine. When the Cricut (Go) light starts to blink, press it to begin the cut.
Step Twelve: Finish the Cut, Check it, and then Unload the Mat
This is a pretty quick cut, and before you unload the mat be sure to check that the cling has cut all the way through. Then press Unload.
Note: If it has not cut all the way through you can repeat the cut by hitting the Go button on the machine again. But this only works if you have NOT unloaded your mat first.
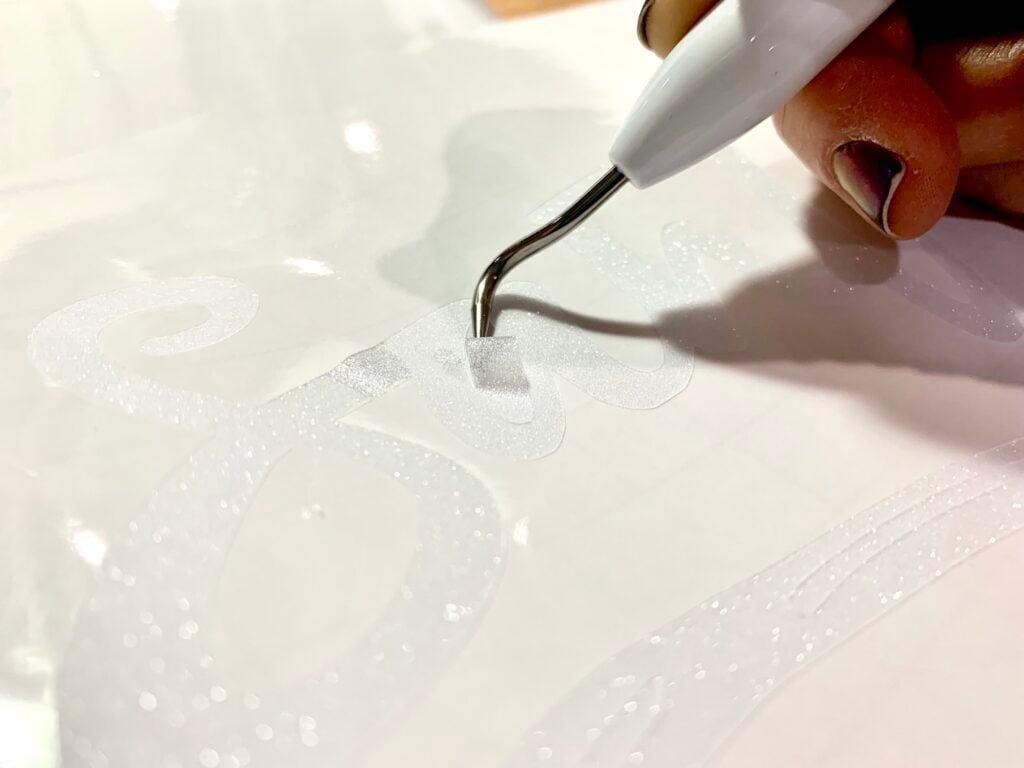
Step Thirteen: Weed the Design
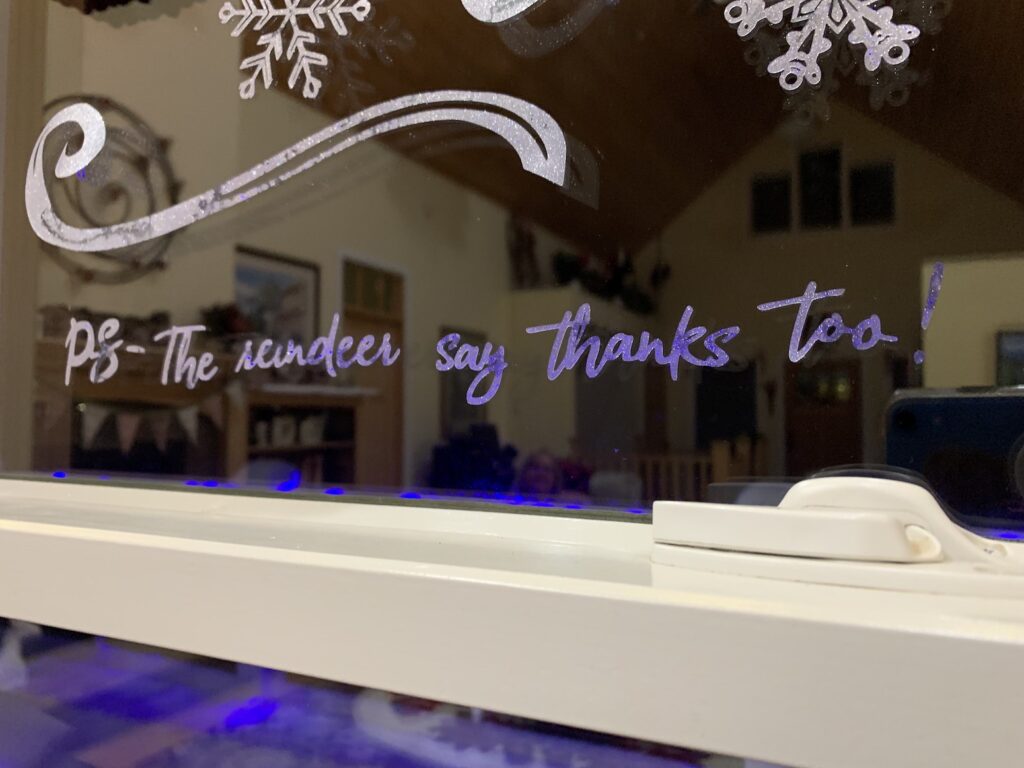
For the large area around the design, simply grab the top right corner and pull across and down to remove the extra cling. It pulls off pretty easily! Just be careful not to remove the smaller parts like the dots on the “i” and the punctuation.
For the small unwanted parts, (like the center of the letters) use a weeding tool or something sharp to remove those parts of the design. I do NOT try to get all the little bits out of the snowflakes, as many of the pieces fall out as you peel up the snowflake to put it on the window. This saved me time and frustration- keeping the project fun!
And to finish, there is no transfer tape for this design, it’s much easier to just peel it up and place it by hand.
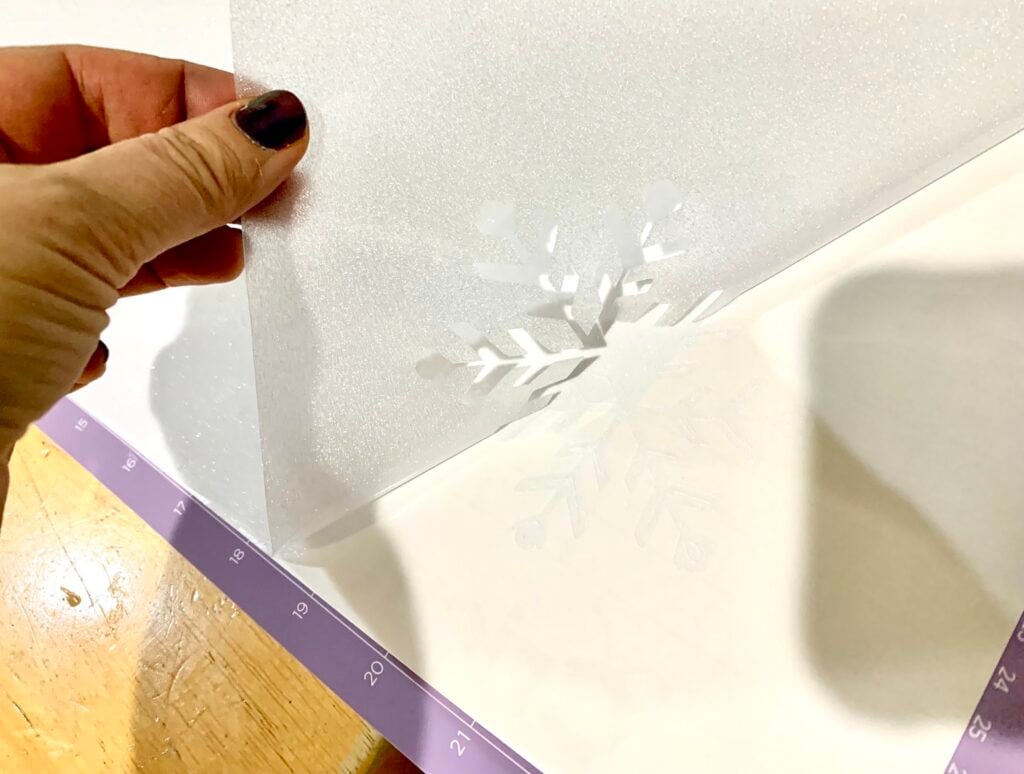
Step Fourteen: Apply to the Window to Make the Note from Santa with Cricut Window Cling!
Carefully, peel the window cling from the backing sheet. I pulled up a screenshot of the finished design on the canvas in Design Space so I could remember where to place everything. This also really was helped by the fact that everything had been attached when it was cut.
Otherwise, you would have to do a lot of hunting for the different pieces. Not easy when you’re doing it at night with only twinkle lights to see with!
Then, to apply to the window you just smooth it on. It applies pretty easily, and you can move things really easily too. TOTAL WIN!

Congrats on Your DIY Magical Note from Santa with Cricut Window Cling!
And You’re Done! Just be sure to keep the backing paper as it’s the ideal way to store your magical window note from year to year. Although, maybe Santa mixes it up and says something different next year!
✨A Magical Christmas Experience✨
I hope you enjoy this project! Although it came together quickly, it really captures the imagination of both the kids and parents. When I put this up last night to take pics my mom said to leave it up, but early this morning my brother and his wife saw it and wanted me to take it down so we could surprise their littles with it on Christmas morning. They really loved it and are excited to see the kids’ reactions.
I’ll add a photo here of the big reveal when it happens! ❤️🎄😂
Two Options to Upload Procreate Designs into Cricut Design Space as Cut Files
1) Upload Directly Into Cricut Design Space.
If you’d like to know how to use your Procreate Designs as Cut Files in Cricut Design Space, I have an entire post and step-by-step YouTube tutorial for this.
2) Create an SVG from your PNG file.
After I created this design in Procreate and then uploaded it into Silhouette Studio. Then I traced it, with the threshold set to high to create an SVG with it. Just be sure to group the areas that you want to keep together and then turn each area into a Compound Path, then group the entire design before you save it as an SVG.
Then, upload it to Cricut Design Space as you would any SVG.
Join the Procreate for Cricut + Silhouette Creators Facebook Group
With weekly Facebook Lives and lots of beginner help, this is THE group for learning how to create crafts or products with your Procreate Designs.
Love This DIY Note from Santa with Cricut Window Cling? Share It!
If you found this tutorial helpful, I’d love to have you share it on social media! The links are below. Thank you!
Thanks for Reading,