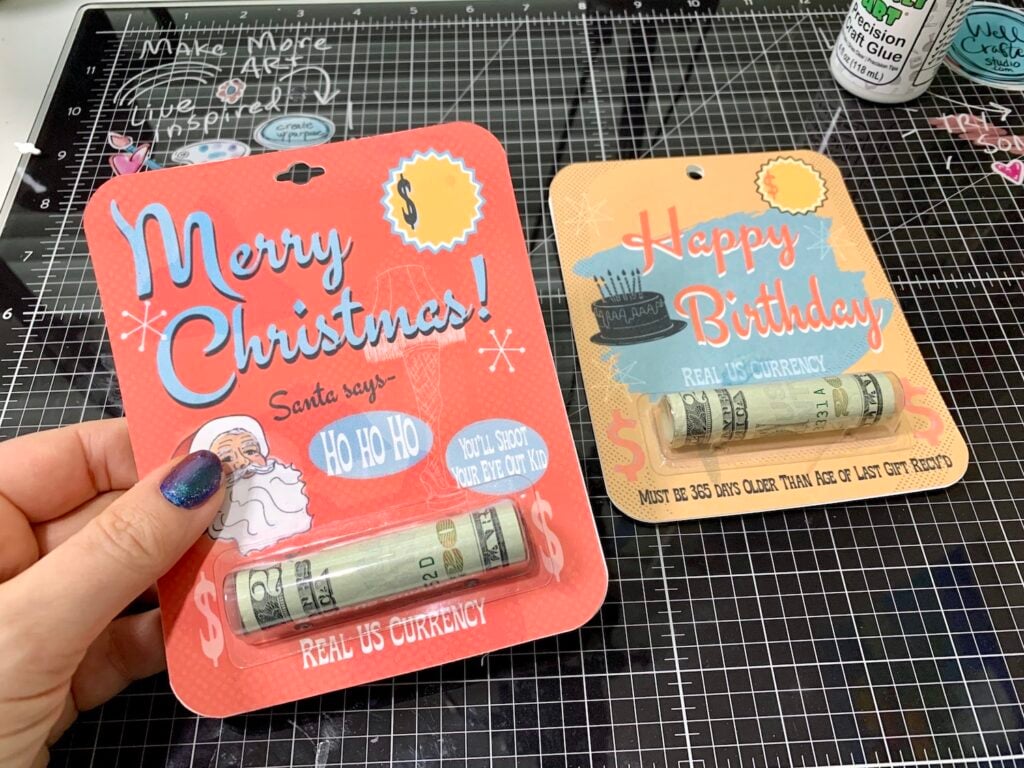
As a mom, nothing thrills me more than to have my son brag about my mad craft skills. It very (very) rarely happens, but when it does, I get way more excited than I should. Last May, we were looking for a fun way to gift cash to all the friends he had graduating from high school. These money roll gift cards were super easy to do, the materials aren’t hard to get, and they look cool enough that a couple of his friends asked where he got them. Later, when he told me about it, he said he “might have bragged a bit that his mom made them.” I’m totally taking the win!
Get the Free Money Roll Card Designs!
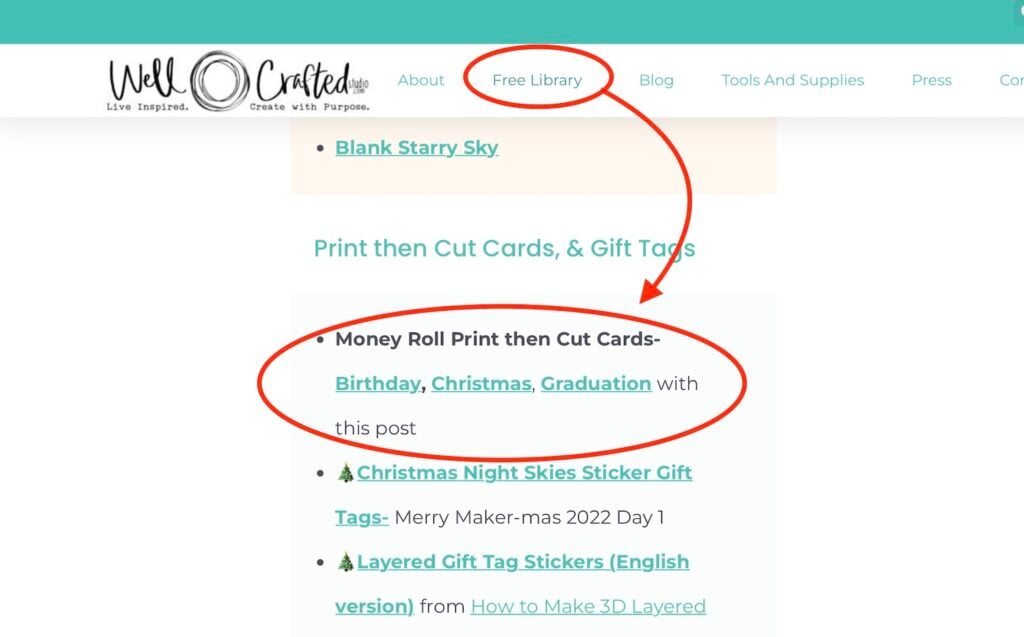
Although this started as a graduation gift idea, these are easily tweaked for different occasions, and I designed cards for birthdays and Christmas as well. You can get all THREE of these designs in my Free Library!
Need the password? Just sign up for my email list, and you’ll get the password emailed directly to you!
How to Make Money Roll Gift Cards with Cricut
Tools and Materials
- Money Roll Card Designs (Free Library)
- Cricut Explore, Explore 3, Maker, or Maker 3 (with fine point blade)
- Home Inkjet Printer ( I love my Canon Crafter’s Printer!)
- Light Grip Cutting Mat
- Cardstock to print on- there is a workaround if your printer won’t print on cardstock using regular-weight paper.
- Brayer (I love this for sticking my paper to my mat!)
- Double-sided tape or glue
- Plastic tube packaging for lip gloss (you can recycle your own or you can purchase on Etsy)
This post contains affiliate links. Thank you for supporting my small business.
Directions
Step One: Download the Free Designs!
You can find this design in my Free Library, where it’s free to download in a zip file format.
Step Two: Upload the Designs into a New Canvas in Cricut Design Space
Open a new canvas in Cricut Design Space and then use the upload icon on the far left toolbar to start the process. Click Browse to upload the .png file for the back of the card (you’ll repeat with the front).
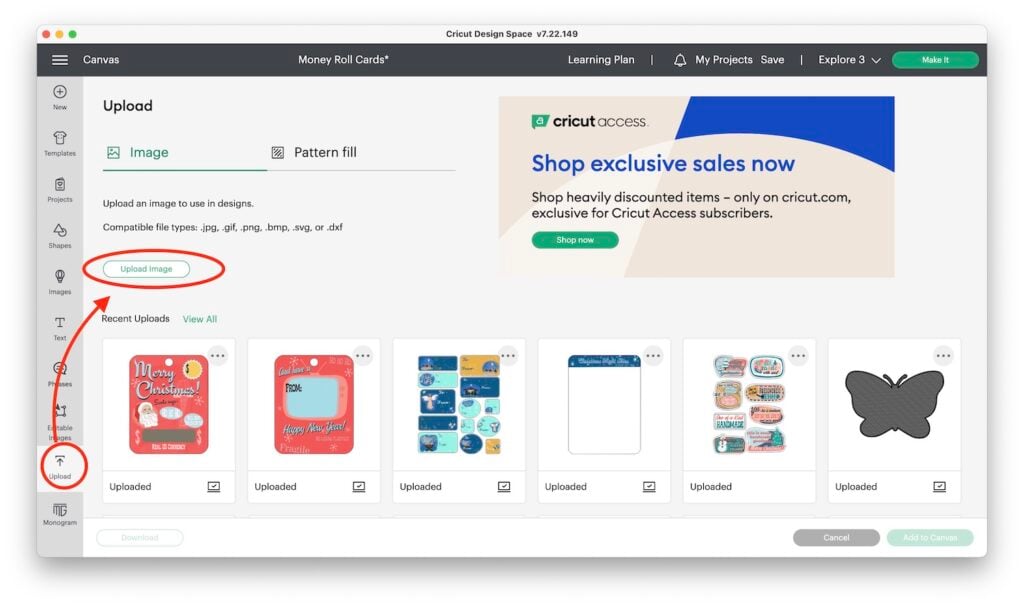
Save as Complex
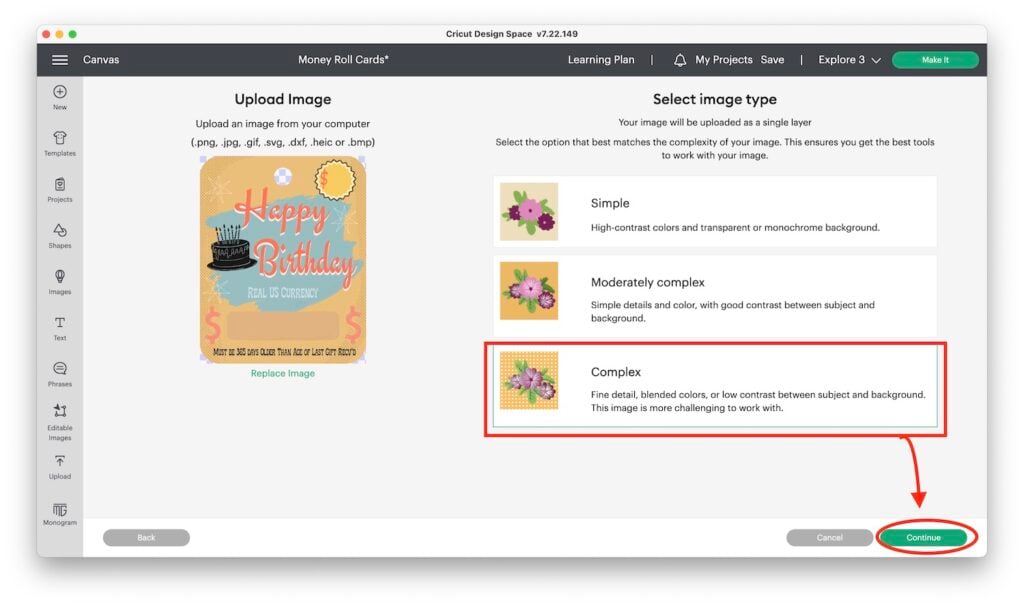
Save as Print then Cut
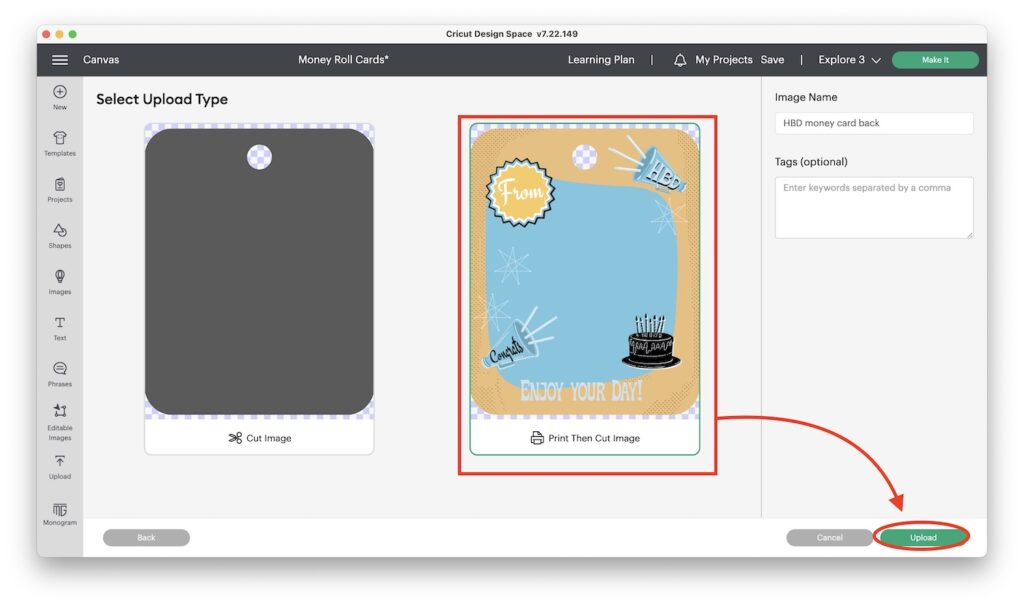
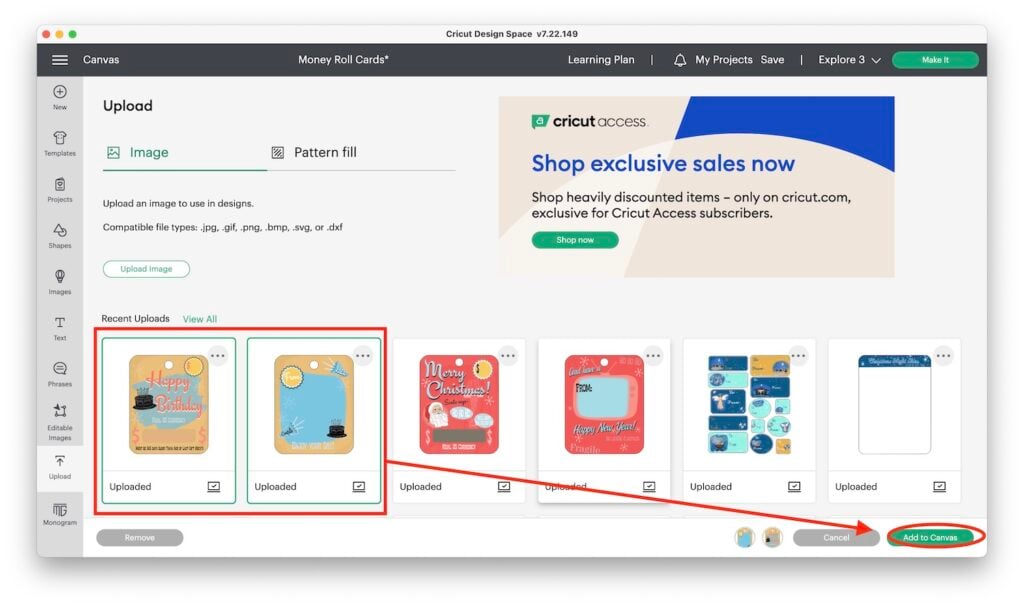
Repeat upload process with the FRONT of the Card! Then insert both cards into your canvas by clicking them to select and then Add to Canvas (lower right corner of screen.)
Step Three: Center Align the Cards and Size
To make sure you’re sizing the front and back of the cards the same, Select both and then go to Align in the top toolbar and Center. You can select by clicking and dragging across them on the canvas, or by clicking on one in the Layers panel, holding down the Shift key and clicking on the other layer.
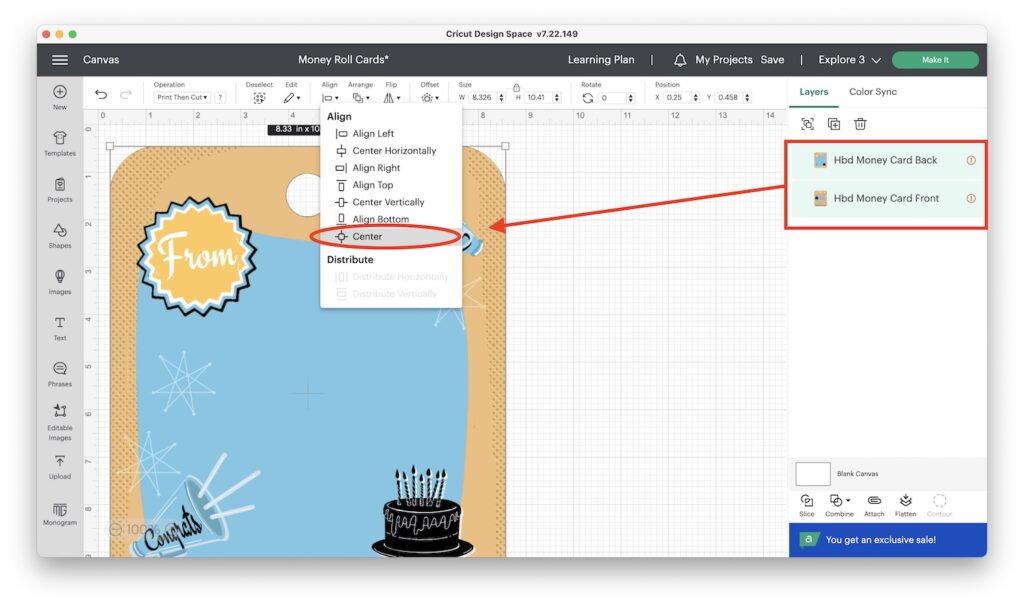
Then change the Size of the cards by changing the width to 4.35″ in the top toolbar. Make sure the Lock icon above the Size is closed so that you keep your proportions!
Step Four: Attach and Make It!
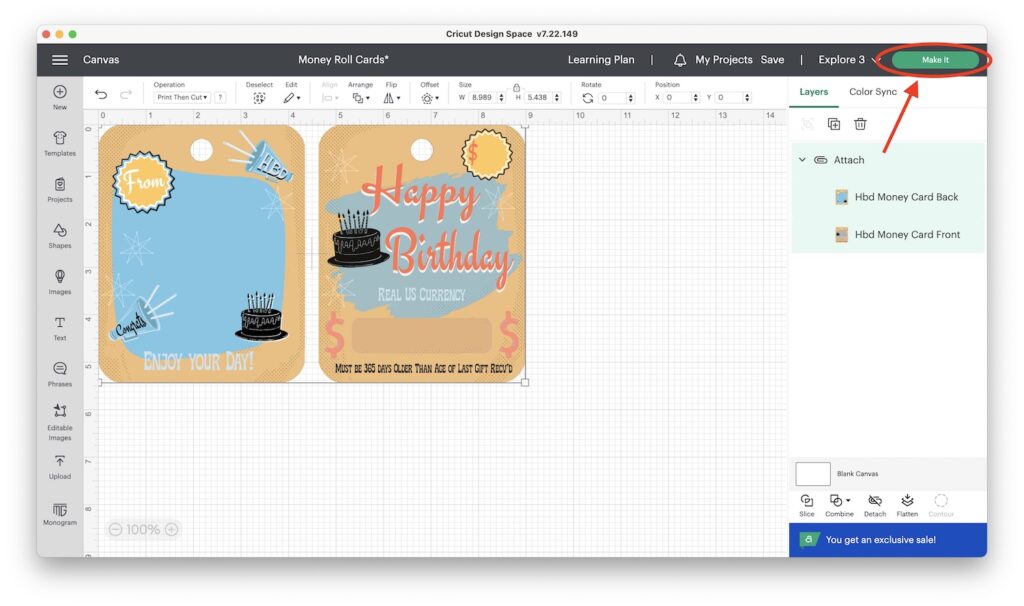
Click and move your cards side-by -ide at the top of the canvas. Give a little bit of space between them, and then with both Selected, click the Attach icon in the lower-left corner of the screen.
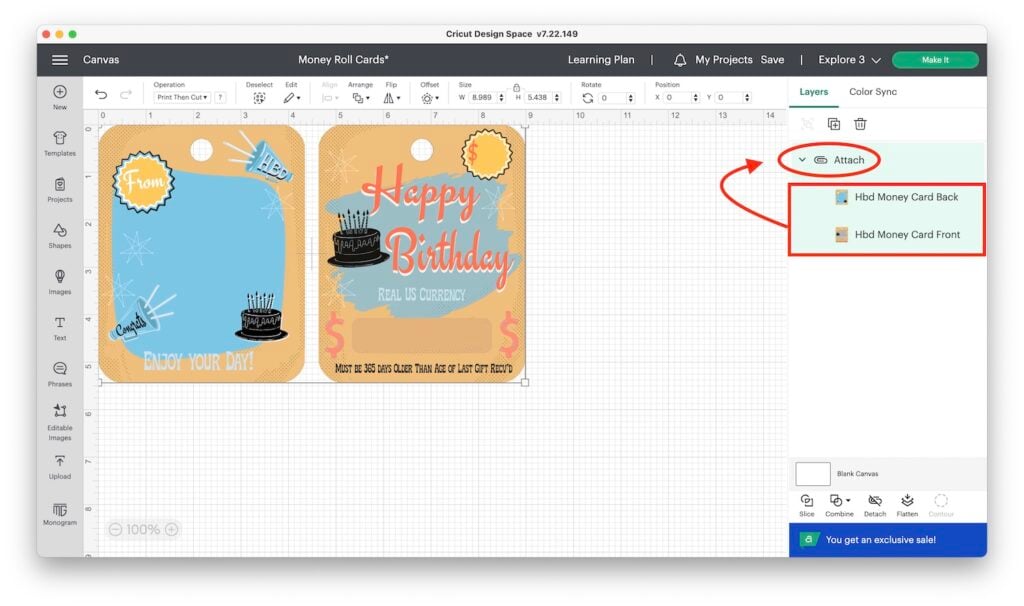
Save your project (top toolbar) and then hit the green Make It button in the top right of the top toolbar.
Step Five: Print Your Cards
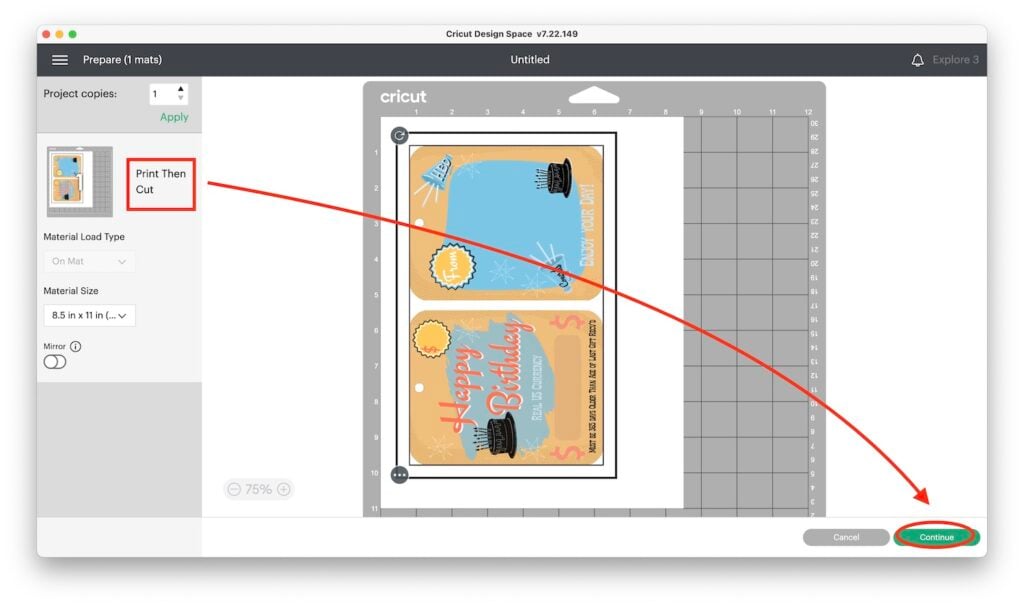
Bypass the Preview Screen, and just hit Continue in the lower right corner. Then, on the next page click Send to Printer.
In the Print Dialog Box that pops up click to toggle off the Bleed and toggle on System Dialog. Click Print to open the System Dialog for your printer. Note: This opens BEHIND the Cricut window usually so you have to minimize it to see the System Dialog options. You do not HAVE to use the System Dialog.
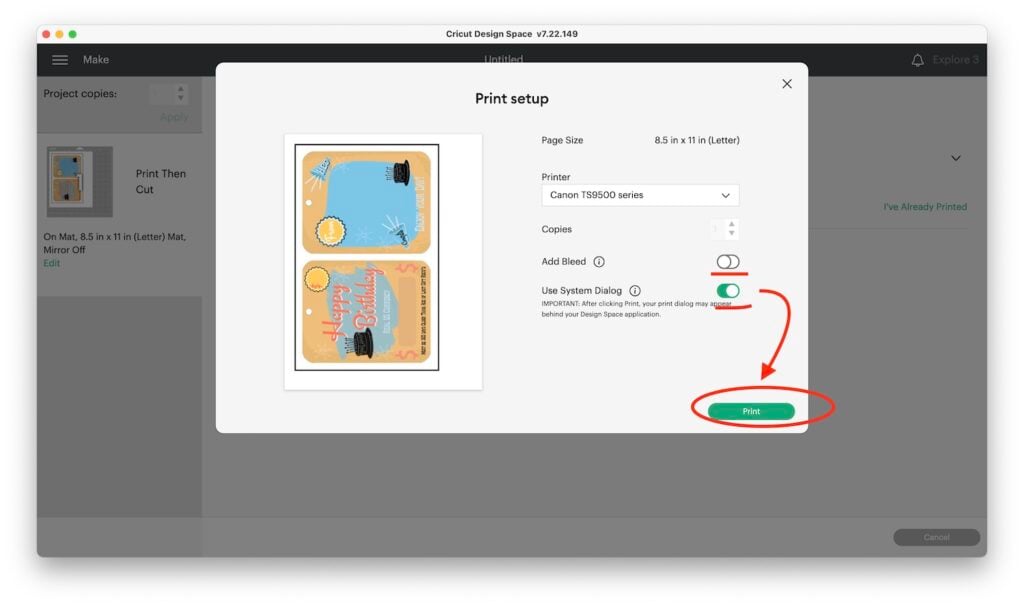
Note: I like to use System Dialog because I can choose the Rear Tray and cardstock on my Canon printer. The rear-tray feeds the heavier paper through without bending it or jamming it. I”ll have a workaround tip for regular printers below.
Step Six: Prep Your Mat
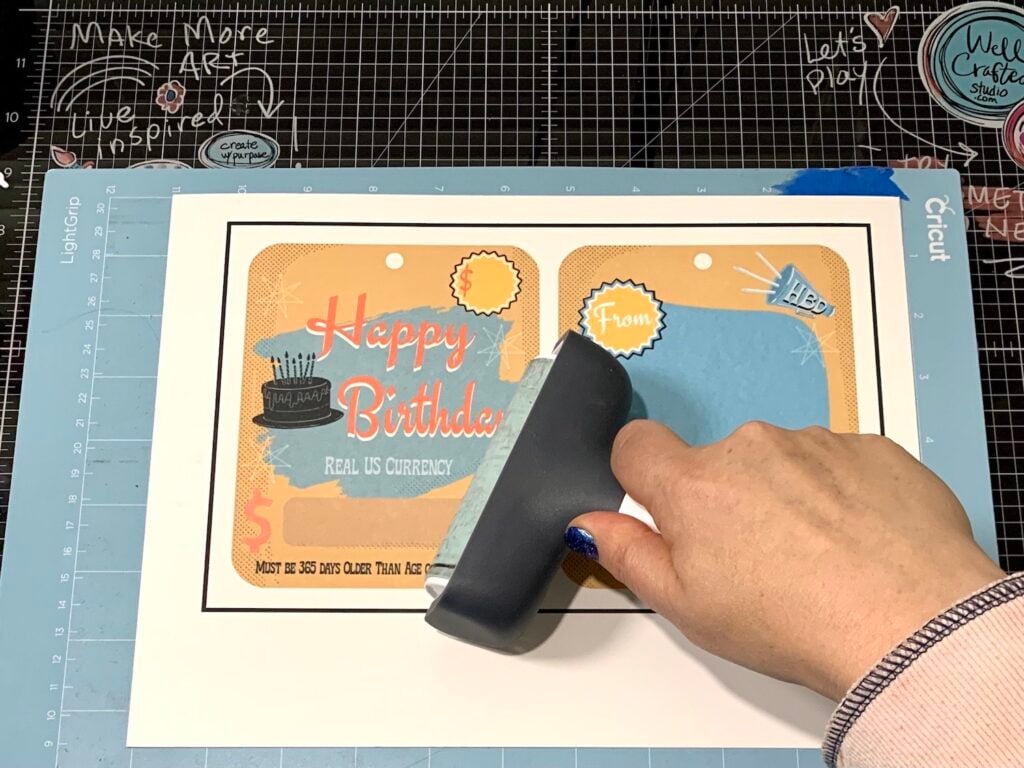
Place your printed cardstock on your mat as shown on the Mat Preview Page.
Use a Brayer to press the paper to the sticky surface.
Step Seven: Choose Your Material Setting and Cut the Cards
Click the appropriate material setting option for your material. I’m using the Heavy Cardstock option.
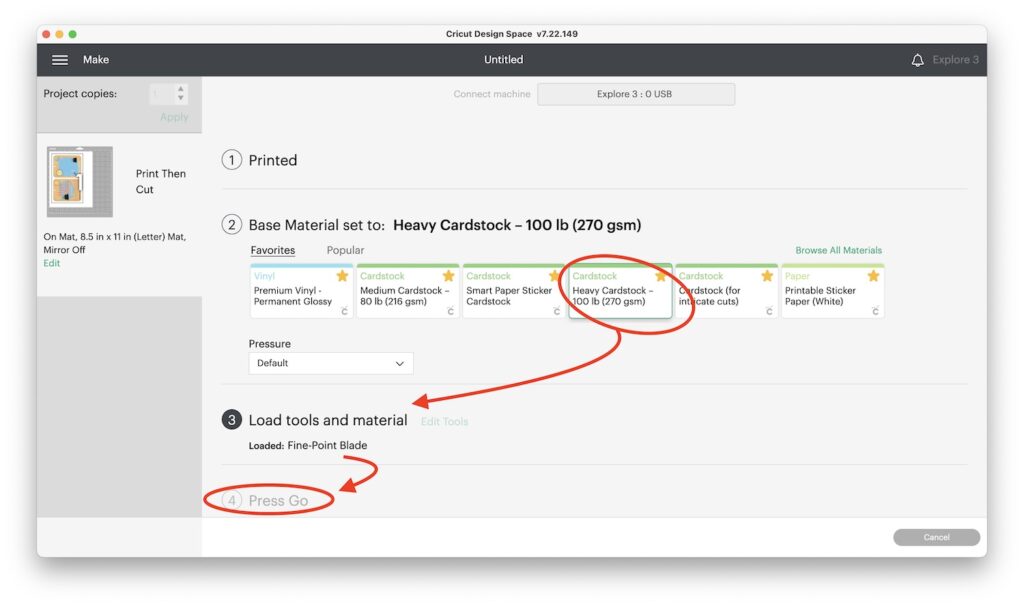
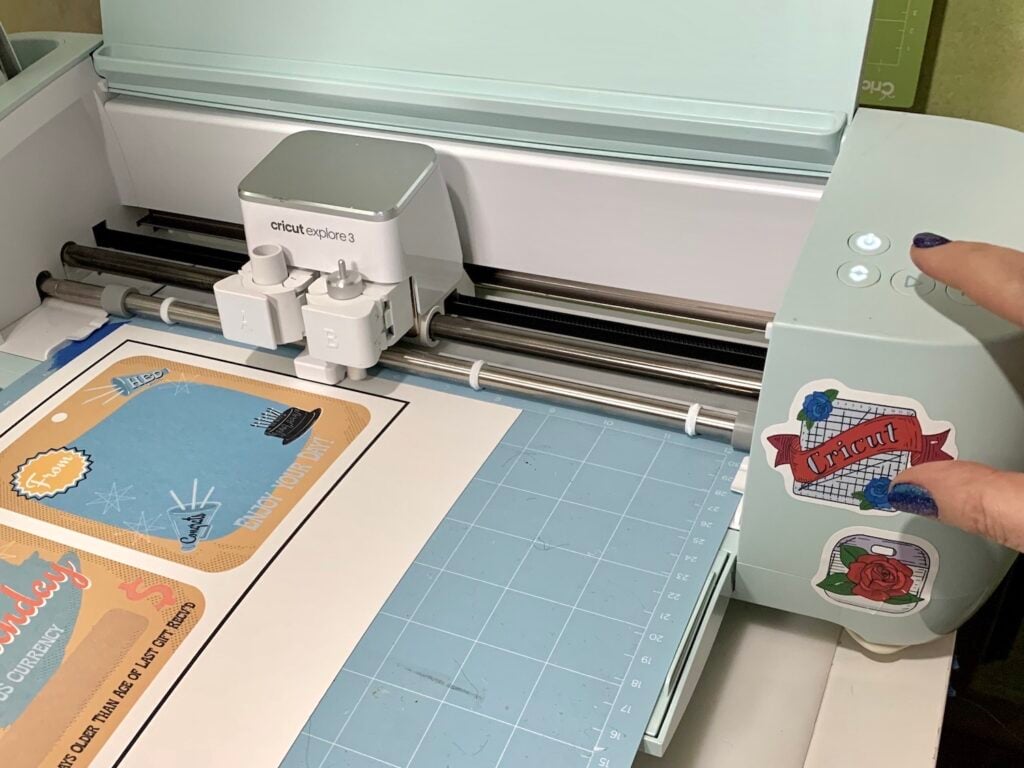
Then, follow the onscreen directions, load your mat into your machine and press the blinking Go button!
Step Eight: Unload from the Mat (Without Bending)
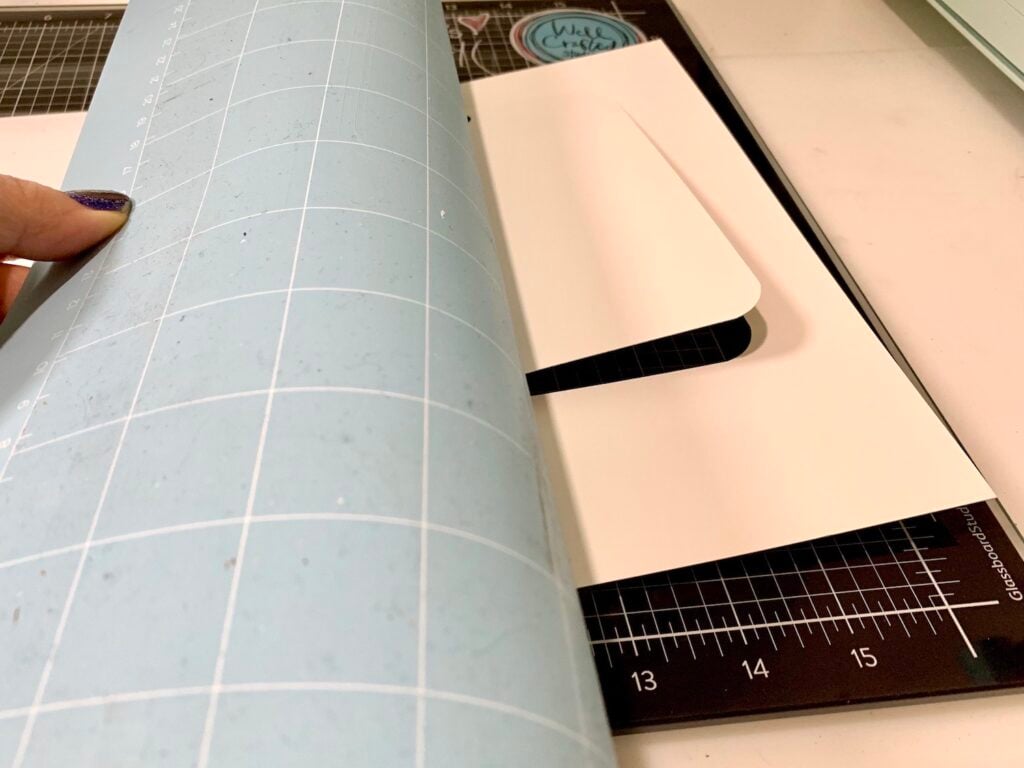
Check the cut to make sure it’s cut through. If it looks good, press the Unload button on your machine. Then flip the mat over and gently peel the mat back and away from your cardstock so the cardstock doesn’t bend.
Step Nine: Tape or Glue Together
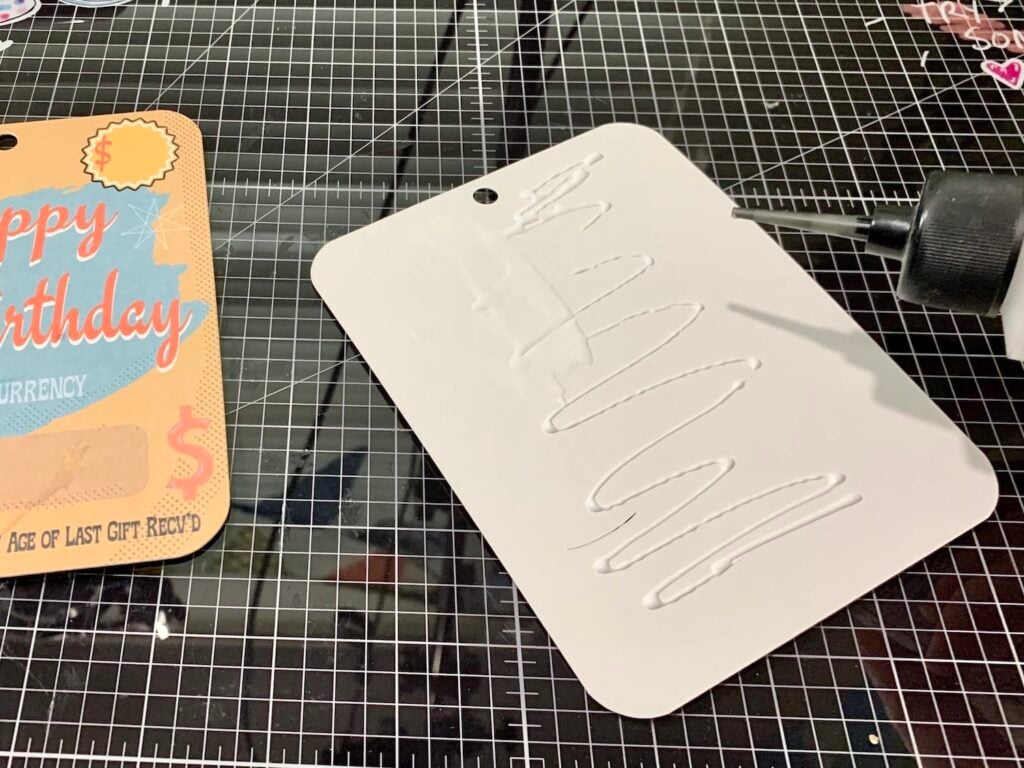
Using double-sided tape or glue, adhere the cards together. Apply adhesive, then stack the cards back-to-back and press them together to attach.
Personally, I like the double-sided tape bc the paper doesn’t get wet and there’s no wet glue on my surface that can mess up the ink on the card. (Not that it happened or anything while I was doing the samples….😂)
Step Ten: Add Money and Plastic Cover
Remove the double-stick tape from the plastic packaging tubes (if you bought the ones off Etsy).
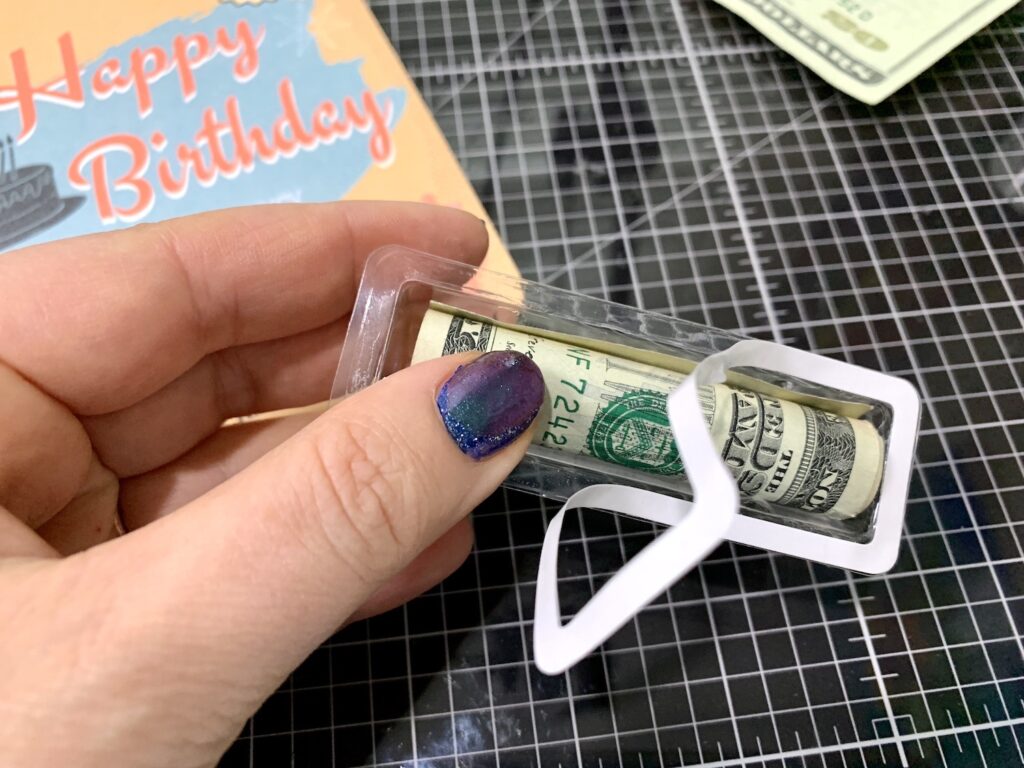
Alternatively, if you’re using ones you tore off of some chapstick you bought at the store you may have to wash them to remove any packaging residue. With some of the newer foil packaging, I actually had to scrape off the previous packaging before I could reuse it.
Finally, roll up the money from the narrow end, and place it in the packaging. Then adhere it to the card with the double-sided tape.
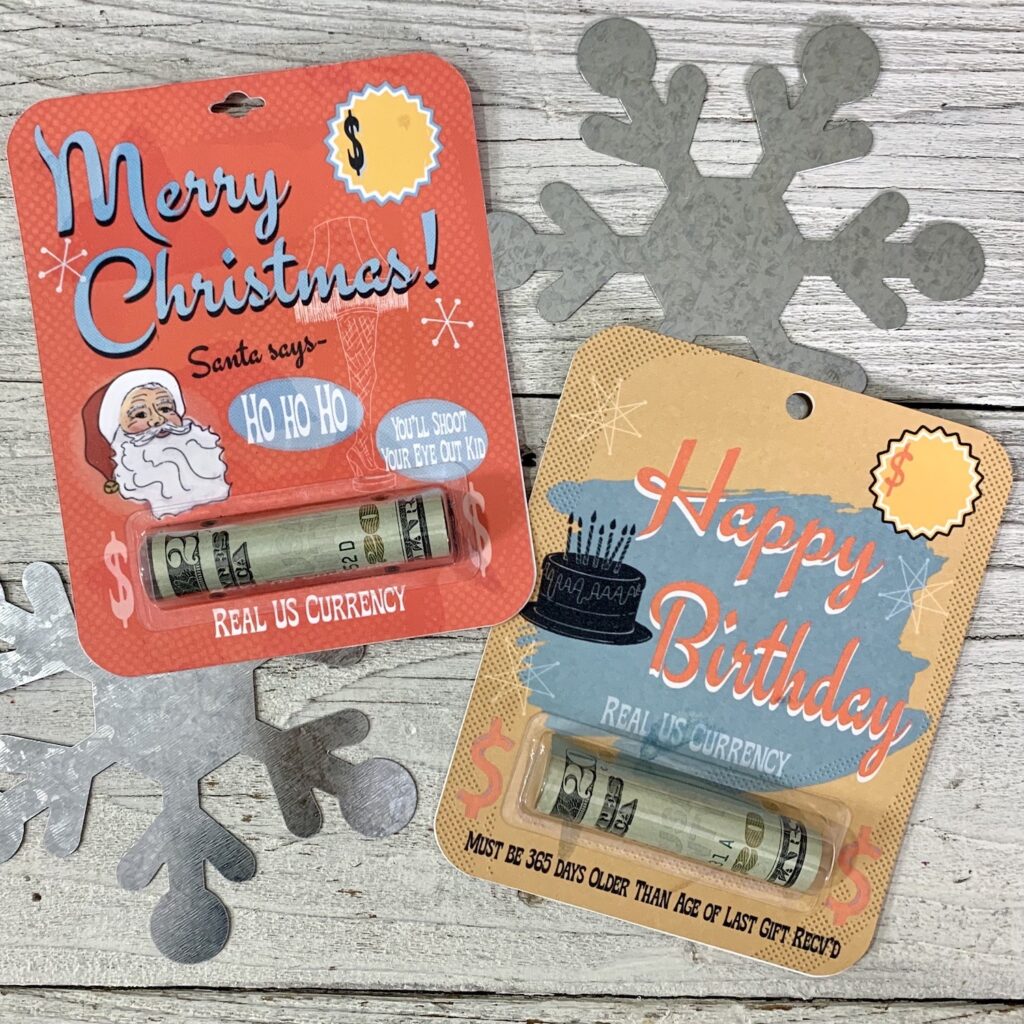
And that’s it! You’re ready to gift away! And when you make these money roll gift cards with Cricut you’ll want to give them to all the kids, your co-workers, your family, etc. etc. 😂
Workaround If You Can’t Print Cardstock
Not all printers can handle cardstock without jamming. So a way around this is to print on regular typing paper, with a piece of cardstock between it. To do this, duplicate one of your designs on the canvas in Design Space and change the operation to Basic Cut!
For More Inspiration
Love this project? But have a different occasion in mind? It’s easy to make your own designs in Procreate!
And to help you get you started I have a free rounded edge shape template that you can upload and use in Procreate. You’ll find it in the Free Library in the Procreate Brushsets section.
You can also see step-by-step how I design these in the FB Live replay of this Procreate PlayDate. In the replay, you’ll also see me cutting the cards with my Cricut. It’s the complete project from design to creation. Super fun!
>>>See the FB Live here!<<<
And if Procreate seems cool, but you have no idea where to start, I have a fabulous beginner post on Procreate that is a great introduction to the app!
Check Out MORE Merry Maker-mas Projects + Giveaway
This project is brought to you by Day Three of Merry Maker-mas 2022 and I’m so glad you checked it out. You can see each day’s project “unwrapped” on the Merry Maker-mas Page. I also tell you about the different prizes that make this a fun giveaway event too!
Love this Tutorial on How to Make Money Roll Gift Cards? Share it!
If you found this post helpful I’d LOVE to have you share it on social media, or just with your friends. You can use any of the links below. Thank you!
Thanks for Reading,


I really love this ideal. I am working on it this weekend. Ty so much
This is such a cute idea!
This is perfect for holiday gifts:)
Yes! The kids love it too.
I’m making these for all my nieces and nephews!