
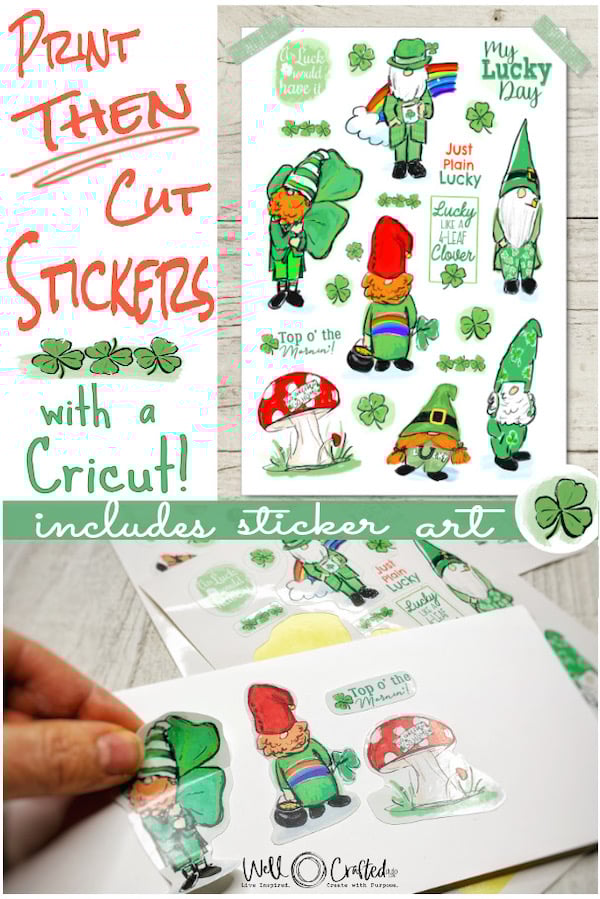
Legend says Leprechauns are little fairies who earned their pot of gold by working as cobblers. They look a lot like gnomes to me though. So I did a little digging this week to find a connection, and I’ve concluded there are similarities between gnomes and leprechauns that can’t be ignored. For instance, both are small, mischievous creatures who are rarely seen and are portrayed as little guardian figures. Gnomes are thought to be protecting woodland animals, gardens, and the land. Leprechauns guard their pot of gold and their freedom. They’re also both super cute and I have a lot of fun drawing them. Which is lucky for you because you can make these DIY Leprechaun stickers at home with just a printer and a Cricut (or a pair of scissors).
How to Print and Cut Stickers
If you’d like a tutorial on how to print then cut stickers with a Cricut, I’ve linked to How to Make Stickers with a Cricut below. This video shows how to upload .png files like my FREE Leprechaun Sticker files into Cricut Design Space and then cut them with a Cricut. Or you can skip the video and go straight to the photo tutorial below!

Download the Free Leprechaun Stickers
The DIY leprechaun sticker files are linked in the supplies list below, along with my favorite sticker papers. You can find them in my Free Creative Resource Library.
Need the password? Just sign up for my email list, and you’ll get the password emailed directly to you!
No Cricut? No Problem!
You can just print these designs on sticker paper using your home printer and use a scissor to cut them out by hand. It gets the job done.

How to Make DIY Leprechaun Stickers with a Cricut
This post contains affiliate links. Thank you for supporting my small business.
Supplies and Materials
- Lucky Day DIY Leprechaun Stickers*– .PNG file from my Free Creative Resource Library
- Sticker Paper: I use this matte sticker paper and this glossy sticker paper for inkjet printers. Have questions about the sticker paper? I have a blog post ALL about Sticker Paper that will help you know the differences between options.
- A home printer (I use the Canon Pixma Crafter’s Printer)
- Computer, smartphone, or tablet
- Small Paper Trimmer (or scissors if you’re going to fussy cut your stickers)
- Cricut Design Space – I’m demonstrating using the desktop version, but the app is extremely similar
- Cutting machine like a Cricut Maker or the Cricut Explore Air
- Light Grip Cutting Mat
Directions
Step One- Download the Leprechaun Stickers File and Upload into Cricut Design Space
I won’t get into this too much. You can see how to do it in the video above or in the post, How to Print then Cut Stickers with a Cricut.
Step Two- Upload the DIY Leprechaun Stickers into Cricut Design Space
When you upload the Leprechaun.PNG file into Design Space, you’ll be prompted to process it as an Image Upload. Choose Complex.
IF you’re using the mobile app it may just skip this part and go right to the clean up of your image. The general goal here is to make sure you have a clean transparent background for your images.
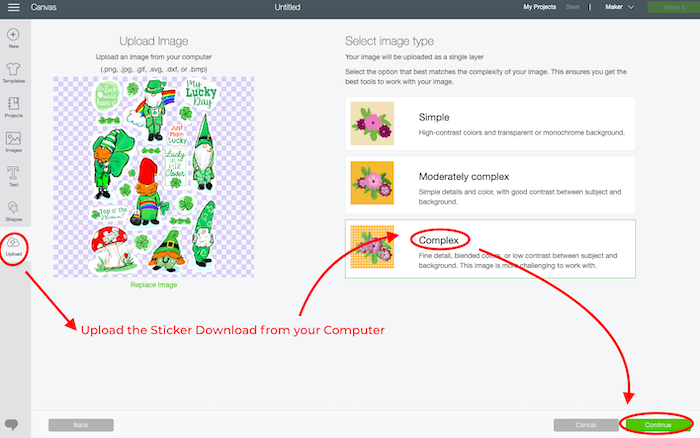
Next, you’ll be given the option of cleaning up your design/creating a transparent background. The Leprechaun image is a .png that has a transparent background already (that’s what the checkered background symbolizes). So you can just hit Continue and be done.

Next, click on the Save as a Print then Cut image. The square around the box will highlight green then choose hit Save in the lower right corner.

This takes you back to your Uploaded Images page, where you can select the file and then click on the Insert Image button to open it in your canvas.

Step Three- Size the Image Two Ways
Now have some choices to make. Either make one full-sized sticker sheet or you can make two smaller sheets on the same page. However, Cricut will not let you use an image bigger than 6.75″ w. x 9.25″ h. as a Print then Cut image so you will always have that limitation.
-To Make One Full-Size Sticker Sheet (6.75″ x 11″)
First, select the design, then in the top toolbar change the height of the design to 9.25″. Because the constraints are locked, changing the height will automatically change the width in proper proportion. And that’s all you need to do for this sheet. SO go ahead and choose Make it in the upper right of the screen.
-To Make Two Smaller Sticker Sheets on a Single Piece of Paper
To start, make the image smaller so you can more easily work with it. Then, with the image selected, duplicate it once.
Select both and rotate the sheets 90 degrees in the top toolbar. and then, with both selected, choose the Align function in the top toolbar. From the drop-down menu, choose Align left. This will move your sheets up against the ruler on the left-hand side of your screen. Then in the top toolbar change the width to 6.16″ and then move the bottom sheet down just a bit until its’ bottom edge is even with the 9″ line on the left side ruler. Select both and Attach. Then click Make it in the upper right corner of your screen.
*Optional- you can Save and name your project before you click “make it.”

Step Four: Print your Image
On the next screen, you’ll see the Mat Preview. As long as it says Print then Cut on the side you’re good! Hit Continue in the lower right corner.
Now you’re on the screen where you’ll be prompted to print your image. When you say you want to, Cricut will bring up a box with your printer selected. Toggle off the Add bleed suggestion. And toggle on System Dialog if you’d like to choose which tray on your printer, or if you’d like to tell your printer what type of paper you’re using.
I use the System Dialog option every time because my Canon printer has a rear-feed option that keeps heavier papers from getting stuck in my machine. LOVE IT!!!
Make SURE you have your sticker paper in your printer (most printers have you load it upside down into the paper cassettes) and then click Print. This will send it to your printer.
Note: The glossy sticker papers don’t always dry immediately. I’ve had them smear on me when I handled them too soon. So as a glossy sheet finishes printing I will carefully set it aside and then let it dry just a bit before I gather the sheets up and stack them.
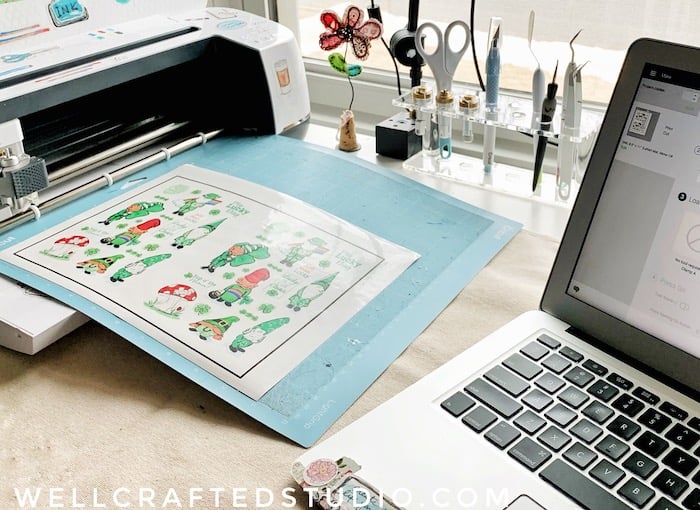
Step Five: Cut Your Stickers
Once you’ve printed, you’ll want to click Continue and progress to the next image. This will show you how to position your printed sticker sheet on a mat. I like to use light blue (less sticky) mats.
Once it’s positioned correctly you can go back to your screen and ‘select your materials.” I usually like to do a kiss-cut with my stickers so that the stickers are cut but still on the backing paper. This is opposed to die-cut where each sticker is completely cut out from the sheet of paper. To get a nice and clean kiss-cut I use the “Vinyl” setting and change the default pressure to “Less”. I’ve found this works really well with the sticker papers I use (see supplies links above).
Place your printed sticker paper on the mat so that it aligns with your image on the screen. Then, upload your mat and when prompted, press the blinking “Go.” Your Cricut will find the printed black registration box around your images, and then it will cut your sticker images. Once it’s done, unload the mat, flip it over, and then pull the mat away from the sticker paper.
Step Six: Trim the Sticker Sheets
I use my small guillotine paper trimmer to cut off the black lines. But any paper trimmer will work. Once you’ve done that and if you made the single larger images then you’re done!
If you’ve made the two smaller size sheets you’ll want to cut the sheet again in half. That is usually at 4.75″. This creates two sheets that will fit neatly into a standard-sized card envelope. Perfect for gifting. Pretty sweet, right?

And Done- Enjoy your DIY Leprechaun Stickers with Procreate!
If you love these Lucky Day Leprechaun Stickers and you’re intrigued enough to want to know more of the myths behind the Little People, I found a great article on Mental Floss, Things You Probably Didn’t Know About Leprechauns. And you can let me know in the comments if you think they’re a type of gnome or not.
A Quick Tip on Matte vs. Glossy Sticker Papers
I’ve made stickers with both matte and glossy. And even though I know the coating on the glossy is the only difference, to me, the glossy stickers always seem richer and more detailed. I’ve had friends say they like the matte better though- especially for their planners. In my post, How to Make Valentine’s Gnome Stickers I share a comparison of a few different types of sticker paper and which is my favorite. You can find a little more about this on the Resources Page.
Draw Your OWN Leprechaun Stickers with Procreate
Interested in drawing your own stickers? I hand draw mine in Procreate, an iPad drawing app, and then save them as a digital file to cut with my Cricut. The two together are kind of amazing. I have a step-by-step tutorial and YouTube video that demos how to use Procreate to make stickers in my post, How to Draw Stickers in Procreate to Cut with Your Cricut.
I also have MORE about Procreate in my Beginner’s QuickStart Guide to Procreate

For MORE Sticker Inspirations
Want more stickers? I have several printable designs available in my Shop. Love Gnomes? I can feed your Gnome obsession with Gnome stickers of all kinds. Check out my shop if you’re curious!
Love this? Share it!
If you found this tutorial for DIY Leprechaun Stickers helpful, please share it either on social media or by pinning the image below to Pinterest. I really appreciate your help with this!
Also, if you have any questions about this tutorial, please let me know. You can reach me by leaving a comment here, on my Instagram, or on any of the videos on my YouTube channel!
🐿Squirrel? Bookmark or Pin this post, How to Make Spring Gnome Stickers with Cricut and you’ll know RIGHT where to find it!


I have been waiting for these promised little guys! Thank you!!! My planner is happy!
I’ll just start sending them to you as I make them. You can test them for me. ❤️
Oh I hope you amke them for Spring and Summer. I love them. They are adorable.
Stay healthy!
Thank you! I have some fun ideas for spring- it helps to know that people like them. So thank you for letting me know. ❤️
You are such a sweetheart, Jenn. Thank you for your inspiration in words and creativity. God bless you.
Thank you!!! This totally made my day. ❤️