Do you have the new Cricut Mug Press? If you do, then you’ve probably already tried making coffee mugs, maybe even tumblers. But have you tried making anything else with your Cricut Mug Press? Water bottles are super popular, but the blanks are too small to fit well in the press. So in this tutorial, we’re going to figure out how to use smaller sublimation blanks in the Cricut Mug Press and make water bottles!
If you don’t have this newest addition to Cricut’s lineup of machines, (and you’re trying to figure out if it’s worth purchasing) just know that you can make more than just white ceramic mugs.
Looking for gifts to make for the too-young-for-coffee crowd? These water bottles are great custom gifts for all ages, because they go with to school, sports, travel, and work.
- Water bottles Make Great Gifts for Any Age
- Sublimation vs. Infusible Ink
- The Problem with ANY Mug Heat Press- Not Just Cricut's
- Two Solutions to this Problem
- Where to Find Water Bottle Sublimation Blanks
- How to Find Sublimation/ Infusible Ink Designs to make water Bottles with Cricut Mug Press
- Tutorial: How to Make Water Bottles with Cricut Mug Press and a DIY Silicone Wrap
- Watch the YouTube Tutorial to SEE How to Make Water Bottles with the Cricut Mug Press!
- For More Sublimation Projects
- The Basics of Sublimation
- Love This Post on Making Water Bottles with Cricut Mug Press? Share it!
Action Steps:
- Get the instructions to find out the hack- Watch the YouTube tutorial (bottom of post), or read the step-by-step photo tutorial below, OR you can use the printable how-to card at the very bottom of this post.
- Download and print the free sublimation design from my Well Crafted Studio Library. Or you can use infusible ink transfer sheets or infusible ink pens.
- Get the supplies, you may find you already have most of them!
- Make the project!
Water bottles Make Great Gifts for Any Age
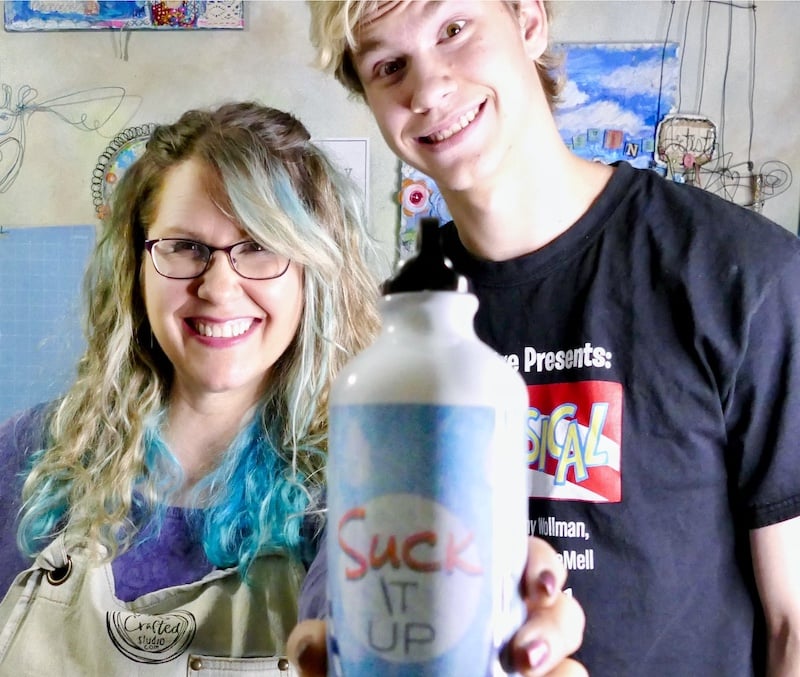
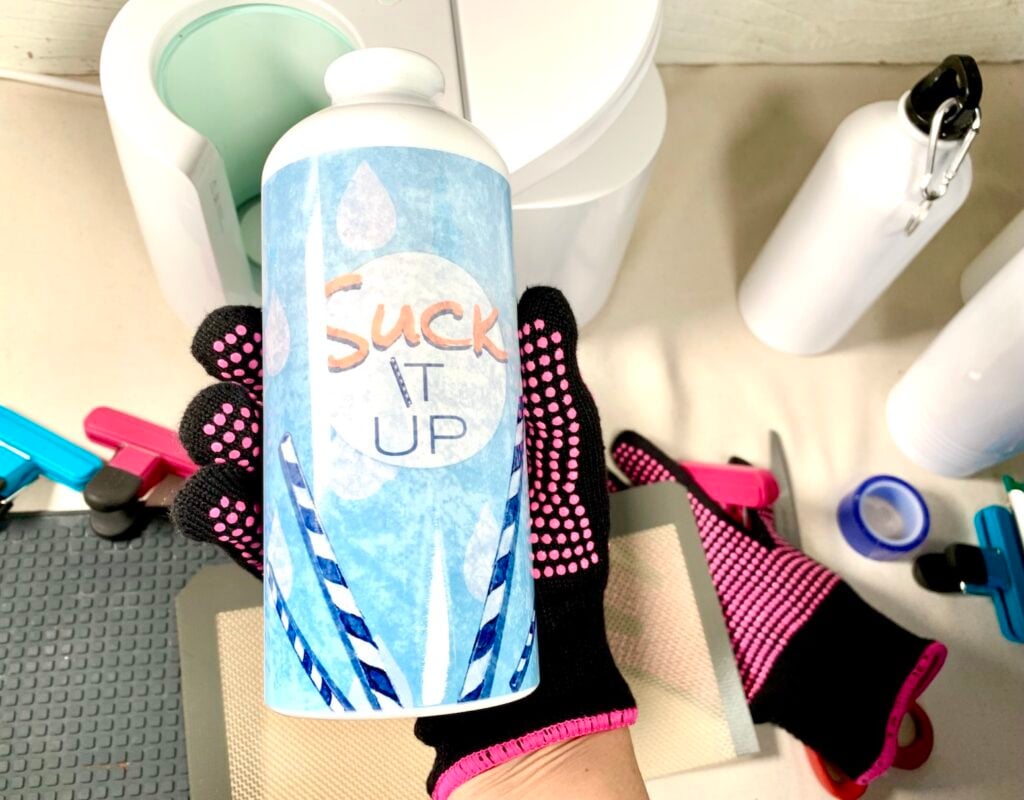
My son is a high school student and would rather drink coffee than water, but he’s all over these new water bottles. First, because he helped design them. Second, because I totally screwed up the design the first time and he thinks it’s hilarious.

See the problem? 🤦🏼♀️
The “Suck” is so big you can’t read it without turning the bottle. So I made it smaller.
But now it’s super easy to inadvertently cover up the “up” when you hold it. So yeah. Water bottles with the attitude of a teenager. He can’t wait to take these to school to “show” his friends.
Water bottles are something kids (and adults) bring with them EVERYWHERE now, so they would make the perfect gift. My niece and nephews are going to love getting their water bottles customized with their own art.
Sublimation vs. Infusible Ink
First, Infusible Ink is Cricut’s proprietary term for their sublimation product line. The process of using infusible ink is actually a sublimation process.
Although Cricut only demos the mug press with their line of Infusible Ink products, you can actually sublimate any image onto a mug with the Cricut Mug Press. However, you will need a sublimation printer with sublimation ink to print your own custom mug designs.
Six months ago I had NO idea how sublimation worked or why it’s so cool. All I knew that is when my friend sent me a mug she’d sublimated I felt the surface and nothing was raised up. The entire design was IN the surface of the mug.

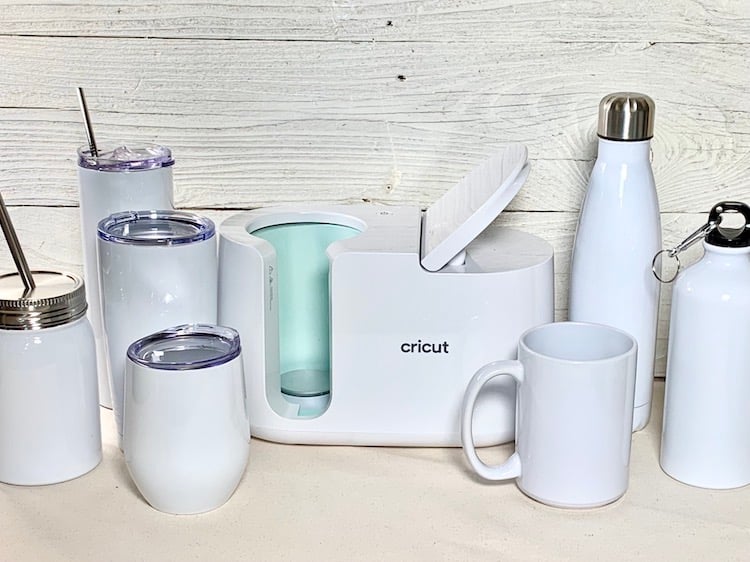
Cricut does have a line of 12 oz and 15 oz compatible mugs, but you are not limited to using JUST these white mugs. The mug press works with any sublimation mugs or tumblers that have a straight wall as well as WATER BOTTLES!
The Problem with ANY Mug Heat Press- Not Just Cricut’s
Most mug presses will heat and press at the same time. They are created for a certain size of object, and to do a different size you need to get a different press. This is true for both the Cricut Mug Heat Press as well as other brands. Except, Cricut only has the one mug press that only fits 12 oz and 15 oz mugs.
Two Solutions to this Problem
There is a second way of transferring a sublimation design- use a convection oven for the heat. Then, to apply the pressure needed, you can use either a shrink-wrap sleeve or a silicone mug wrap.
Option #1) Silicone Mug Wraps- Pre Made or Homemade
The pre-made silicone mug wraps only come in certain sizes but can be used many times. They are also super easy and quick to use. However, you may have to adjust them as you press AND they leave a gap where the handle of the mug usualy would go.
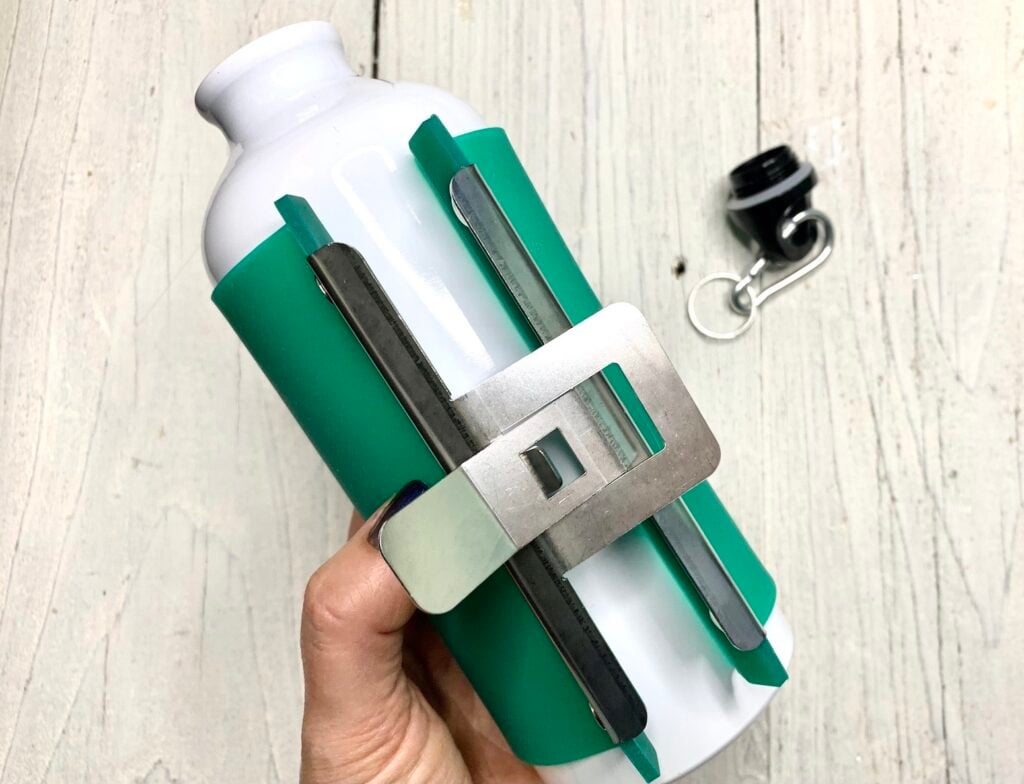
You can either purchase these OR YOU CAN DIY YOUR OWN WATER BOTTLE WRAPS with silicone baking mats and silicone clips.
You can also make different heights or profiles. This costs about the same as purchasing the wraps, but you will have to put a little time into making them.
Option #2) Shrink-Wrap Sleeves + a Heat Gun
The shrink wrap takes more time to apply and is single-use. But you can purchase many different size shrink-wrap sleeves for many different profiles.
This means you can do curvy mugs, tall tumblers, as well as any size of sublimation blank. You just need the shrink-wrap sleeve that will fit.

Note: You do need a heat gun to shrink the plastic. You can’t do that in the oven.
Where to Find Water Bottle Sublimation Blanks
First, search online for “sublimation blanks” this will give you products that have been treated with a coating that will absorb the sublimation inks once they become gases.
I get the majority of my blanks from Amazon, including the water bottles used in the tutorial below.
These aluminm water bottles feel like high-quality products and I like the way they feel when I drink out of them. There’s a nice lip to them so I don’t drool like with some water bottles. (If this is just a “me” problem you can disregard that part of the recommendation.)
They also have a secure, but easy-to-use top that has a carabiner (so it can attach to a backpack or belt loop and not get left behind). I will definitely buy them again!
How to Find Sublimation/ Infusible Ink Designs to make water Bottles with Cricut Mug Press
Cricut Access* has lots of different mug press designs available and more are added every day. You can find these under “images” in the left side toolbar on your canvas. Then search for “mug press”. They are all either for the Infusible Ink Transfer sheets or the Infusible Ink Pens.
And FYI- I just added a section for Sublimation Designs in my Free Library.

You can also find sublimation designs at online graphic design marketplaces like Design Bundles, and the Hungry Jpeg.
*Cricut Access is a monthly subscription of $9.99, you can try it as a free trial. Be sure to take advantage of the discount subscribers get in the Cricut shop.
Tutorial: How to Make Water Bottles with Cricut Mug Press and a DIY Silicone Wrap
Tools and Materials
- Cricut Mug Press
- Silicone Mug Wrap or Silicone Mat + Clips
- Sublimation Water Bottle Blank
- Suck It Up Printed Sublimation Design, Your Own Sublimation Design or Infusible Ink Transfer Sheet- I’m using a free design I created with my Boho Rainbow Procreate Bundle*. You can find the custom design in my Free Library.
- Laser Paper or Unwaxed Butcher Paper
- Heat-Resistant Tape
Optional:
- Heat-Resistant Gloves
- Soft Measuring Tape and Pencil to measure circumferance of the bottle to size your own design or to measure out mat.
- Paper Cutter or Scissors to trim sublimation design
These are affiliate links, which means that if you purchase through these links that I get a small commission for recommending them. This does not change your prices at all. Thank you!
*For more on the Boho Rainbow Procreate Bundle and how you can make your own mug designs click here.
Directions
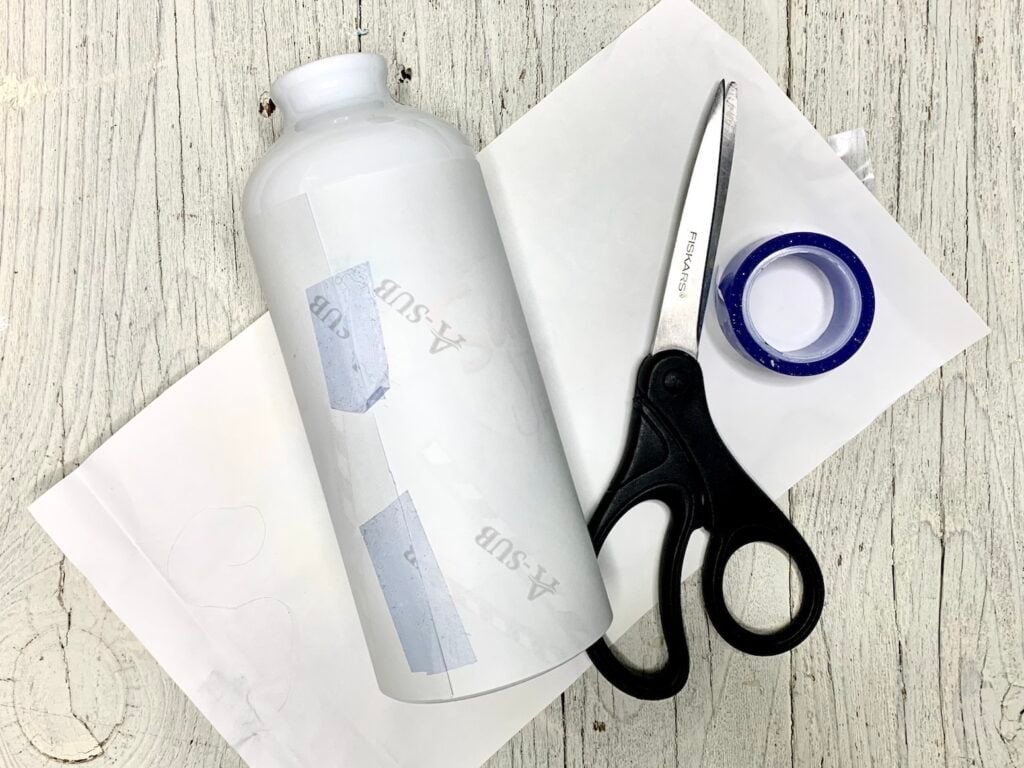
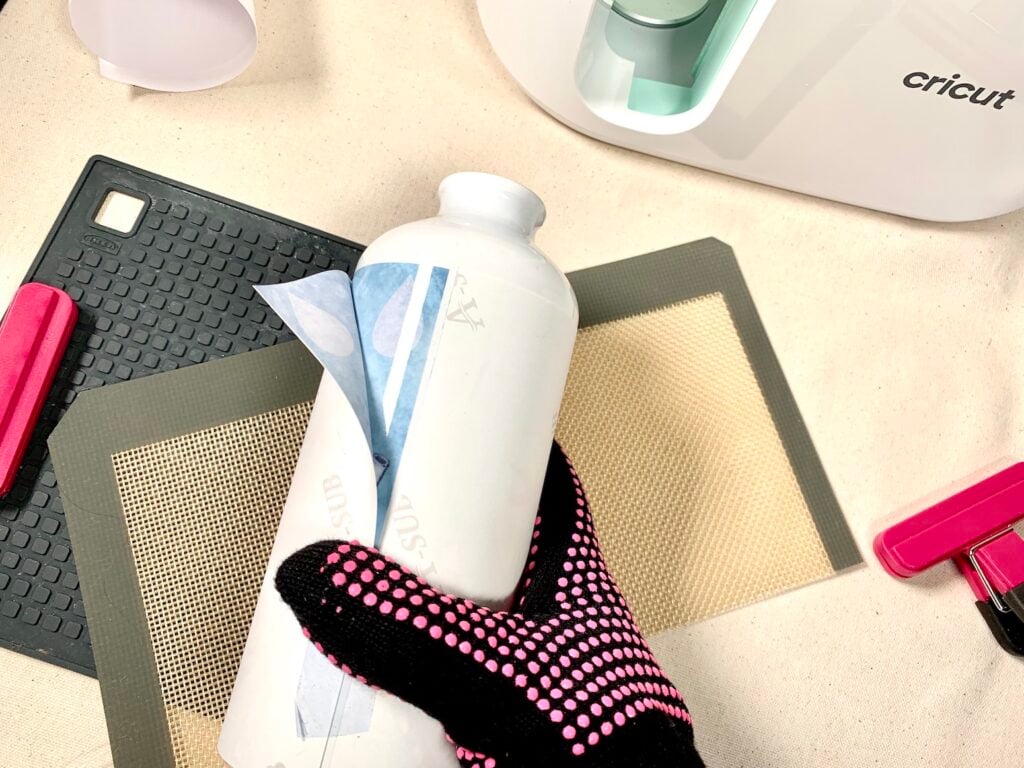
Step One: Prep the Sublimation Transfer Design
If you’re using Infusible Ink transfer sheets you can find directions on how to cut them in this article. If you’re using any of my FREE sublimation designs, you’ll want to download it from the Free Library and print it with a sublimation printer*. If you’re using your own transfer design then you’ll want to print that as well.
MAKE SURE YOU MIRROR THE DESIGN! This means flipping it in the Layout in the printer settings, or toggling on the Mirror in Cricut Design Space before you cut the infusible ink sheet.
Trim the Design so that it will fit the blank. Ideally, make it the same width and length as your water bottle. You may need a soft measuring tape to get the exact size.
*I use my Epson Eco-Tank with Cosmo Inks on A-Sub Paper. You can find out more about these in my post, Sublimation Made Simple for Cricut Crafters.

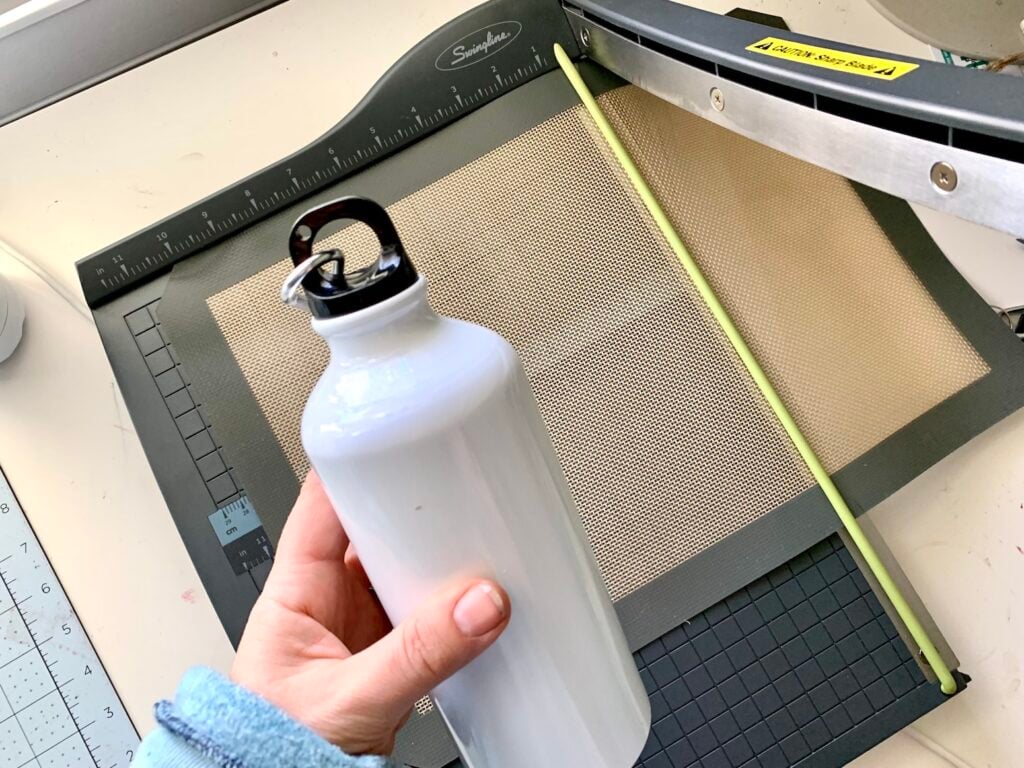
Step Two: Cut the Silicone Mat to Fit Your Water Bottle
Use the soft measuring tape to know how big to make your water bottle wrap. Then, use a paper cutter to trim your silicone backing mat to fit your water bottle. Make sure it’s long enough for you to be able to clip the ends together.
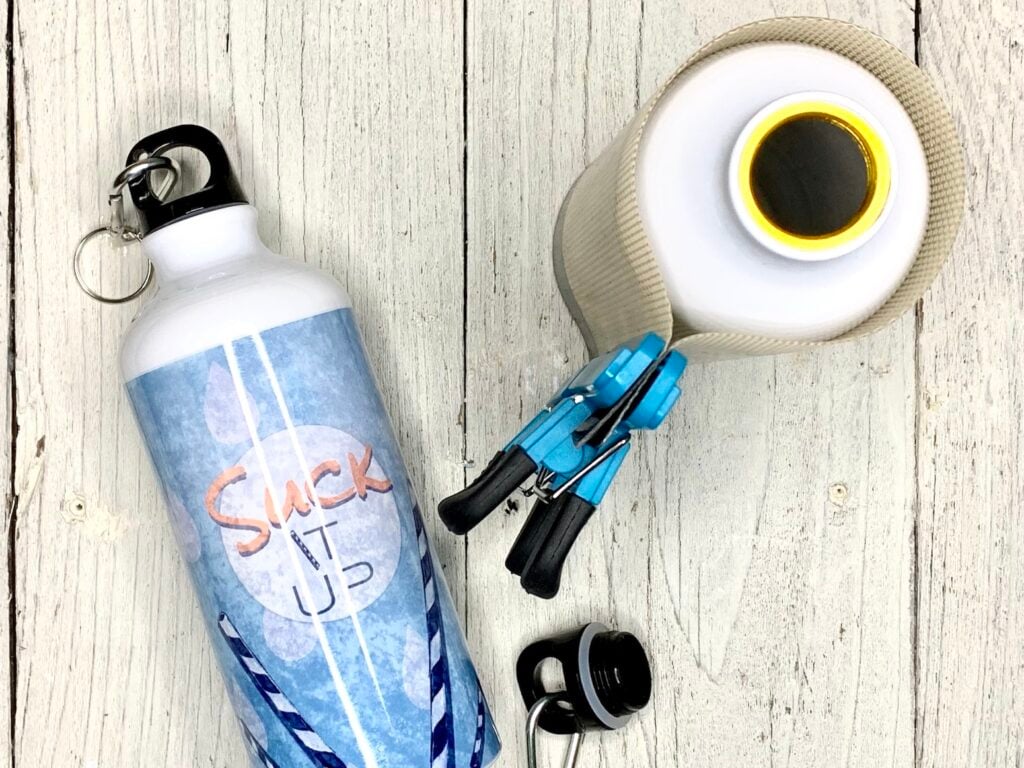
Step Three: Wrap the Water Bottle with the Sublimation Design and Tape It
Position the design so it’s exactly where you want it to transfer.
Wrap it around the water bottle and then use heat-resistant tape to secure it tightly.
Next, use a layer of butcher paper (unwaxed) or laser paper to wrap around the design and tape that as well.
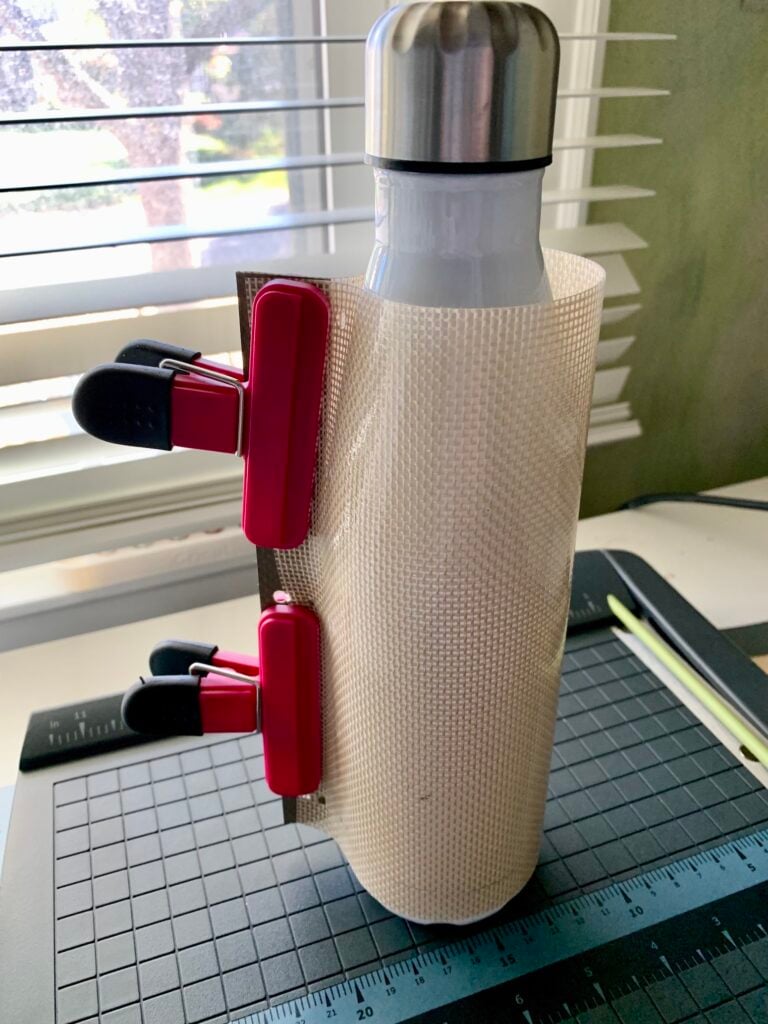
Step Four: Secure the Silicone Mug Wrap Around the Water Bottle
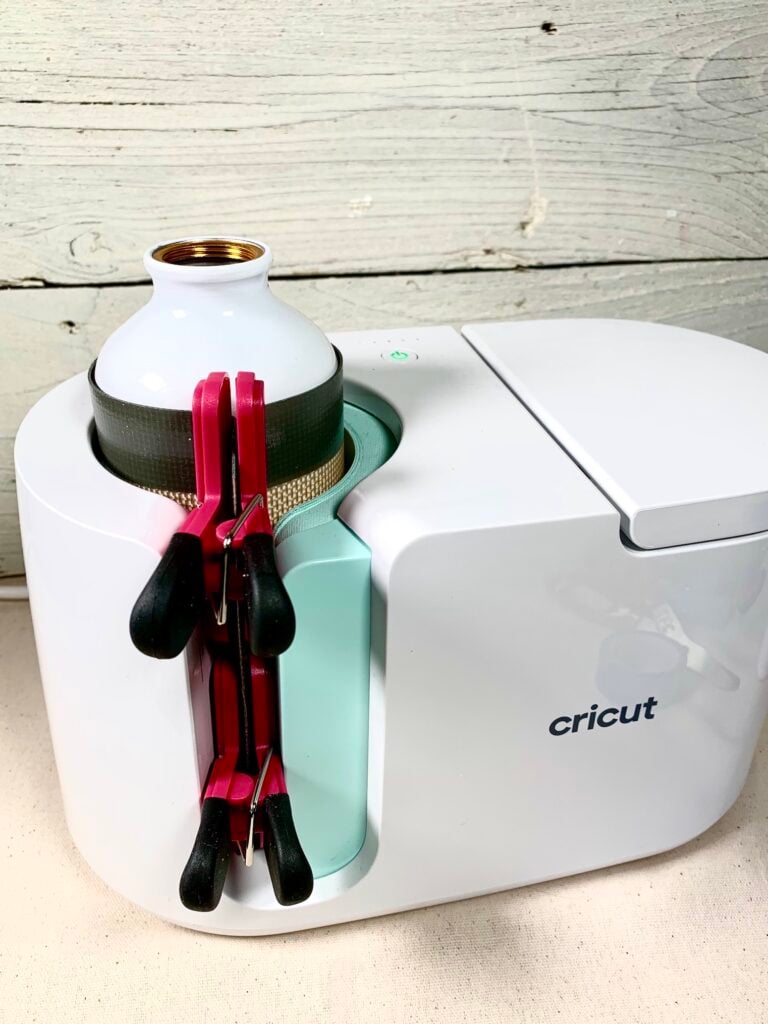
Clasp the silicone mug wrap around the water bottle. Position it so the clasp is over the seam.
Step Five: Pre-Heat the Cricut Mug Press
Turn on the machine by pressing the power button on the top of the Mug Press. The heat plates in the machine need several minutes to warm up. The light will turn green when it’s ready to press.
Note: If this is the first time you use the mug press there is an online setup (using the USB cable that was in the box) that you’ll need to go through before you can use the machine. This is also how you’ll get any firmware update to the machine.
Tip: You can set the manual temperature of the press. See more on that in this article.
Step Six: Insert the Water Bottle into the Mug Press
Make sure that the plastic top of the water bottle is removed. Lift the lever on the press to open it up.
IMPORTANT: PLEASE be sure you’re working in a well-ventilated area (like near an open window or door) as there are fumes from the gas as the machine is working.
Place the water bottle in the machine as pictured (so that the clamp goes in the place where the mug handle usually would).
Before you can start the mug press you have to close the lever. This automatically creates a tight fit that means you don’t have to adjust any pressure settings. It really is so simple to use!

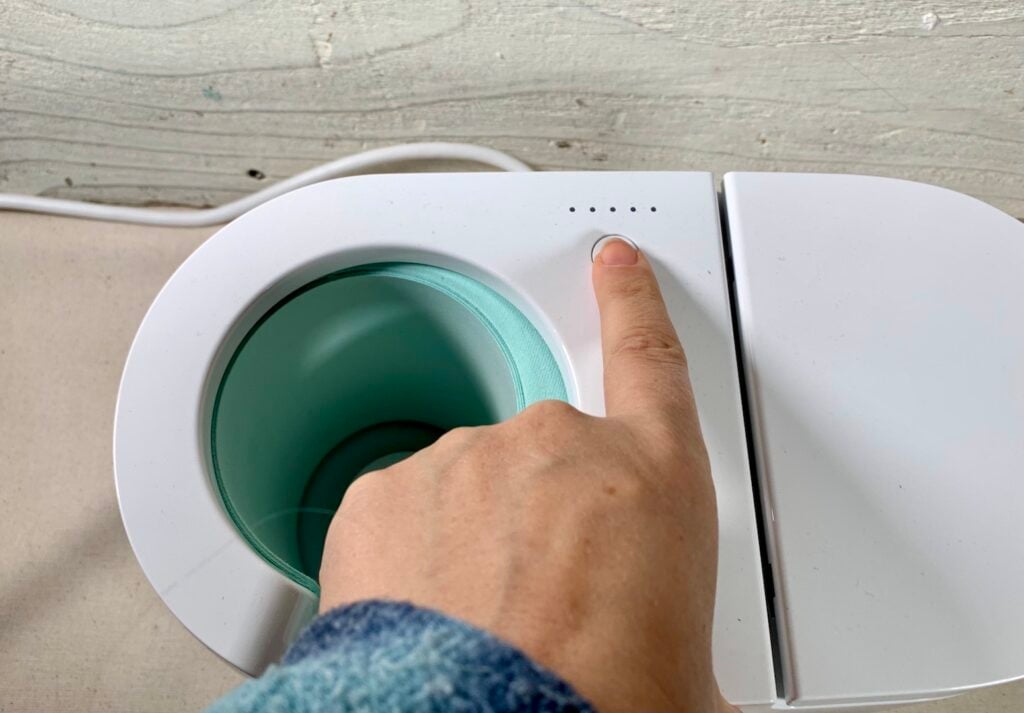
Step Seven: Start the Mug Press and Press!
Press the “Go” button. The Mug Press has a one-touch setting that will light up each consecutive dot as it presses. Until all the dots are lit.
It takes about 6 minutes to do a single press. Lift the lever and carefully remove the water bottle. I got a pair of heat-resistant gloves on Amazon and I am so glad I did!
Step Eight: Reposition the Wrap and Flip the Water Bottle Upside Down
If your design is large (tall) you’ll need to reposition the wrap and flip the water bottle upside down.

Step Nine: Check the Transfer and Repeat the Process as Necessary
For best results be very careful when you check the transfer. I just peel back a tiny little bit. The thing is that you want to make absolutely sure that you don’t shift the design.
Step Ten: Remove the Water Bottle, Unwrap it and Let it Cool
Lift the lever of the Cricut and carefully remove the water bottle and set it to the side on a heat-proof surface (like an easypress mat, silicone mat, or heat-resistant tabletop) to cool.
Watch the YouTube Tutorial to SEE How to Make Water Bottles with the Cricut Mug Press!

Printable Tutorial for How to Make Water Bottles with Cricut Mug Press
How to Make Water Bottles with the Cricut Mug Press

More than mugs! If you're ready to try some new projects with your Cricut Mug Press why not give water bottles a try? Although they are too small to fit the press, this tutorial shows you a hack that will let you successfully press smaller sublimation water bottles, tumblers, and more!
Materials
- Water Bottle Sublimation Blank
- Sublimation Design or Infusible Ink
- Heat Resisitant Tape
- Laser Paper or Unwaxed Butcher Paper
Tools
- Cricut Mug Press
- Silicone Mat and Silicone Clips
- Heat Resistant Gloves (optional)
- Silicone Pot Holder (optional)
Instructions
- Prep the Sublimation or Infusible Ink Design
- Wrap the Water Bottle with Your Design + Layer of Paper and Tape All
- Cut the Silicone Mat to Fit Your Water Bottle
- Secure the Silicone Mug Wrap Around the Water Bottle with Clips
- Pre-heat the Cricut Mug Press
- Use the Mug Press to Transfer the Design
- Flip the Water Bottle Upside Down and Press Again
- Carefully Check the Transfer and Repeat as Necessary
- Remove the Water Bottle from the Mug Press and Let Cool
Notes
Safety Notes- Be sure to operate the mug press in a well-ventilated room as there are toxic fumes that are generated during the sublimation process. I also recommend heat-resistant gloves when handling the hot water bottle.
For More Sublimation Projects
If you’d like the idea of making more than just ceramic mugs with your Cricut Mug Press, I’d love to have you check out my post on Sublimation Blanks for the Cricut Mug Press.
I went crazy and found some great options, (check out # !) that will give you waaaay too many ideas of what you can make with your new machine. Which ones have you tried? I’d love to know your opinion.
The Basics of Sublimation
Sublimation ink works with heat and pressure to transfer a design into the surface of a sublimation blank.
To sublimate, you press your sublimation ink against a sublimation blank and heat until the ink turns into a gas and goes into the surface it’s pressed against.
That means the treated object will absorb your ink into its poly coating so that the ink is actually embedded into its surface.
Yup! Unlike paint or vinyl, this makes it impossible to remove the design once the ink has transferred. This means you can make your designs dishwasher-safe and extremely durable.
If you’ve ever been frustrated with your vinyl decals peeling up after just a few washes then you know how attractive this is!
Love This Post on Making Water Bottles with Cricut Mug Press? Share it!
If you found this post on hacking Cricut’s Mug Press to make water bottles helpful I would LOVE to have you share it on Facebook, Pinterest, or Instagram. If you make something cool be sure to tag #wellcraftedstudio and brag a little. I can’t wait to see what you create!
Thanks for Reading!

Want to Remember this Post? Save How to Make Water Bottles with the Cricut Mug Press to Pinterest!


