One area of crafting that I LOVE using Procreate to design for is engraving metal. With Procreate, I can add patterns to my design in selective areas making the design itself visible and really stand out. Just imagine how much cooler your engraving would look if you could add shading (like to the sides of a coffee mug design to make it seem rounded). The finished look of your engraving is much more professional! But even better- what if you could fill in the engraving with ANY pattern, not just lines or crosshatching? THEN, you engrave that design on jewelry, key fobs, cake servers, or other metal items. When you know how to make an engraving design on Procreate for Cricut, all of this is easy to achieve!
Why Make Designs for Engraving? Don’t SVG’s Work?
One challenge for any of these methods is visibility, i.e., getting your designs to show up clearly. If we were using just a regular SVG file, then the images would engrave (or foil) as a double line. By adding pattern fill, we’re able to create light and dark areas that read to the eye as solid shapes and are much easier for us to understand visually.
Free Brushset for Engraving, Foiling, or Drawing
This tutorial demonstrates step-by-step on Procreate how to add selective pattern fill to make engraving designs*. BUT, this same method works if you’re creating transfer foil designs too.
I’m using Procreate brushes from an Engraving Brushset that you can get in my Free Resource Library in this post and video. So go grab that, get comfortable, open up a new canvas in Procreate, and LET’S PLAY!
*Do You Want to Know How to Start Engraving? Check out my post for beginners, How to Get Started Engraving Metals. I also have LOTS of tutorials and an entire playlist of YouTube videos for you to check out! I’ve engraved spatulas, spreaders, cake servers, bookmarks, ornaments, necklaces, charms, and earrings. There is seriously a TON that you can do with your engraving designs.
Watch the YouTube Tutorial!
How to Make an Engraving Design on Procreate for Your Cricut Engraving Projects!
Tools and Materials
From My FREE Resource Library:
- Engraving Brushset for Procreate
- 80’s Sticker Set Procreate Stamps
What I Use:
- Procreate App (under $10 in Apple App Store) Not available for Android but you can try something from this list or try Adobe Fresco.
- iPad Pro 12.9 (2019) or iPad 10.2 or newer*
- Apple Pencil, Second Generation (optional- you can just use your finger too.)
- PaperFeel Screen Protector- I love this! It reduces my hand strain because the added friction of the screen keeps my stylus from sliding across the glass screen. It also gives me a more natural stroke so that drawing on my iPad feels like drawing in my sketchbook. It’s so awesome!
*Find out which iPads are compatible with this list.
Directions
Step One: Download and then Import the Procreate Freebies for this Tutorial
Do you need to download my Engraving Brushset or the Sticker Stamp Set to follow this tutorial? Absolutely not! BUT I created these freebies to make it easier for you. To get them just sign up through one of my email subscriber forms and you’ll get the password to the Free Library as well as a lot of fun freebies that are emailed to you once per week.
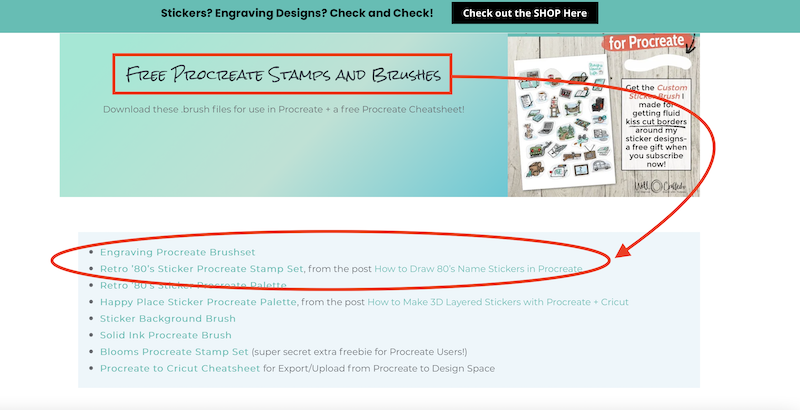
Once you’re in the Library, scroll down to the Free Procreate Stamps and Brushes section and then click on the links for these digital files to begin the download.
Directions for downloading files on your iPad- You’ll be asked if you want to download the Engraving_Set_.zip – click on the Download. Then, in the top right toolbar, you’ll see a blue circle with a down arrow. Click on that and then click on the zip file. This should open up your iCloud Downloads where you’ll find the zip. Simply click on it to open the zip. THEN, click on that file and it will import into Procreate. You’ll find them in your Brush Library.
Step Two: Add a Shape to Your Canvas
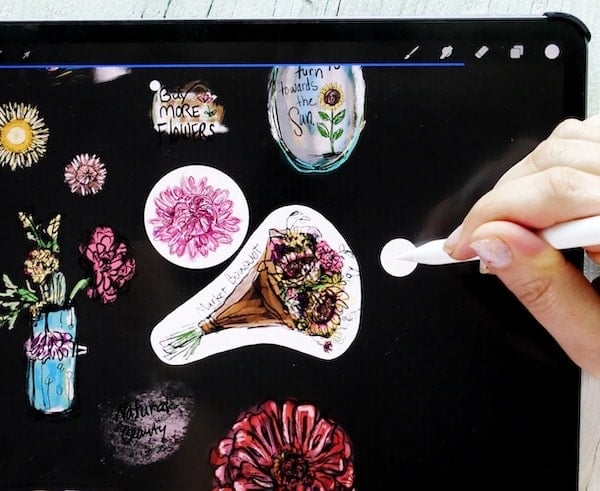
Open up a new canvas from the Procreate Gallery*. You can use any design or stamp but I’m using the unicorn stamp from my FREE 80’s Sticker Stamp Set. If you’d rather add text than a shape, I have more on that in Step Five!
*See this post for how to create a custom canvas in Procreate.
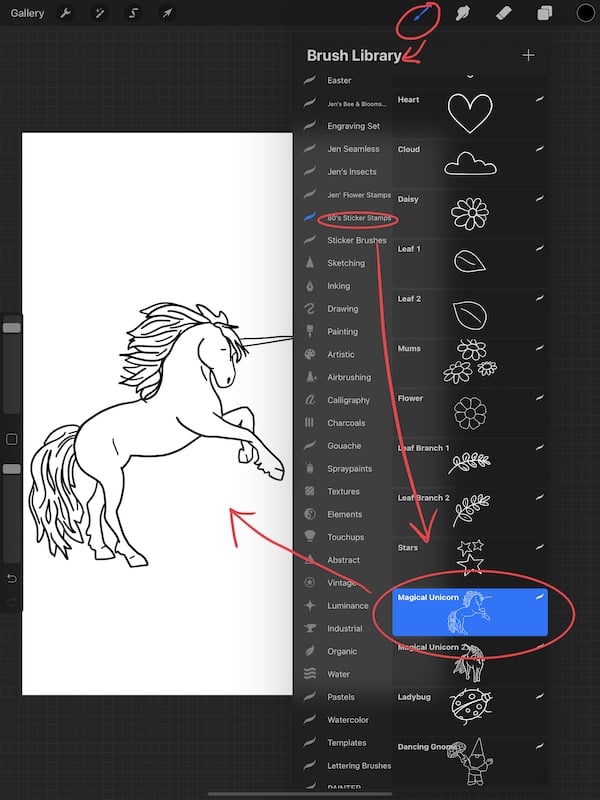
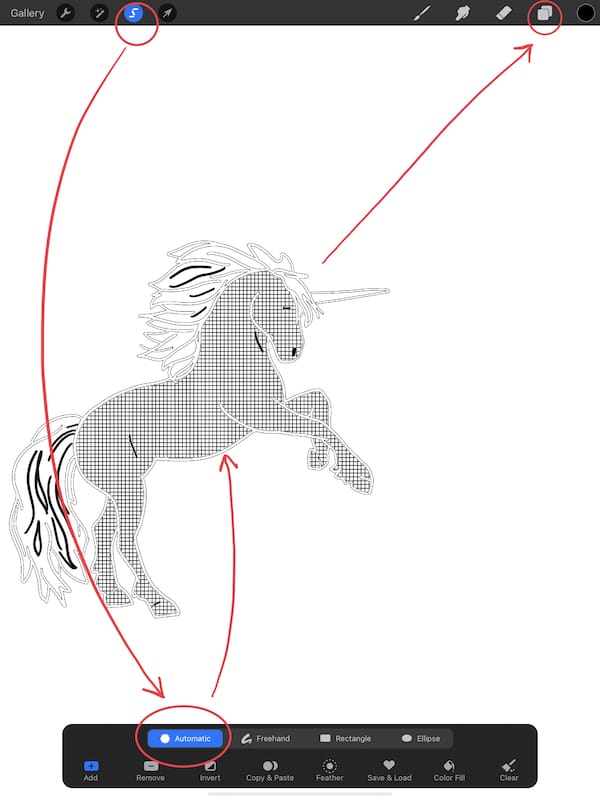
Step Three: Use the Selection Tool (Automatic) to Select Your Fill Area
Click on the Selection (ribbon) icon in the top left of the toolbar. This opens the Selection Panel and you’ll see it pop up on the bottom of your screen. Make sure it’s on Automatic, then tap on the shape you’d like to fill.

Step Four: Add Pattern to Your Engraving Design
With everything STILL Selected, open the Brush Library and Select a pattern brush (from the FREE Engraving Brushset or from your other brushes). Then on a new layer (add with the plus symbol in the layers menu) start to add pattern fill to your shape.

How to Add Pattern to the Shape’s Outline
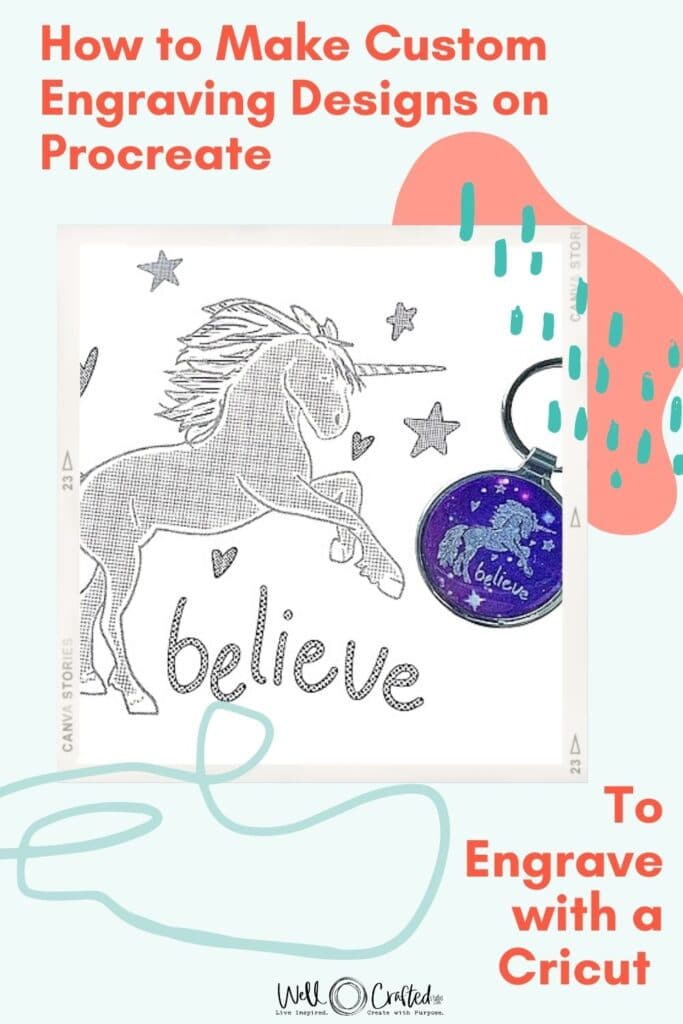
You CAN add pattern to just the outline of your shape as well. Or you can add a different pattern. I did this with my Unicorn Key Fob. You can see what this looks like in the two pics below. The reason for this is that a single line reads as a double line when you go to engrave in Cricut Design Space. By adding pattern to your outline you’re creating a line with visual weight to it.

Step Five: Use the Eraser Tool to Add Contrast
Remember that the engraved areas will read as highlighted or light areas. And because we added pattern fill to our outline that will seem like a light line on our dark background. SO to add some contrast between the shape and the outline try using the eraser tool to remove some pattern fill around your shape’s outline.

Step Six: Use the Outline Brush to Draw Text
To add the text you can either handwrite it on a new layer, or you can add text with the Add Text option on the Action Toolbar.
Then, on a new layer, use the Outline Brush to trace that text. Delete the original text layer once it’s not needed and you’re golden! That’s how I got such perfect-looking text on my engraving design for my Live an Art-Filled Life key fob (see below.)
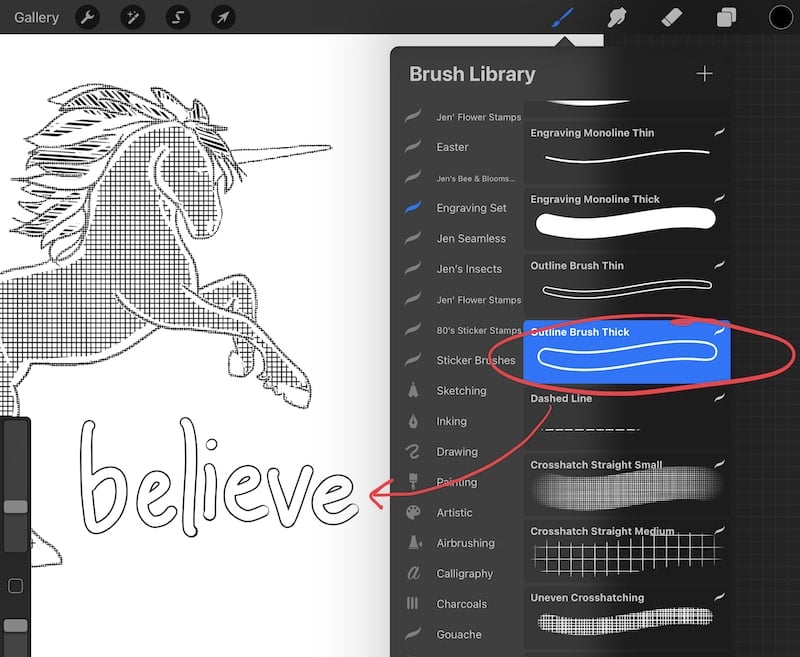
Then use the same process to add pattern fill to your text.

Step Seven: Save Your Design and Export It
In the Layers panel, click off the checkbox next to Background Layer. This will give you a transparent background. Then, go to the top toolbar and select the Action (wrench) interface. Click on the Share icon (box with up arrow) and then under Share Image choose to share as a PNG.

WOOHOO!!! You’ve JUST Created a Design Made to Engrave!
If you’d like to know how to engrave the keychain above and finish it with resin you can check out the tutorial! (coming soon)! Want to know more about engraving infusible ink? You may just love my post, How to Engrave Infusible Ink Sheets on Cricut Aluminum.
What’s Next?

Now that you’ve come this far and created your custom engraving design on Procreate, the obvious next step is to engrave it!
If you’ve never engraved before I have some links at the top of this post that will help you begin. In my next tutorial, I’ll be sharing how to use infusible ink on sublimation blanks and engrave through it to create these DIY key fobs.
Love this Post on How to Make a Custom Engraving Design on Procreate? Share It!
If you found this post helpful, then I would SUPER appreciate it if you would take a minute to share it! This really helps me reach more people so that I can continue to create content like this post.
Thanks for Reading,
Squirrel Much? 🐿 If You’d Like a Little Help Remembering This Tutorial for How to Make an Engraving Design on Procreate Pin the Image Below to Pinterest or Save It!




What a great design and tutorial. I just love the horse with the hatched fill. It is excellent.
Thank you Lucy!!! I’m glad you like it. ❤️❤️❤️