
Imagine handing someone a ring dish you made. It’s cute and I’m sure they love it! But then stop and think about if you handed them a ring dish shaped like a ring. It’s just a little tweak in the design but it gives the object a lot more style. It requires just a little bit more effort and you have to be willing to try something new. I made it easy with a video tutorial and printable templates. And although I’m using air dry clay to do this hand building, you can easily use this same process for ceramics!
We Make it Easy with a Template and Video
What do you think? Think you want to try it? Below you’ll find a how-to tutorial as well as sketched out instructions on a FREE printable template. I wanted to make it super easy for you to give it a try. To get your Project Template access the Creative Resource Library. I show you how to use it in the YouTube video below!

What Air Dry Clay Should I Use?
I’m still testing different air dry clays. For this tutorial we’ll be using Crayola Air Dry Clay. It’s a non-toxic clay that behaves a lot like regular potter’s clay. It is an air dry clay (no oven needed) and takes 2 to 3 days to fully cure, depending on the thickness of your project. It also dries to a really nice white color, and has a weight similar to regular kiln fired ceramics.
The Crayola Air Dry Clay was also the one that I felt looked the most like traditional ceramics once it was glazed. And that was my goal – to find a clay that worked like, looked like, and felt like kiln-fired ceramics. If you’re interested in air dry clay comparisons leave a comment below and I’ll do a review post.
One last bonus to the Crayola Air Dry Clay that I want to mention is that it is easily found locally at any Michael’s or JoAnn’s. So you can use a coupon, give it a shot, and then you haven’t invested a ton of time or money. If you don’t have the time to pick it up, I included Amazon links to the products I use or recommend below.

Project: How to Sculpt Ring Dishes with Air Dry Clay
Supplies and Materials
- Air dry clay- Crayola
- Rolling pin
- Canvas Duck Cloth
- Water in a small dish
- Round Cookie Cutter (this is a nice set)
- Air Dry Clay Project Template – this is a free download from my Creative Resource Library.
- Potter’s Metal Scoring Tool
- Rubber Modeling Tools for Clay – I only use one in the video, but I am so buying this set!
- Triple Thick Glaze – DecoArt with foam brush
- Non-stick Craft Mat – easy to glaze on, because everything comes right off.
Directions
Step One: Prep the air dry clay.
Grab a handful of clay, roll it and pat it, and set it aside to dry just a bit. When the clay first comes out of the container it’s pretty sticky, tacky and difficult to use. So I usually pull a few handfuls out of the container, roll them into a ball, and pat them a little flat (so there is more surface area exposed to the air). Just until it’s not super sticky feeling anymore. Make sure that you put the cover on the container again, so that the clay in it doesn’t start to dry.
Step Two: Roll out the air dry clay on a canvas fabric.
When I create at my local art center, every hand building table is covered with canvas duck cloth. I took that trick home with me, and now at home I have a small piece of utility fabric or canvas duck cloth that I lay out on the table. The clay doesn’t stick to it and I can fold it up when I’m done working. Instant clean up! I just take it outside and shake the clay dust and bits into the garbage.
When you roll out the clay use a regular wooden rolling pin that you’ve specifically designated just for ceramics projects (that means don’t use it for cookies after this). Even though the clay is non-toxic, it’s just a good idea to keep your art and baking tools separate.
Roll out the clay from different directions. Roll evenly, until it is about 1/4″ thick. If you need to start over, just ball it up and roll it out again. If there are a lot of cracks in the shape, ball it up a bit more, compressing it in your hands or on the table as you do so. This is called “wedging” the clay. You’re removing air pockets and creating a more solid slab to work with. Now roll it out again. Some small cracks don’t matter, so don’t get all perfectionist about this.

Step Three: Cut out the shapes.
To cut the clay into shapes you can try using a cookie cutter, cut it freehand with a needle tool, or use a template and cut around the template with a needle tool. In the video I’m using the templates with a straight edge potter’s slip tool for the tea bag dish. For the ring-shaped dish I use a round cookie cutter for the ring bowl and the template to cut the gemstone.
You can find the Air Dry Clay Project Template as a free download in my Creative Resource Library. The template technique is so easy, and you could easily create your own templates in any shape you want. Just print the page out, cut around the shape you want with a scissor, and then set the shape on the clay. In my small bowls post, I demo using a needle tool to cut around the template. That totally works, but if you’re trying to cut straight lines, I’ve found a thin metal scoring tool is perfect!
ProTip: When cutting the gemstone for the ring dish, hold the scoring tool at an angle to cut a more realistic-shaped gem.
Step Four: Start to shape and sculpt your ring dishes from the air dry clay.
Take a moment to gently smooth out the hard-cut edge. You may have noticed many ceramic pieces have a more rounded, organic-feeling edge. To get that look, just dip your fingers in the small bowl of water. With just a small amount of water, gently go around the edges, smoothing them with your fingers. Once you’ve done this, the clay will feel a little tacky again. I usually set it aside to dry for 10-15 minutes or until it feels less sticky.
The single most important thing to be aware of when you’re try to shape and sculpt the clay is to make sure that the clay is not too wet. Again, if I was to touch it with my finger tip and see my fingerprints, it’s not ready yet. Just let it sit off to the side just a little bit longer, until you can touch the surface and it’s not so tacky.
ProTip: You can tell the clay is ready to work again when you touch it with your finger and you don’t leave a fingerprint on the clays’ surface.
Some art mediums and style demand strong, often large movements. Drawing can be like that. Working with clay, there are a lot of small gentle movements. Especially if you’re throwing on a wheel or working small. Similarly when you’re sculpting clay, you want to take deliberate actions to gently move and manipulate the clay.
ProTip: I know it’s a strange tip, but keeping your fingernails short makes a huge difference in how frustrating the experience is.
Alternatively, you can use tools instead of your hands (and you can keep your manicure). I did link to a really stellar looking set of modeling tools in the supplies list that includes several rubber tipped brushes. I totally think I need these for my upcoming ceramic sculpture class!
For the ring dish: Use the rubber tool or some other pointed tool to draw the lines of the facets into the gem. You can shape around these lines if you like, or leave them pretty minimalistic and just suggestive of the shape.
For the tea bag dish: Using a tool or your hands, gently draw in the lines of the top of the bag, following the design on the template. Use the rubber tool to gently start to create different levels of depth, thinking about the way a bag would be folded over. The top would be the highest point, the next layer would be below that, and the rest of the bag would be the lowest layer. If you have questions just review the video.
Step Five: Mold the air dry clay into the shape of the dish.
For the ring dish: Although you can follow the directions below and shape the bowl of the dish with your hands, the look is more professional-looking when you use a mold to slump it over. I use the same Fiestaware salt shaker from my small bowls tutorial. It has a nice rounded shape that works great as a mold. However, rather than wrapping the whole circle around it tightly, we want to retain the integrity and the shape of the edge, so keep it flared out evenly to create about a 1/4″ wide edge around the center bowl shape. This is what’s going to give us the impression of a ring. If you have questions about what this looks like check the video above!
For the tea bag dish: With your hands gently bend the shape up around the edges. Make small, gentle movements, and go around the shape several times.
Remove the ring form from the mold right away and set it right-side up. If you feel like the clay is sticking to the form you’re using for a mold, you can place a paper towel or a thin paper between the clay and the mold to keep them separate.

ProTip: Using force and creating a sharp bend will probably crack the clay. Shaping the edges works best when the clay isn’t super wet, but isn’t dried yet either. So pick it up and test the clay. If it’s too hard, mist it with some water. If it’s too wet, let it sit and air dry a little longer.
Step Six: Score and slip the pieces together.
Now that you have the individual pieces ready, you can go ahead and join them. We’re going to use a tried and true traditional potter’s technique: the slip and score. This was all mysterious sounding when I had never done ceramics, but “slip” is really just describing watered-down clay. To score means to incise lines into the clay that will help the slip glue the pieces together.
ProTip: To create an easy slip, take some of the scraps of clay from when you cut your shape and put them into a small bowl of water. After a bit you’ll notice the clay has started to break down into more of a mud consistency. This is perfect for the slip and score technique.
To join the two pieces of clay together use a tool to rake score lines into the areas on the clay that you want to join. You can use a scoring tool, or you can use a small-toothed comb or a fork. Score both pieces you are joining. Use a small amount of the slip and apply it with your finger to the scored areas. Press the two pieces together tightly and hold for a moment. Set them down gently, and let the pieces dry.
ProTip: If your gemstone is not the same thickness of your ring bowl then it will not lay evenly and this could cause stress on the joint. So you could elevate the gemstone so it is even. Or my advice would be to re-cut the shape from a piece that is the same thickness as the ring dish.
Step Seven: Work in little finishing details.
Little details go a long way to “finishing” a piece of pottery and create an appearance of handmade vs. homemade. With a little water on your finger gently rub down the edges and the lines in your work, subtly shaping the edges. Make sure that the piece sits flat on the table, and if you’d like to sign the bottom of your piece you can do that as well.
Step Eight: Let the the dishes dry.
Let your ring dishes dry for 2-3 days, until they are a solid white color and no longer cool to the touch. As the water evaporates from the clay, it dries and creates a cool feeling. Those are two ways you can know your piece is ready to be painted and or glazed.
Pro tip: Smoothing and shaping is a simple thing to do and really makes your pieces look more professional. Details matter and help your products look professionally handmade, not homemade!
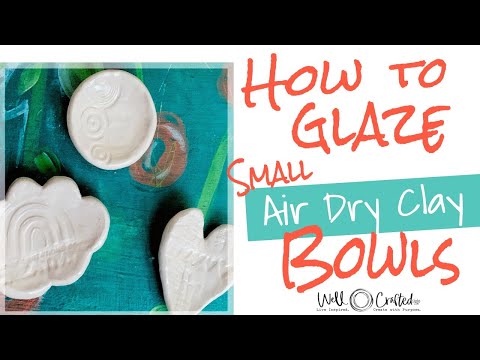
Step Nine: Glaze the dishes.
Time to glaze your pieces! Use a foam brush or regular brush with soft bristles to apply the glaze. I used the Triple Thick Glaze by Decoart (the link is in the supplies list). Load the brush with a generous amount of glaze. Try to use as few brushstrokes as possible, and try to apply as evenly as possible. This glaze does want to pool and drip when you apply it thickly, so be aware of that and check for drips. If you see drips on the edges use your brush to gently wipe them back.
ProTip: Do not glaze the very bottoms. The glaze will want to pull away from the clay and instead bond to wherever you place it. Set aside the little bowls (preferably on a non-stick craft mat or the canvas duck fabric) to dry. It will take 2-3 days, depending on the thickness of your pieces. And done!
Sculpt ring dishes with air dry clay for all your friends!
And done! Now you just have to decide who’s going to get all the cute little air dry clay ring dishes you will undoubtedly go crazy making!
For more air dry clay and ceramics inspiration, I’d love to have you check out my Air Dry Clay and Ceramics Pinterest Boards! I really hope you enjoyed learning how to sculpt ring dishes from air dry clay and are now determined to try it. If you’re curious about how to use the other templates on the project sheet, then you won’t want to miss the first post in our air dry clay project series, “How to Make Small Bowls from Air Dry Clay“.
FYI…
If the phrase “Imposter Syndrome” caught your eye, here’s a post by Nada Alic about how it effects creatives: 11 Creatives on Working Through Imposter Syndrome. It’s a real thing and I feel like anyone who is succeeding in any area of their life feels this to some degree. This article had a lot of quotes from creative people on the subject of Imposter Syndrome and is totally worth the read!


Hi Jen! I recently got into pottery and I was wondering if you had a recommendation for a matte glaze?
Hi Jasmine,
You’ll love it! It totally does a sneak attack and you’ll be obsessed before you know it. But as for your question- I haven’t tried it but I just picked up a can of spray mod podge in matte for another project and was really impressed with the finish. It’s an acrylic based product, like the triple thick but should give a nice uniform coverage. You’ll have to experiment with the number of coats.
But I’m curious now, so I’ll give it a try and reply again. Thanks for the question!!
-Jen
I also saw your videos on how to make a trinket dish. And actually inspired me to help my grandkids with craft projects. My only question is that it didn’t show the type of paint that you used two collar in one of your trinkets. Can you tell me what is the best type of paint to use before I put it on the glaze. Thank you so much for your videos
Hi Mary Beth,
Actually I was still experimenting at the time and one of the paints I used was flaking up under the glaze and I was going to try different ones. What did work was multi surface craft paints or regular craft paints. What did NOT work was chalky craft paints. They were terrible. Definitely do a few tests.