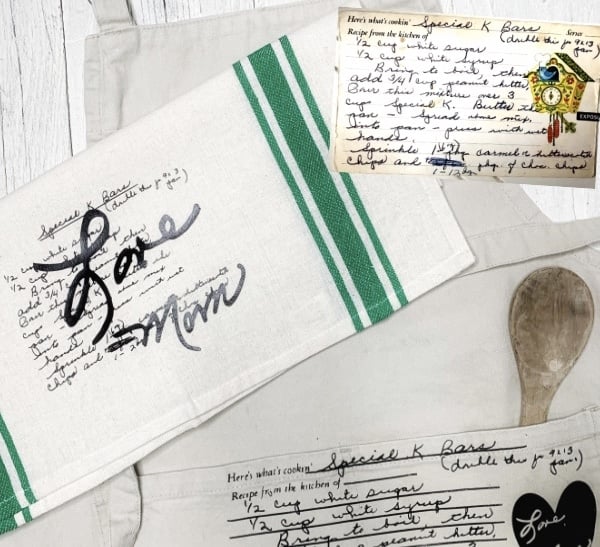
When we create something that has personal meaning for us, it’s well more meaningful. Letters, signatures, and handwritten recipes add a vintage, heirloom feel to our crafts. I love the look when I first saw it but wanted to use recipes that are meaningful to my family and me. So I played around with different methods and found my favorite. Below, I show you how to use the Magic Eraser app to quickly and easily clean up a handwritten recipe.
But first, to craft with an old recipe, you need to have a cut file of the recipe and clean up the background of your image.
Many old recipes are faded in areas, with writing that is hard to see or trails off. Because I plan to use my Cricut Maker to craft the designs, I tried using Cricut Design Space to process the image. And although it is possible to clean them up using that program, it isn’t easy.
The Challenges of Using Cricut Design Space to Clean Up Your Handwritten Recipes
- You can’t save the recipe while cleaning it up, so you may spend over an hour cleaning up a method, and if you close the program, you lose all your progress.
- When you use the magic wand, there’s a short processing delay every time. Which adds to the time you spend. It feels less than magic.
- It lacks precision, so the final image loses some detail and isn’t as crisp as you may want.
Experimenting with Different Methods for Cleaning Up Backgrounds
Ideally, I wanted something super easy to use that didn’t frustrate me, wasn’t crazy expensive (like some software can be), and could blow the image up large enough to do detailed work.
I also needed to be able to save my image as a .png with a transparent background. That makes uploading the image to create a cut file a snap.
Looking for an alternative to Design Space, I tried pro photo software and a couple of photo apps. But what I found I like best is the app Magic Eraser. There is a three-day free trial, but it charges you $9.99 for a one-year subscription fee.
But honestly, three days should be long enough for you to clean up a few recipes.
9 Things to Like About Magic Eraser
- It’s available in the Apple App Store or on Google Play, and it works with mobile or tablets. You don’t need a stylus.
- It’s designed to erase backgrounds. It’s what it does.
- It has a killer high-resolution zoom feature, so you can really be detailed with your editing.
- You can restore an area if you need to, as well as erase with it.
- The Magic Wand tool removes significant areas with just a click.
- You can mask the image to see it better (I love this).
- You can save it in high resolution .png or HEIF with no watermark.
- As far as I can tell, there isn’t a way to save your progress and close out the image, but the image stays open on your canvas from one session to the next. If you try to replace the image and start over, it will warn you that you will lose your progress.
- There are also patterns and photos that you can insert into the background to make some pretty funny photos.
But in short, I continue to use this app because it’s less frustrating, and the result is better.
Tutorial: How to Clean Up a Handwritten Recipe to Craft With
Tools and Materials
- Photo of a handwritten recipe
- Magic Eraser for Backgrounds (ios app) Magic Eraser (google play)
- Mobile or Tablet Device
- Optional- Stylus but this app works fine with your finger
- Basic Photo Editing ( I use the one native to my photos but any basic photo app will work)
Note: I am NOT an affiliate for Magic Eraser. I just think it’s a great option for cleaning up the background of images you’d like to turn into cut files to craft with.
Directions
Step One: Edit the Photo with Basic Editing Tools
The goal is to accentuate the contrast between the handwriting and the background without losing the clarity of the image.
So, playing with the brightness, the contrast, the highlights, shadow, black points, white balance, and sharpness is something to try.
I like to take each one, slide the scale around, and see if anything helps. It may, or it may not. Each photo is different. And remember, you can almost always revert to the original image and start over.
Step Two: Open the Photo in Magic Eraser
When you open Magic Eraser, you’ll be prompted to upload a photo from your photo gallery.
On my iPad, all I have to do is tap on the image I want to upload into the program. It will open on the crop screen.
Just drag the corners to get the crop you wish to, or if you prefer to work within some typical constraints, you can choose from the options below the image.
Step Three: Use the Magic Wand
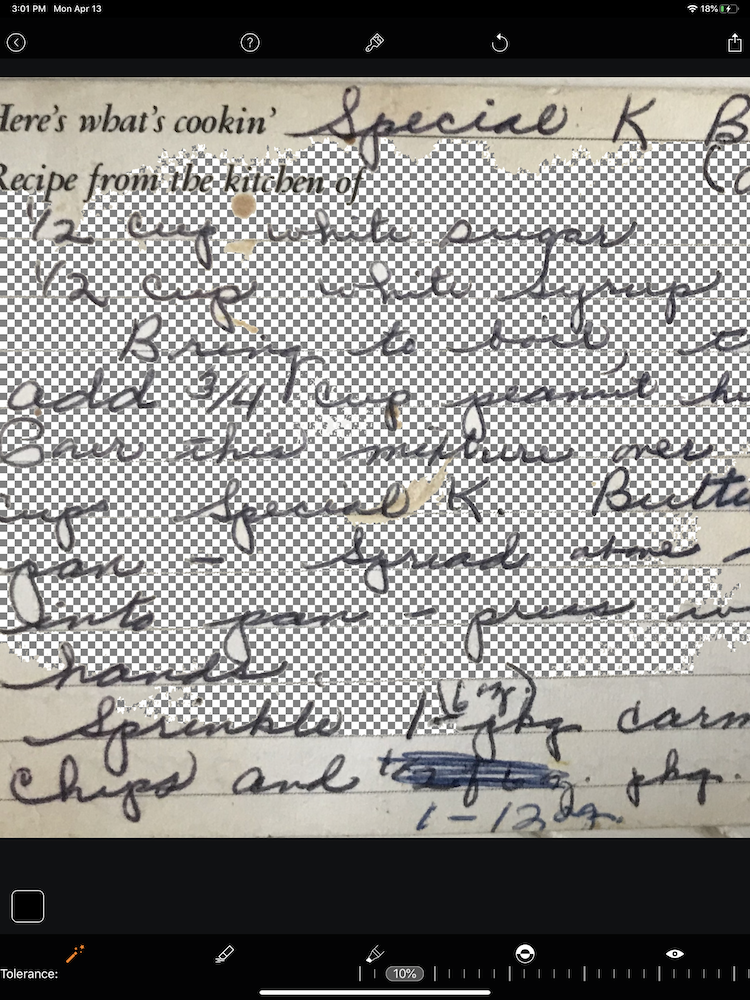
The next screen is your canvas. I like to start my clean-up with the Magic Wand tool (bottom of your screen.)This tool selects an area of solid color and removes it.
So, if you tap on the background of your recipe, it will remove all the cream. However, it may remove too much, so play with the tolerance slider at the bottom of the screen.
Tap on your screen to select, and it will turn orange.
I also use the Magic Wand when I tap into the negative spaces in the center of the letters with my stylus.
Tip- On the iPad, you can make the image super large or small by using the two-finger gestures of pinch and zoom. I’m not familiar with other tablets, but I’m sure there’s a similar gesture command).
This control lets you get super detailed (to pixel level!) with your erasing.
Step Four: Masks
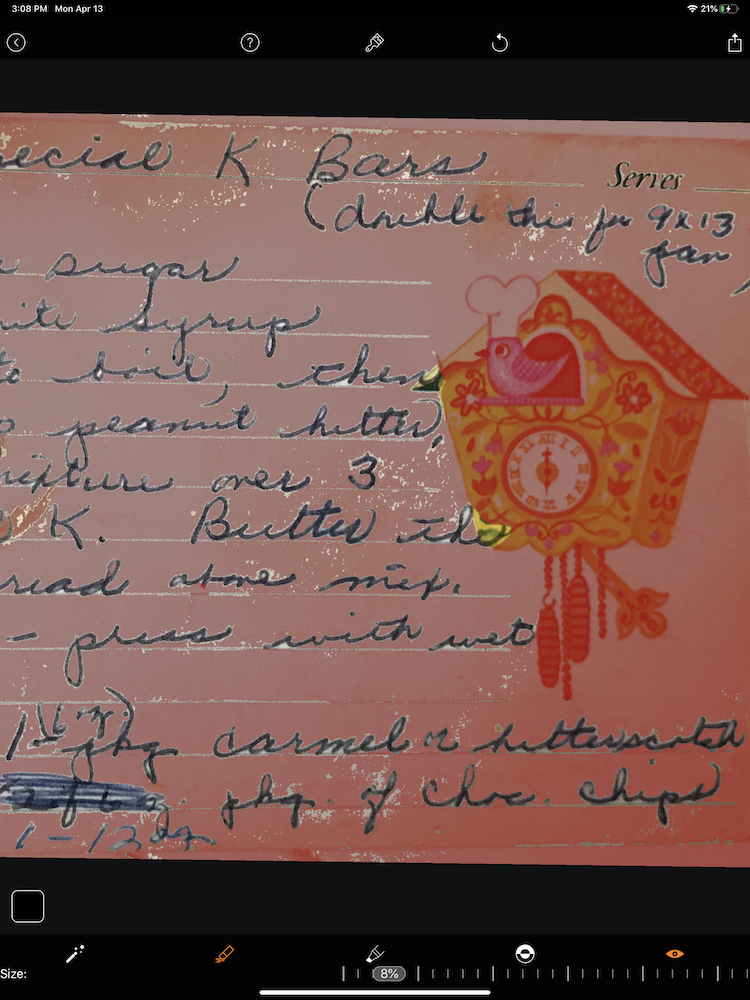
An eye icon is at the bottom of the screen to the far right. This is a masking tool that I love.
Working detailed with the transparent (checkered) background makes it hard to see the subtleties of the handwritten text. If you click on the eye, it becomes a lot easier to see what needs to be erased.
But, even better, it will show you a darker area wherever something is removed (erased). So, you can tell if you erased too much of your work.
At this point, you can use the Replace Brush (see step 6), or the Undo option at the top of the screen (the circle around the arrow). This allows for a LOT of precision work.
There is also an Invert Mask (the funky circle icon to the left of the eye).
This will invert the mask, so transparent areas become opaque, and vice versa. This might be helpful if you were trying to create a digital mask. But I never use this tool.
Step Five: Erase Brush
Just to the right of the Magic Wand is an eraser icon. We’ll use this to manually erase what we want to remove from our image.
You can adjust the eraser brush size with the slider at the bottom of the screen. At the top of the screen, you can tap on the paintbrush to adjust the shape of the eraser brush. For instance, you can change it to a square if that will help you erase it more accurately.
Step Six: Replace Brush (Restore)
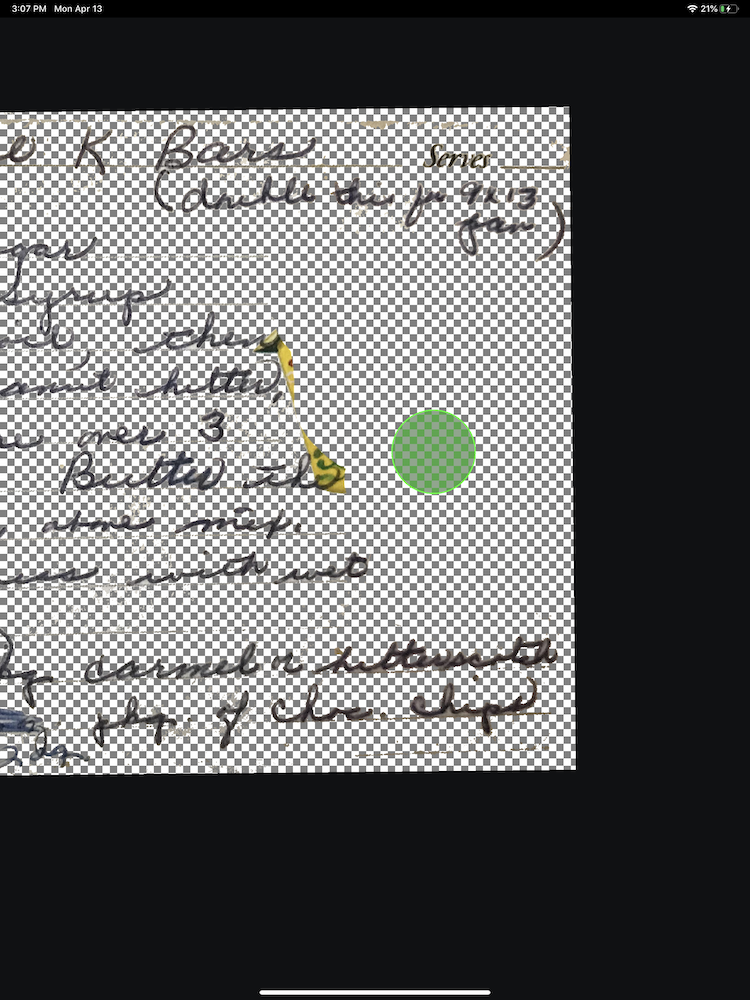
I love this tool! If you find you’ve erased too much of your image, then you can use this tool to restore it. It works just like the eraser in that you can change the size of the brush cursor with the slider at the bottom of your screen. And you can change the shape of the brush with the paintbrush option at the top of the screen.
A tip for using the Replace Brush is that if you find you have areas that would be super time-consuming to erase, then you can go ahead and erase the whole area (text and all). Then select the Replace Brush and change its brush size to match the strokes of your handwriting. Next, simply trace over the writing, and you’ll get a gentle, smooth stroke.
Keep in mind that as we are creating a cut image from this, every mark you see on the image will register as a cut mark.
SO if you find that the writing trails off or something just isn’t legible, you can add back in the parts that aren’t there by using the replace brush. I’ll show you what I mean in the pic below.

Step Seven: Wash/Rinse/Repeat
Repeat the process of erasing/replacing as many times as you need to for a clean and sharp image.
Make sure to erase the edges of the photo and any other elements you may not wish to keep. I knew I didn’t want to keep the cuckoo image in my example, so I erased that. I also erased the lines on the card because they were too hard to work around.
If you decide to keep the look of a recipe card, I show you in the video how to add the lines back into your design once it’s uploaded into Cricut Design Space.
FYI- When you upload your image .png in Design Space, it does clean up the edges of your design as part of its image processing. So, you don’t need to get super detailed trying to smooth out the edges of your ink strokes.
Step Eight: Save the Photo with a Transparent Background
When you’re happy with your image, you can tap on the screen’s share icon in the top right corner (the box with the arrow coming out the top of it).
The next page gives you export options. You can save the image with a white background or a transparent (checkered) background. We need a transparent background so we can upload the image into Cricut Design Space as is.
*IMPORTANT*- In my next blog post, I walk you through how to upload your image into Cricut Design Space. But, full disclosure, the images only upload well using the desktop version of Design Space. On desktop, you have the option of processing the picture as a “complex” image. This will preserve the details of your handwritten recipe. The mobile app really messes with the quality.
What To Do After You’ve Cleaned up a handwritten recipe
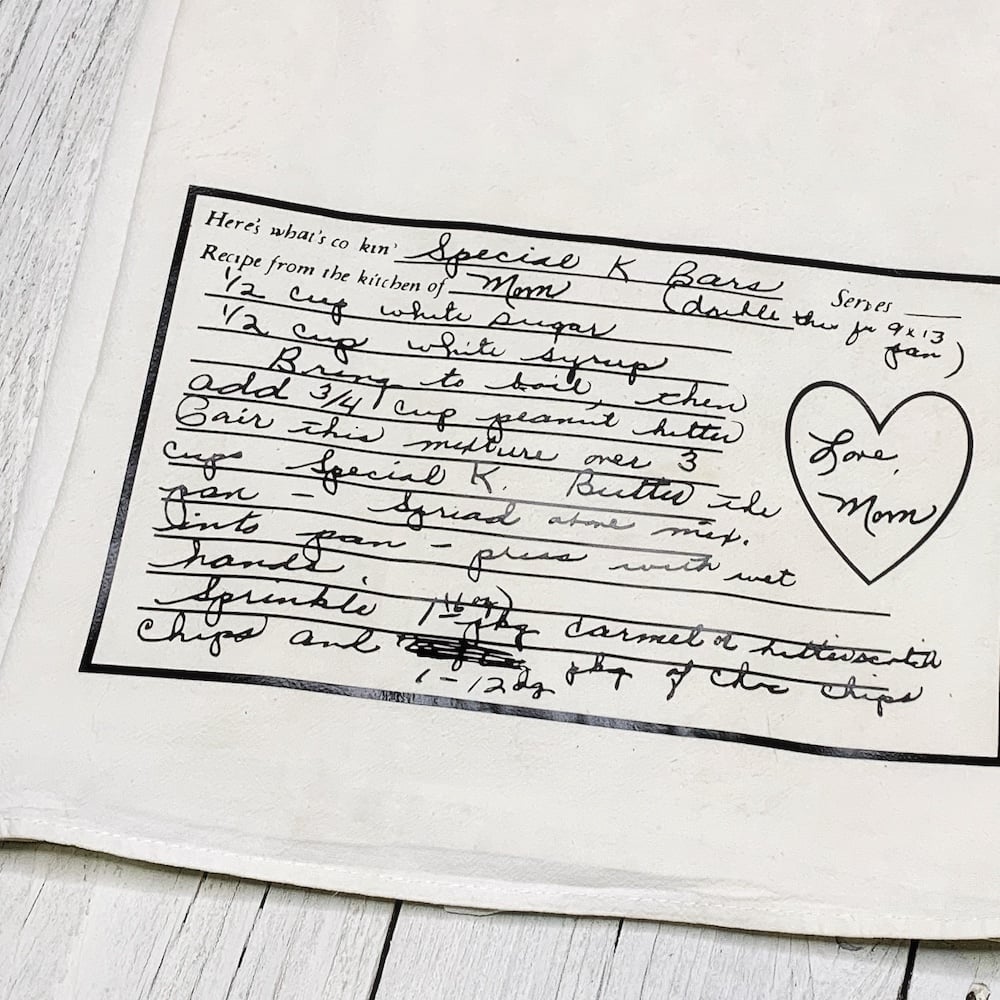
But in my next post (after walking you through the upload process), I’ll show you how easy it is to create custom tea towels and a personalized apron using your cleaned-up recipe image. We’ll upload your design into Cricut Design Space to create a cut file.
Crafting with our memories is a way of ensuring they aren’t forgotten. And these projects make over-the-top amazing gifts for anyone in your family.
For more inspiration
Looking for more fun home decor posts? I’d love to have you check out my tutorial on making little sewn canvas banners. It uses heat transfer vinyl (iron-on vinyl) and would make adorable kitchen decor if you used a recipe image like this. I also found a post by Southern Living Magazine that shows some other great examples of what you can make with old family recipes!
Love this? Share it!
I’d love to see anything you make after reading this tutorial. Feel free to comment here or to post a pic on my Facebook Group! Thanks for reading. And if you found this tutorial helpful, I’d love to have you share it!
Thanks for Reading,

Love this post on how to clean up handwritten recipes to use in your crafts? Pin it to your favorite Pinterest boards!




Thank you. I’ll give this a try.
I used this today and it worked perfectly! Thank you!
I”m so glad!!! Thanks for letting me know Ana! And thanks for visiting my blog.
I downloaded the app from the link you provided but it doesn’t have any of the features in the video. Could you possibly email me a picture of the app please? I really need this.
Thank you..
Hi Dawn,
I emailed you a pic! I hope that helps. I did check the links and they are correct. The app looks a little different on the iPhone than on the iPad but the tools look to be the same.