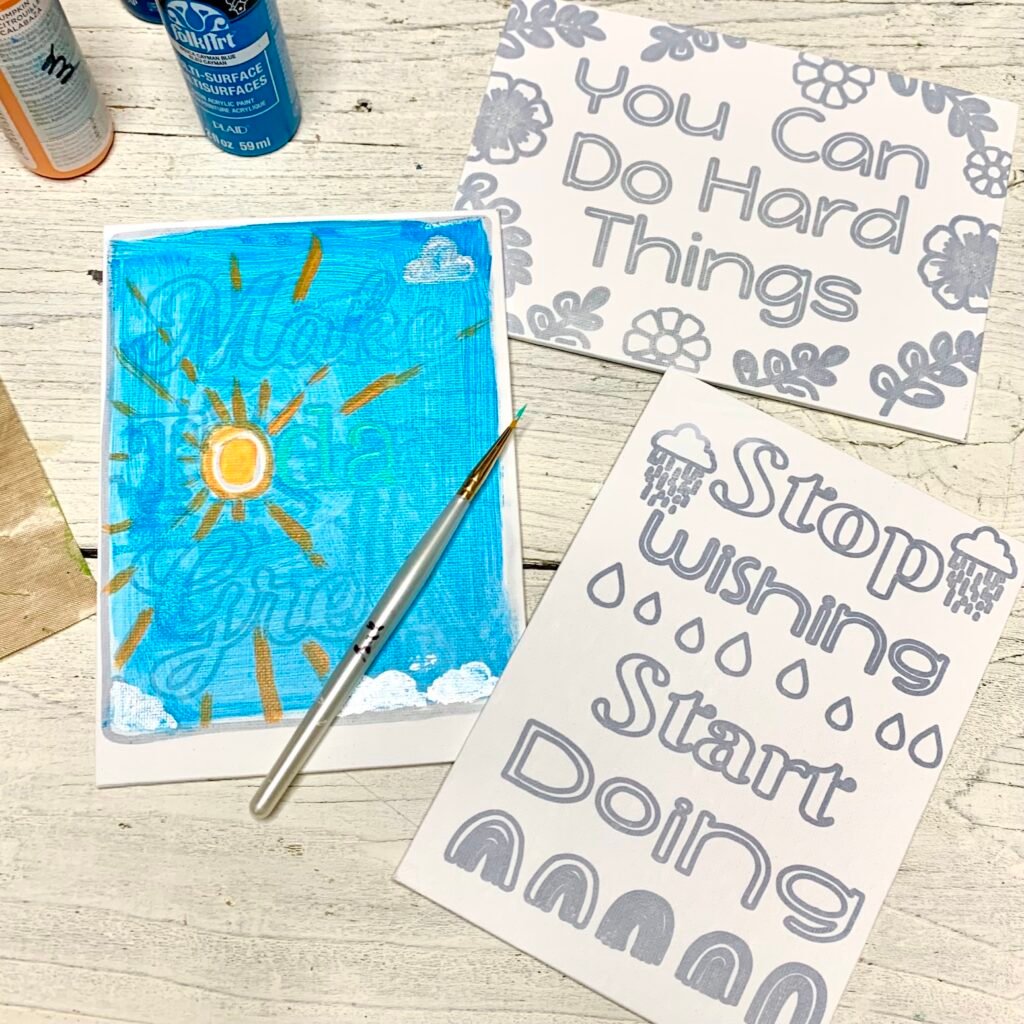
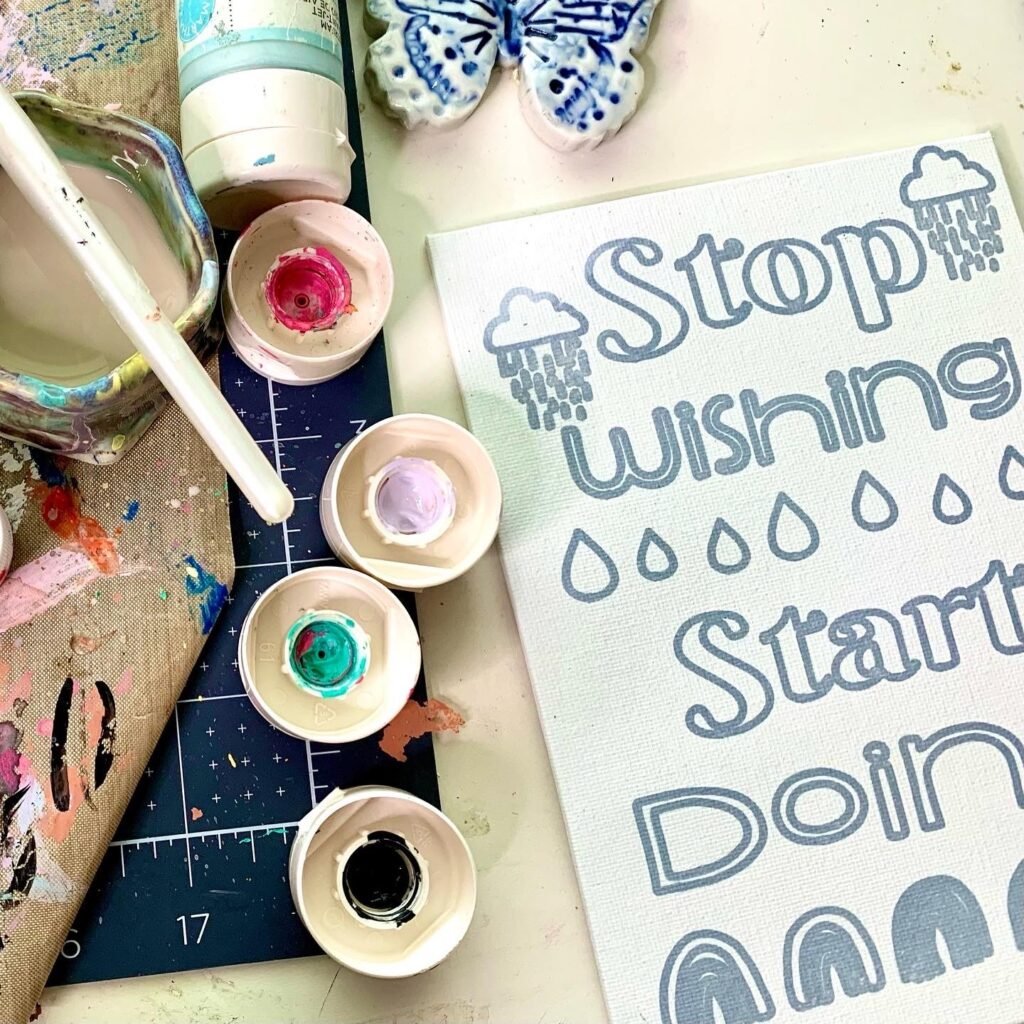
On a recent trip to my local craft store, I saw the cutest little painting kits. These kits had a small canvas with a simple line drawing on it. I knew we could do the illustrations in Procreate, but I wondered how to transfer the drawing to the canvas. First, I tried putting canvas panels into my Cricut to draw directly on them, but they were too thick to go under the rollers. Next, I tried making a transfer using Infusible Ink pens, and it worked! In this tutorial, I’ll help you DIY your own paint party canvas with Procreate + Cricut!
Tip: And because you draw these yourself, you can add numbers and design your own Paint-by-Number canvases with Procreate and Cricut too.
Merry Maker-mas Christmas Canvas Bonus!
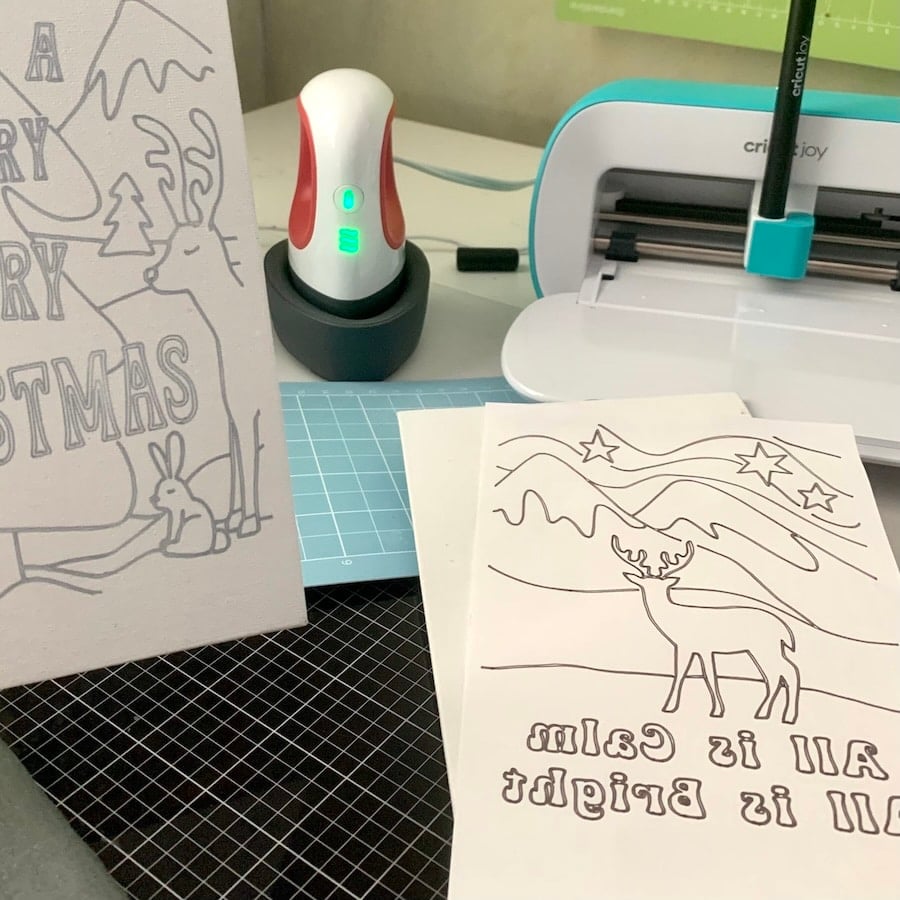
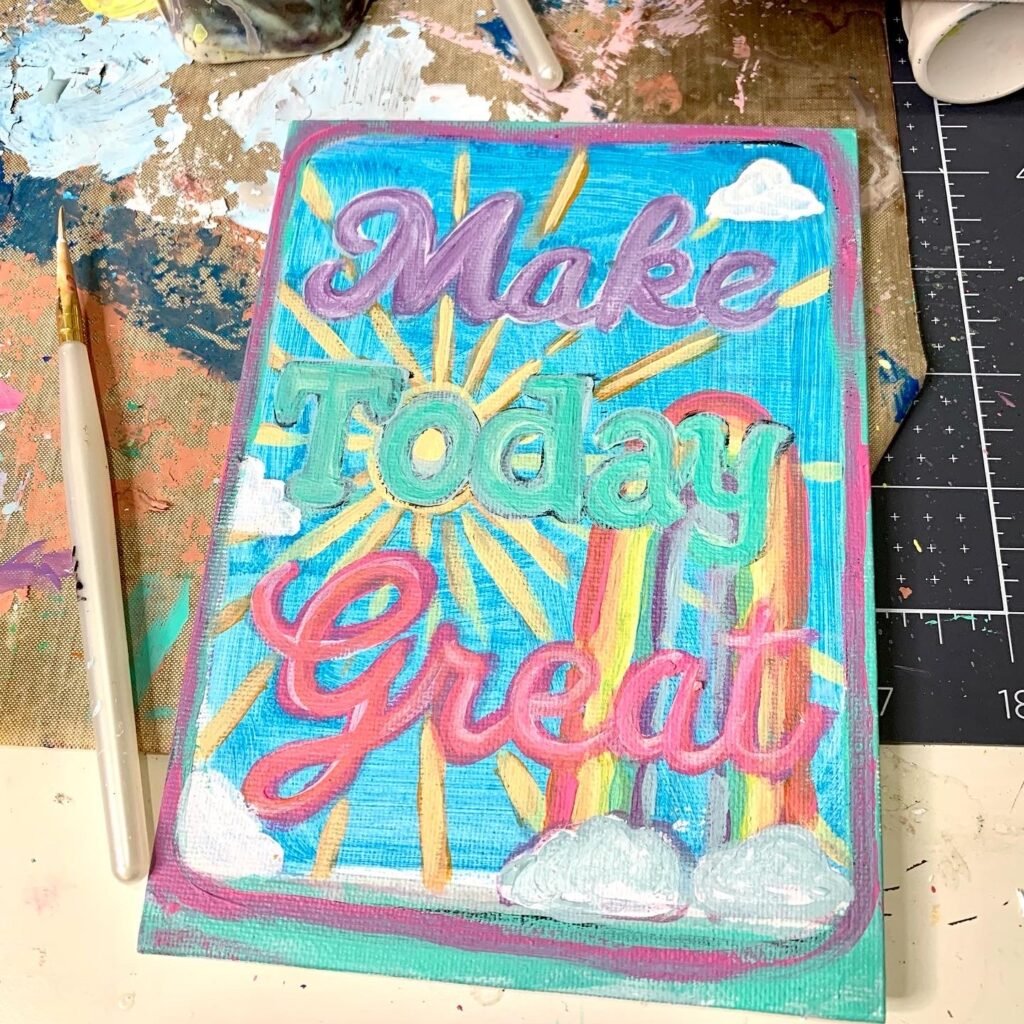
Hooray for Holiday Bonuses! For Day 6 of Merry Maker-mas we have holiday themed versions of the fun Infusible Ink Paint Party Canvases. You can make these with ANY of the Cricut Machines: the Maker, Explore, Joy Extra AND the JOY! I demo’d this project with the Joy and the Easy Press Mini in Live on FB on my Well Crafted Studio FB Page. I’d love to have you check it out! AND if you’d like to see the other Merry Maker-mas projects be sure to check out the Merry Maker-Mas Page.
Get the Free Paint Party Designs from this Tutorial
Although this post will show you how to create your own designs in Procreate, you can just download the free designs I created for you! You can find them in the Sublimation/Infusible Ink section of my Free Library.
Then, skip to Step Five in the tutorial below for directions on creating these with Cricut.
How to Get the Password to the Free Library
To get the password for the Free Library follow this link. When you sign up, you’ll get the password emailed to you, and huzzah! You get instant access to over 100+ free designs.
How to Make a Paint Party Canvas with Procreate + Cricut
Tools and Materials
- Procreate for iPad or Procreate Pocket for iPhone
- iPad Pro 12. 9″, iPad Pro 11“, iPad Air, iPad 10.2 or iPad Mini
- Apple Pencil Gen 2 or Gen 1
- Cricut Explore, Explore 3, Maker, Maker 3, or Cricut Joy
- Infusible Ink Pens- I used a black 1.0 but a smaller size might have been better. (I’m going to get one and test it out next week with my Cricut Joy).
- Laser Copy Paper
- Canvas Panels (we’re using 8″ x 10″ and 5″ x 7″ but you can also use a smaller size.)
- Cricut Easy Press (either the Easy Press 2 or Classic Easy Press) or Heat Press
- Easy Press Pad or Ironing Blanket
This post does contain affiliate links, which means if you purchase through any of these links I may receive a small commission. Thank you!
Directions to DIY Paint Party Canvas with Procreate + Cricut
Step One: Create a New Canvas the Size of Your Canvas Panels in Procreate
To create a new canvas that is sized for this project, start on the Gallery page, and tap the + in the top right corner. This opens up a drop-down panel with canvas options. To create a NEW canvas tap the little rectangles with a + sign inside them.
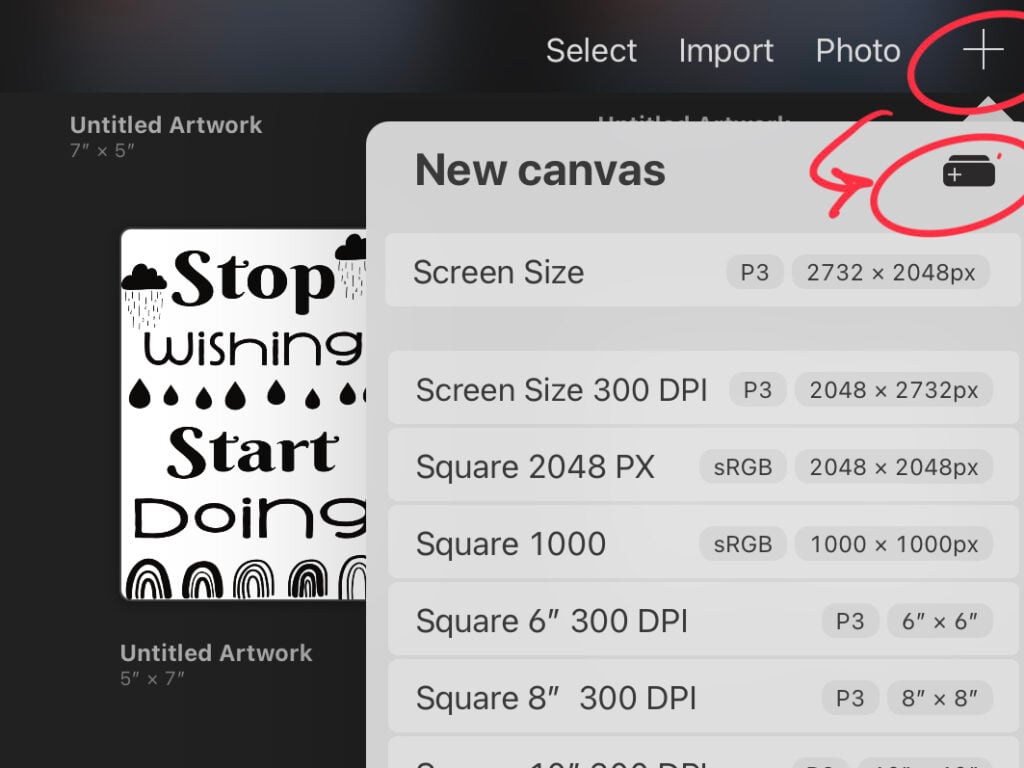
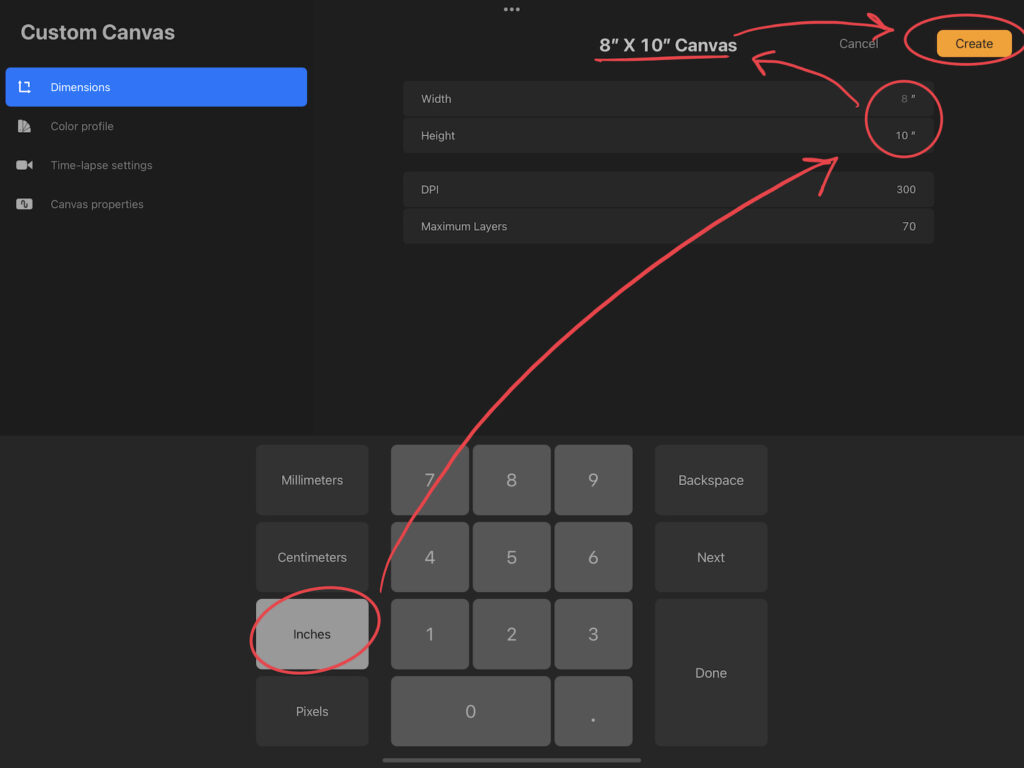
The first thing you’ll want to do in this panel is to change the measurements to inches.
Then, tap in the width and height desired. I suggest an 8″ x 10″ because you can size this down to the 5″ x 7″ size for canvas panels. You can’t size up without losing quality.
Next, change the title from Untitled and rename it. Then hit the Create button in the upper right corner.
Step Two: Draw or Stamp Your Design
Now you need a Procreate brush! To find the Brush Library go to the brush icon at top of the canvas and tap. This opens a drop-down menu with different Brushsets.
I usually do a sketch layer with a 6B pencil (found under the Sketching brushset), then create a new layer where I refine the sketch in pen.
Creating a New Layer
To create a new layer, tap on the two overlapping squares at the top of your canvas. This opens the Layers Panel, then you hit the + symbol in the upper right corner.
In the Inking Brushset, you’ll find a Monoline brush that works well for drawing.
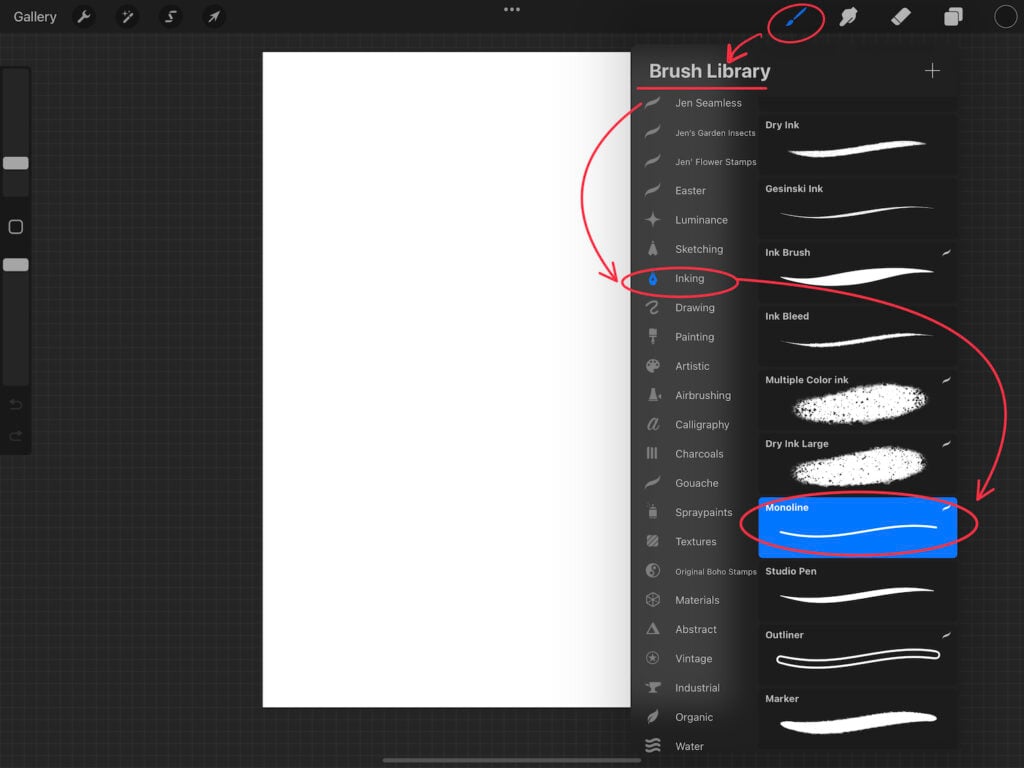
Then, draw out a simple, single-line design. Kind of like a doodle.
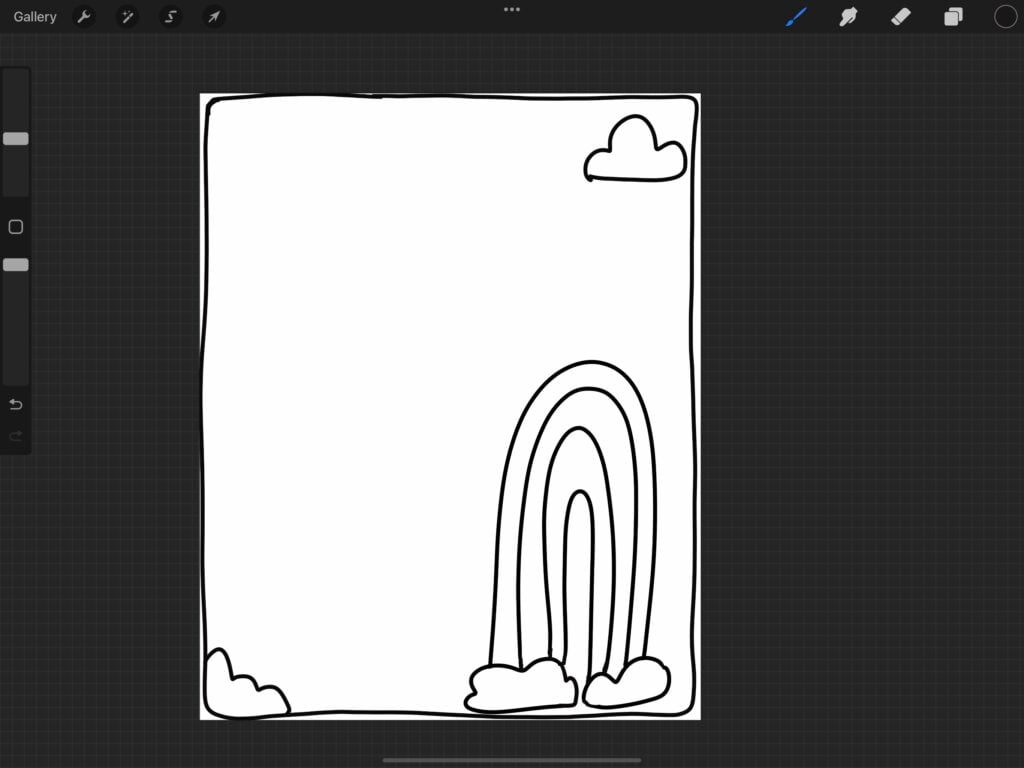
Step Three: Add Text on a New Layer
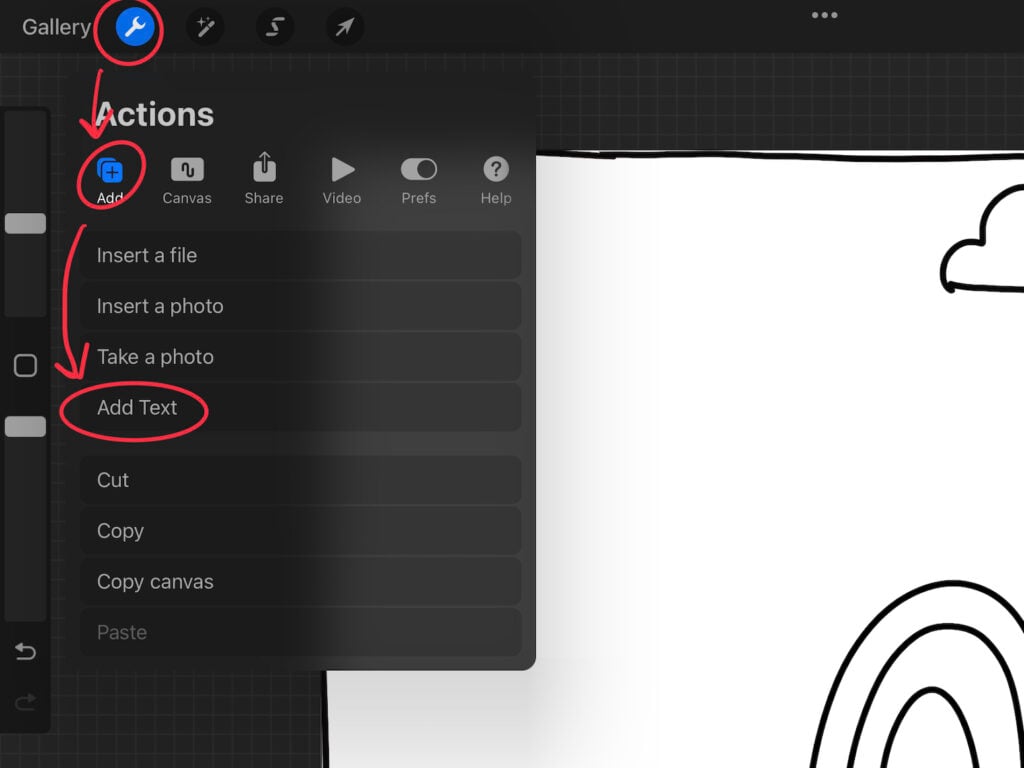
To add text to your Procreate canvas, go to the wrench at the top left of your screen. Then, in the drop-down menu tap the Add, and then Add Text.
Step Four: Export Your Drawing as a PNG and Save to Files or Photos
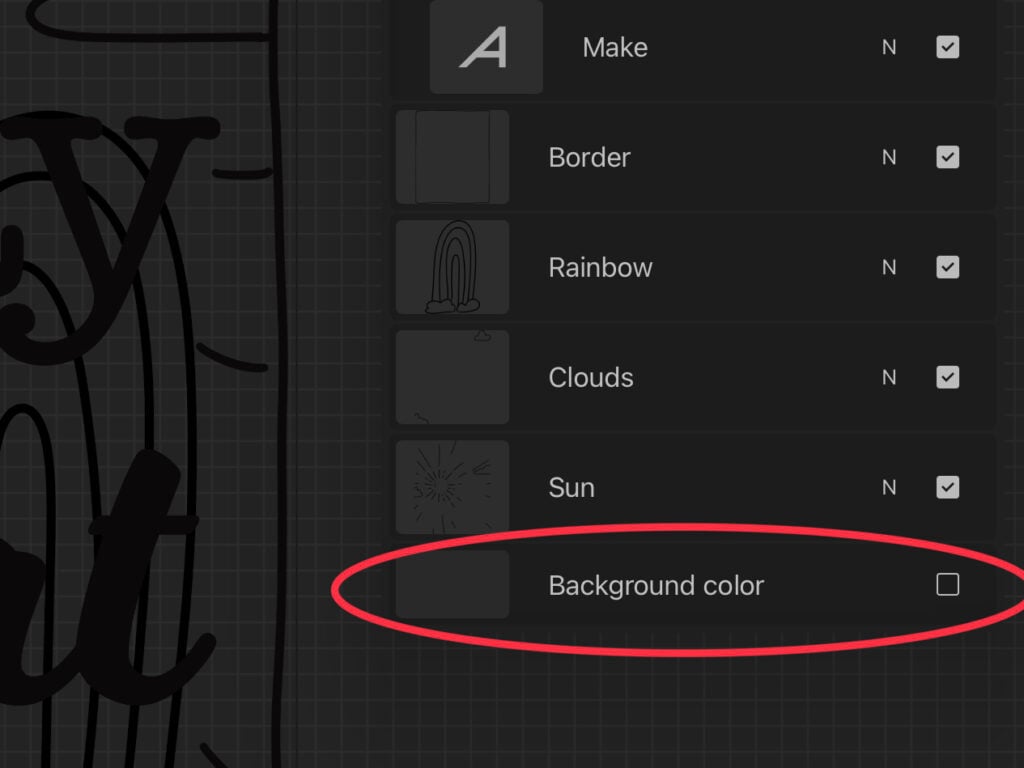
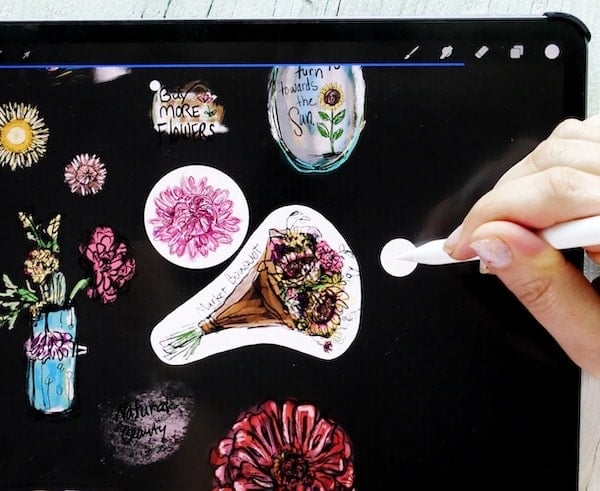
Before you export a Procreate design as a PNG, you most likely will want to uncheck the background layer. This gives you a transparent background that makes it dead easy to upload your work into Cricut Design Space.
Step Five: Open Up a New Canvas in Cricut Design Space
Open Cricut Design Space, and on the Home Page click New Project to open a new canvas.
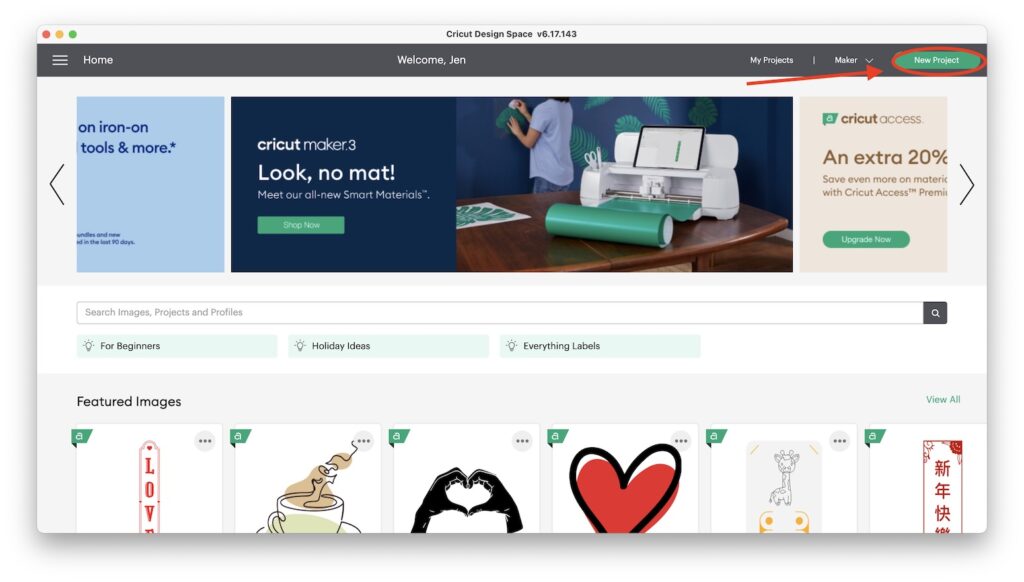
Step Six: Upload Your Procreate Design and Add to Canvas
Now, on your new canvas, you’ll see the import toolbar on the left side of the screen. At the bottom, you’ll see the Upload icon.
When you click that, you’ll open the Uploaded Images page. Then, to upload a new file, click the Upload Image button.
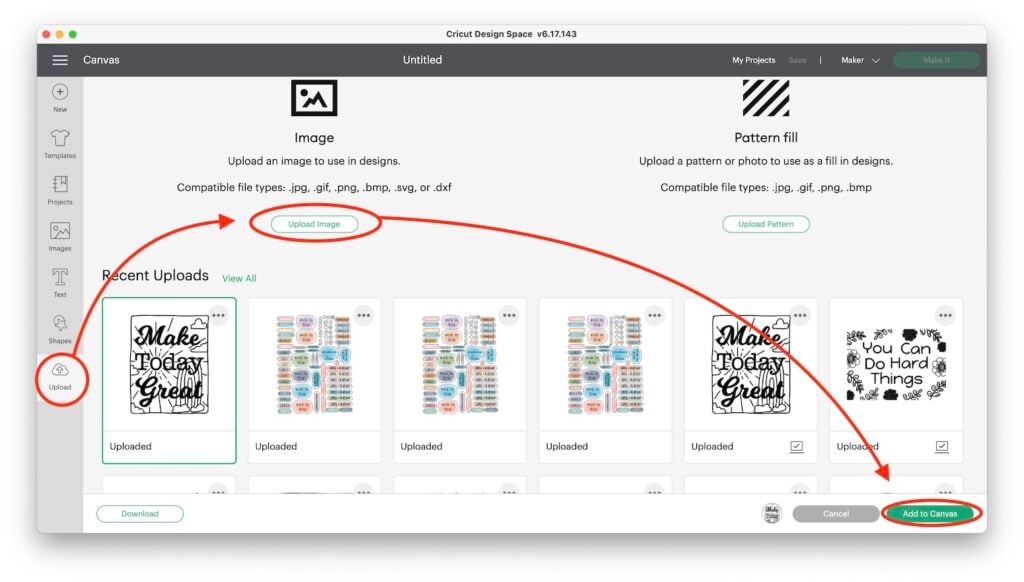
Next, a new page will open and you’ll see a button that says Browse. Grab your file, and click Upload.
Then, back on the Uploaded Images page, click on your design to Select it. Next, hit the Add to Canvas in the bottom right of your screen.
Step Eight: Size Your Drawings to Fit Your Canvas Boards
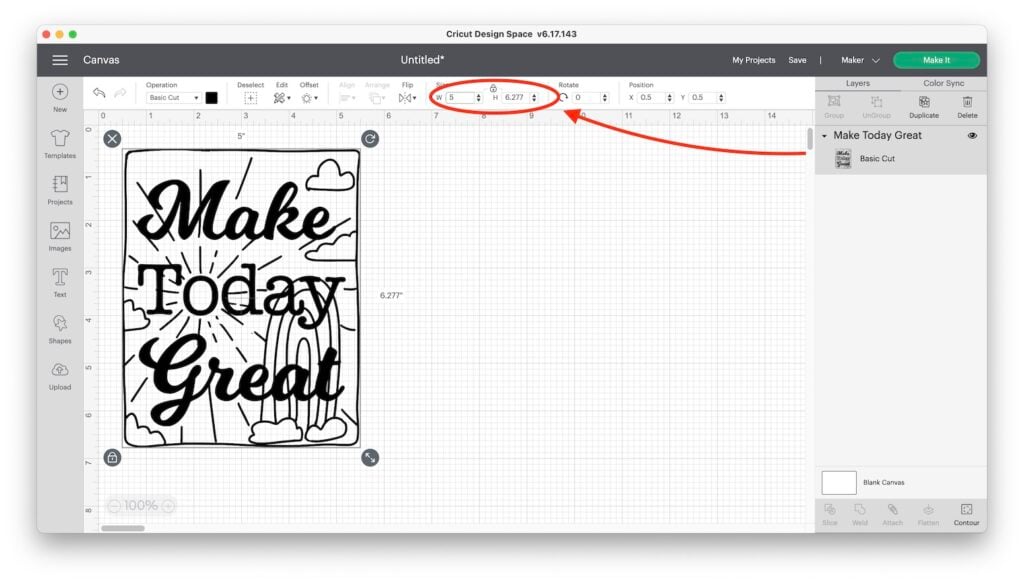
Now, on your canvas, you’ll notice the design came in way too large for our little 5″ x 7″ canvases. So let’s go to the top toolbar and in the Size section, change the width to 5″.
This automatically changes the height as well and keeps the proportion. You’ll notice that although our Procreate canvas was 5″w x 7″h. The design is 5″w x 6.277″h. That’s because the PNG is the size of the image, not of the canvas.
Optional: Create a Simple Shape Template
Now, you may not want your design to be the entire 5″ width, but a little smaller.
So, to really see what your design will look like on the canvas panels, add a rectangle Shape from the left-side toolbar. Unlock the shape and make it 5″x 7″.
Next, change the Operation from Basic Cut to Pen at the far left of your top toolbar.
Now you have a simple shape template you can use to size your design for your canvas panels.
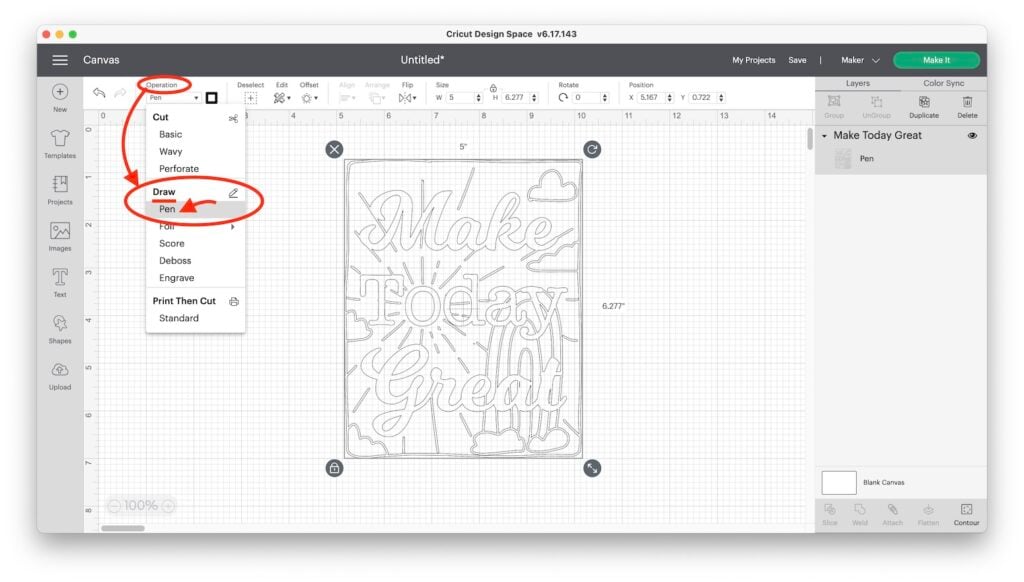
Step Nine: Change the Operation of Your Design to Pen
Now that you have your design sized to what you want it to be, you can change the Operation of your design from Basic Cut to Pen. Again, this is at the far left side of your top toolbar.
And you’re ready to go! It was THAT SIMPLE.
Step Ten: Save and Make it!
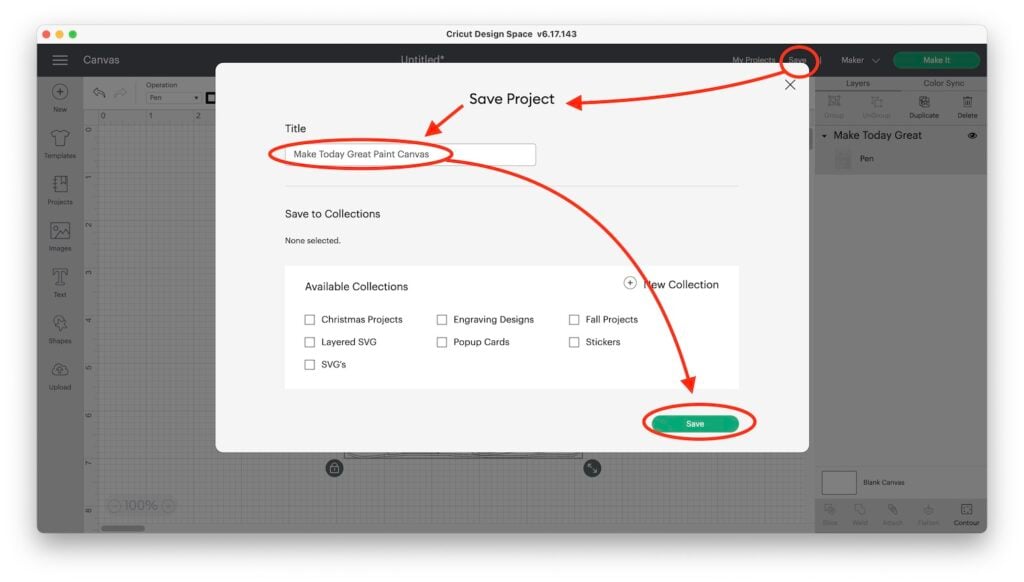
Although we could just hit the Make it button in the top right corner, I usually recommend you save your project at this point. Because, if something goes wrong after this you will still have the project saved and won’t have to start over.
Next, to Save your project hit the Save at the top of your screen. This opens up the Save Project window where you title and then have the choice to add your project to a Collection you’ve created. Once done, click the Save at the bottom to close this window.
NOW- hit the green Make It button in the top right corner of your screen!
Step Eleven: Change the Material Size and Mirror Your Drawing
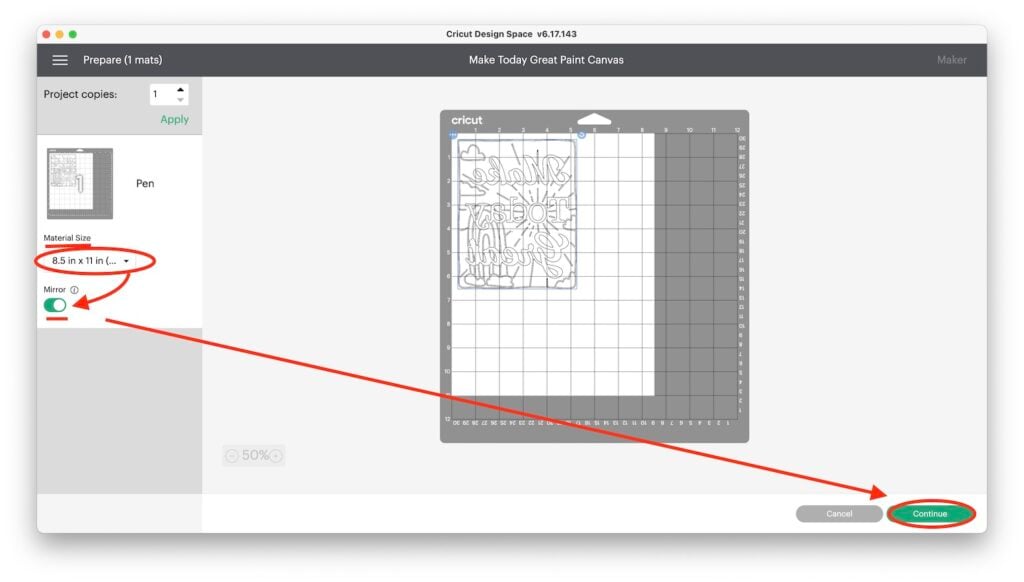
Moving right along, the next screen is your Mat Preview Page and shows you a representation of your cutting mat with your design on it.
First, change the Material Size in the drop-down menu to 8.5″ x 11″ (letter-size).
Now, see that toggle switch on the right side of the canvas? Click on it to toggle it on so that your design flips and is mirrored. You can see what that looks like below.
Step Twelve: Select Laser Copy Paper as Your Material Setting
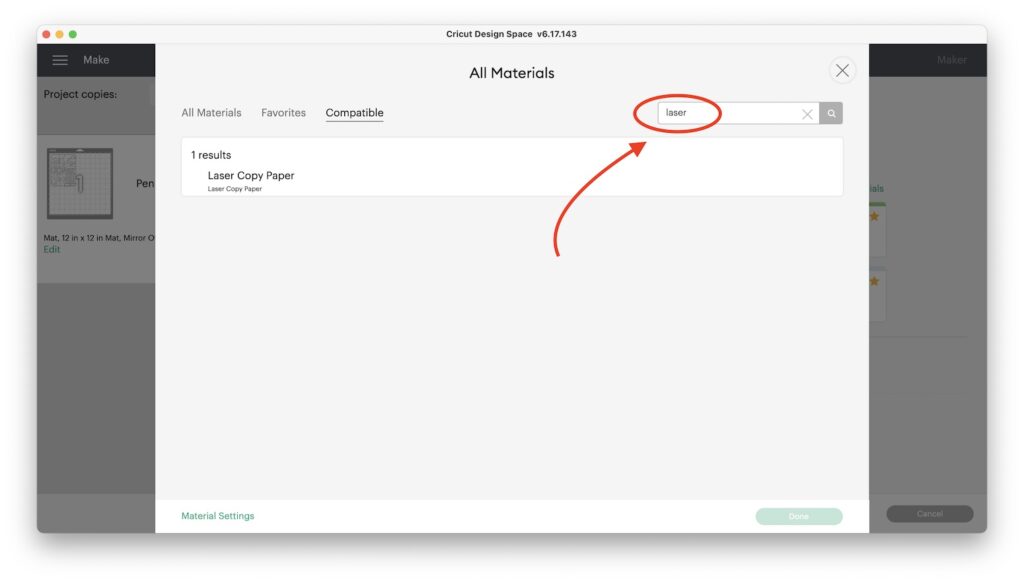
Next, under set Material Settings go to Browse All Materials and type laser into the search bar. This will bring up copy paper. Select this as your material.
Step Thirteen: Prep Your Mat and Place the Infusible Ink Marker in Machine
Start by placing the laser copy paper on your mat as shown below. Because the paper is so thin, you’ll want to use a light grip mat if you have it.
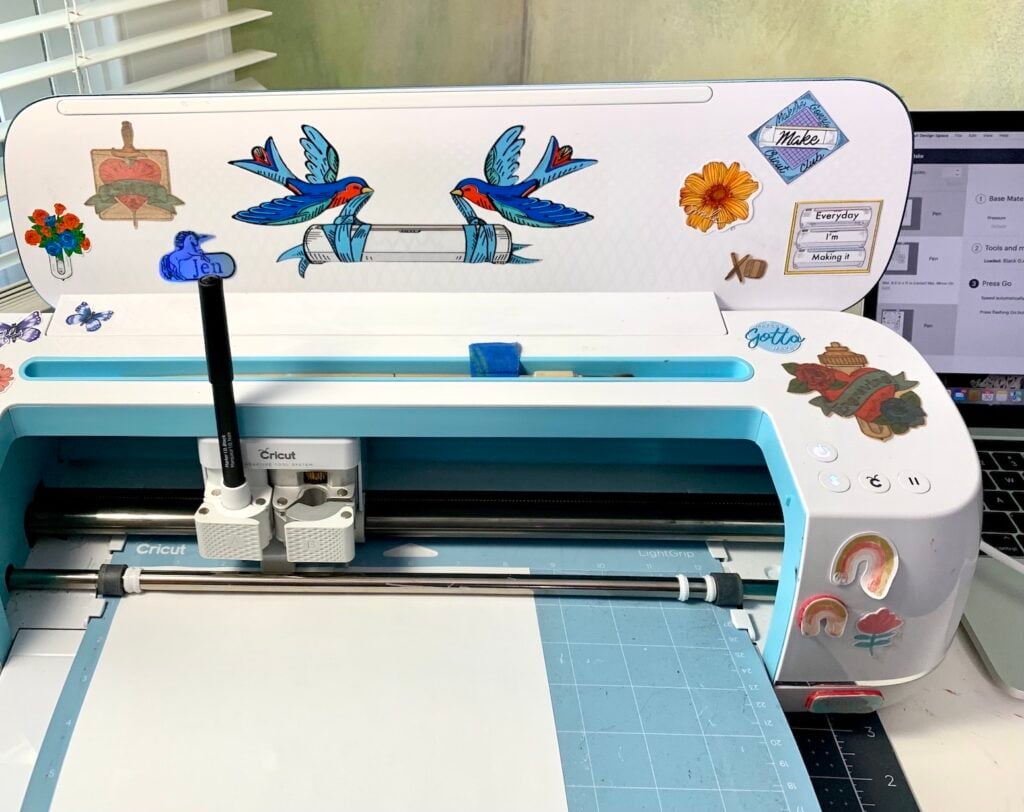
Next, open carriage A by unclamping it. Then, uncap your Infusible Ink Pen and place it into the carriage making sure you’ve got it fitting securely. I used the 1.0 that I had, but you can certainly use a smaller size Infusible Ink pen as well.
Finally, load your mat by hitting the Load/Unload button on your machine.
Step Fourteen: Make it!
When everything looks good, and the Cricut button (the C on the Maker and Explore Air, and the triangle on the Explore 3 and Maker 3) starts blinking green you are ready to press it to start drawing.
Next, the Infusible Ink pen will start to draw, and everything should look like it does below.
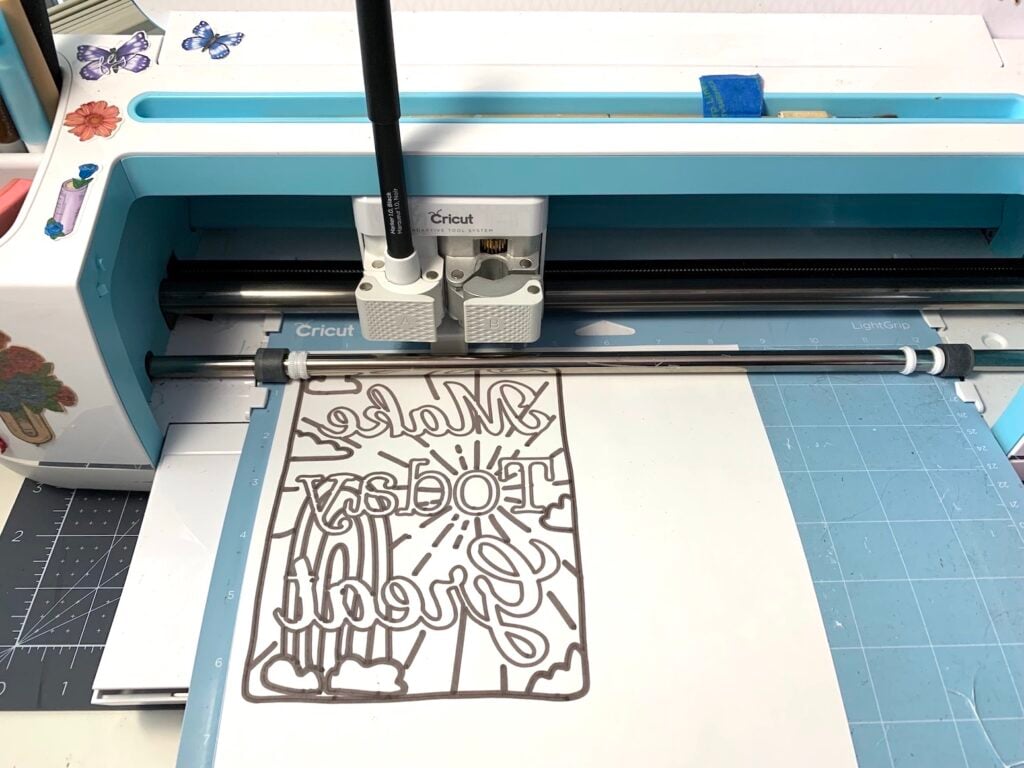
Once it’s done, Unload the mat.
Then, flip the mat upside down and begin to peel the mat away from the paper so that the paper doesn’t curl.
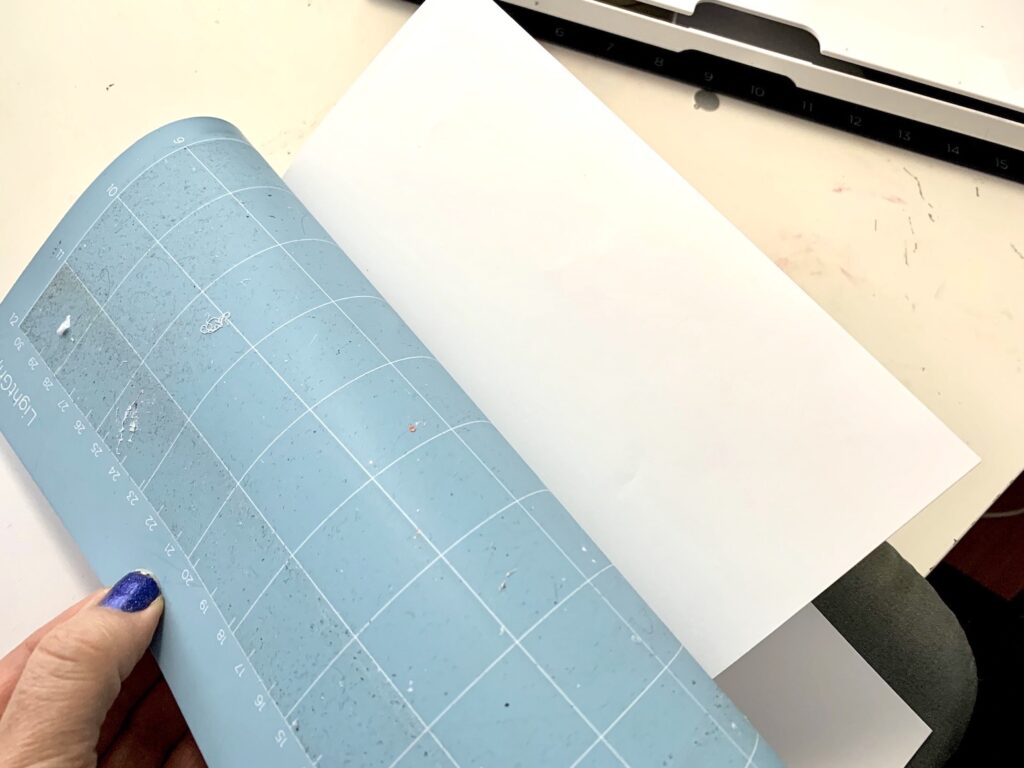
Step Fifteen: Setting the Temp for Your Press
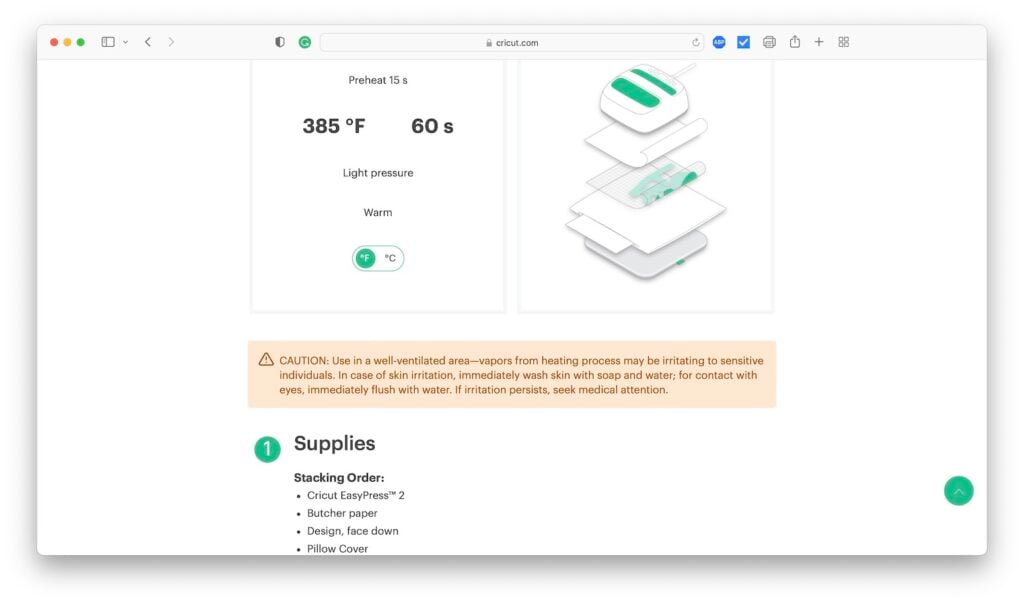
First, turn on your Easy Press 2 or Easy Press. I used 315 degrees with 60 seconds the first time I tried this and got a nice subtle grey that was easy to see. But it was still easy to paint over and not have it show through my craft paint.
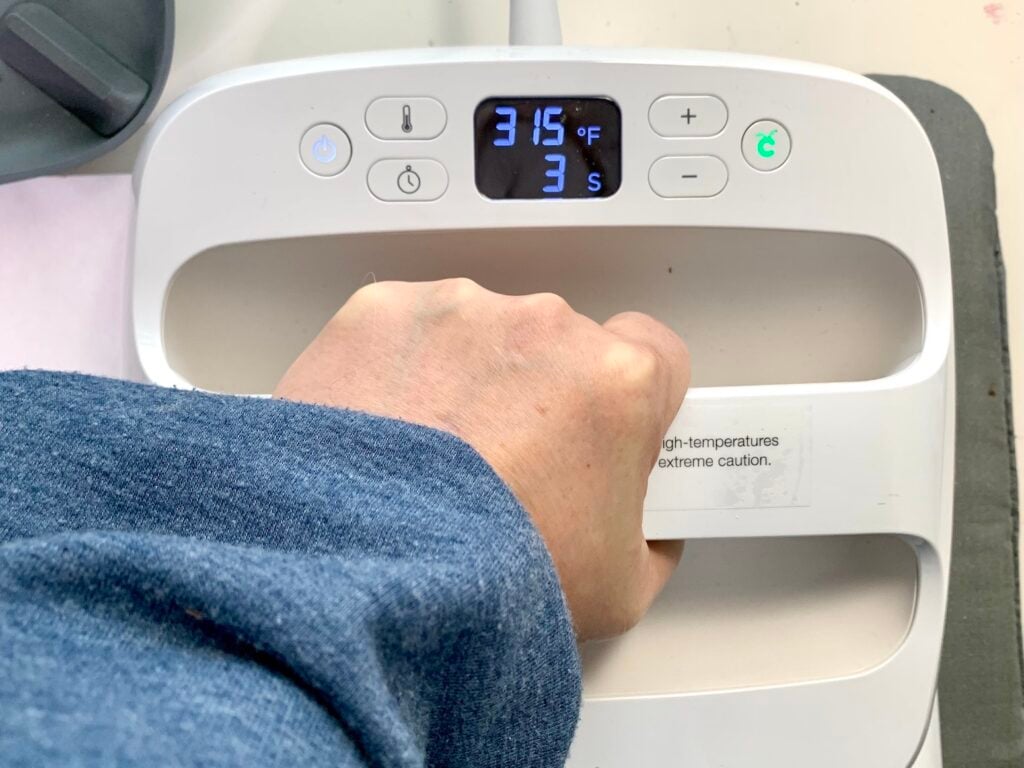
The second time I tried this, I followed the Cricut recommended temps for Infusible Ink on canvas pillows given in the Heat Guide below.
The Cricut Heat Guide
Did you know that you can easily find the heat setting for your projects by checking the Cricut Heat Guide?
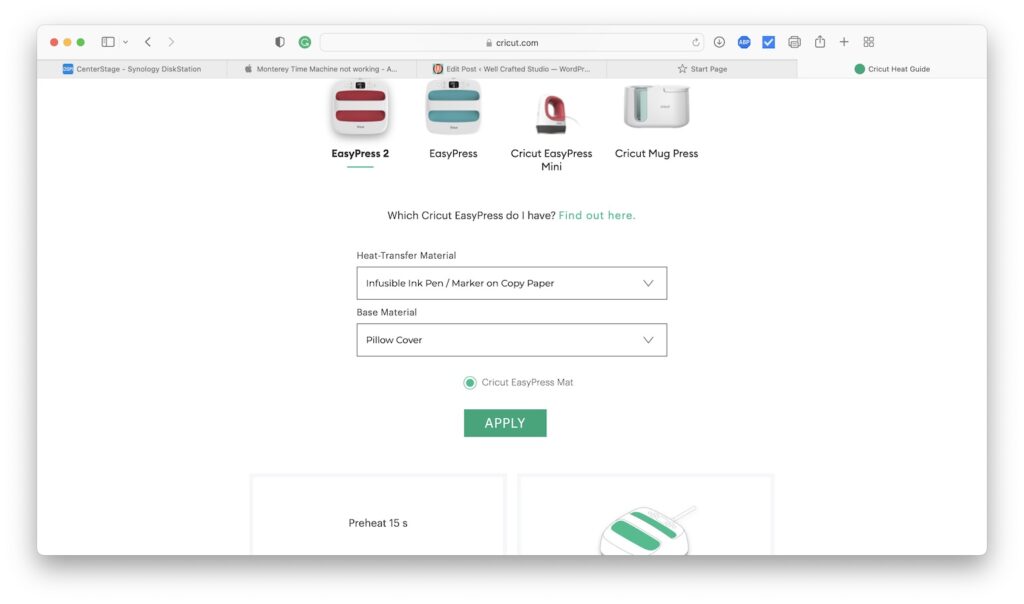
If you’d like, you can see the results with this higher temp with the Faith over Fear canvas in the pic at the bottom of the post.
Tip: You can grab this Faith over Fear design, the Make Today Great, PLUS two other designs in my Free Library.
NOTE: The higher temp (385) and time did make it darker, but I’m not sure I like that since we’re painting over the lines with craft paint. Also, the difference wasn’t crazy huge so it may not matter.
Step Sixteen: Create a Stack
When you use the Cricut Heat Guide, it will give you instructions as well as the recommended temps for your project.
But first, one thing that we need to pay attention to is the Stack. This is the order in which we stack things to press. From bottom to top-
- Easy Press Mat or Ironing Blanket
- Cardstock to protect the Mat
- Canvas Panel face up
- Infusible Ink Transfer face down
- Unwaxed Butcher Paper OR sheet of copy paper
- Easy Press
Here’s what it looks like on the Cricut Heat Guide…
And here is a pic of what it looks like before you press.
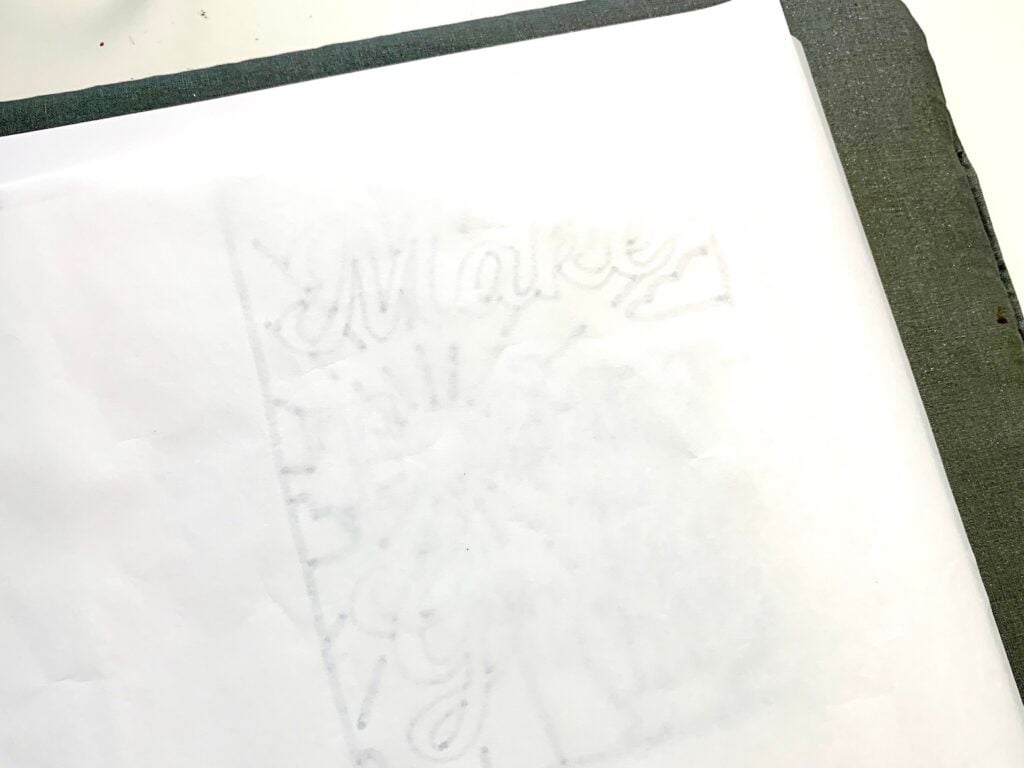
A Quick Tip- I do recommend you use the Cricut Heat Resistant Tape to keep the copy paper in place (otherwise, it’s hard to check the transfer because the copy paper wants to lift with the butcher paper).
So you can see how I created a hinge of sorts at the top with the heat-resistant tape in the next pic of this post.
Step Seventeen: Apply the Infusible Ink Transfer to the Canvas Board
Now, it’s time to do your transfer! Since you have the stack created, and your Easy Press warmed up, you can go ahead and press your canvas!
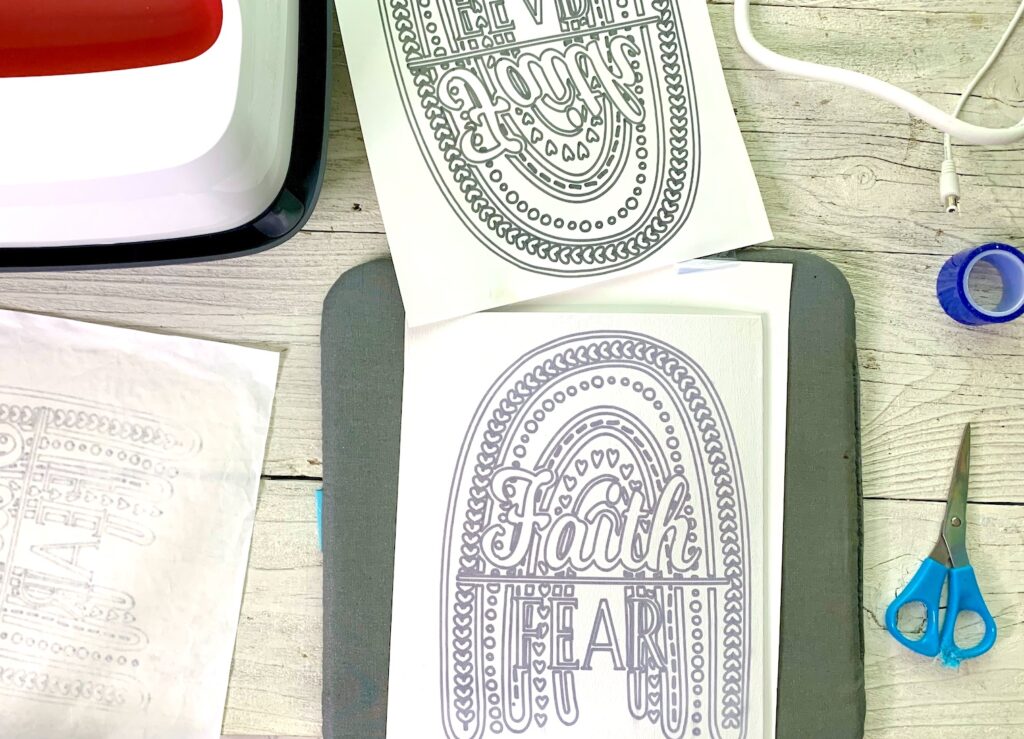
AND TA-DA!!! A DIY Paint Party Canvas with Procreate + Cricut!
What is Procreate and Who is it For?
It’s SO AMAZING! Seriously, this combination will just blow your mind. If you’re a Cricut user who would like to create their own designs but doesn’t have the time or energy to learn complicated (and expensive) pro design software, Procreate is a must-see.
Procreate is NOT just for artists. And it is easy to use.
Not only is Procreate for iPad a one-time fee of only $9.99 in the Apple App Store, but it comes ready to use with hundreds of free brushes, textures, and free color palettes. I’m demoing with the iPad version, but you can also use Procreate Pocket with your iPhone too.
Want to Know More About What You Can Do with Procreate + Cricut?
So I use Procreate all the time to create my Cricut designs and have made mugs, cards, notepads, layered stickers and tags, dishtowels, engravings, and t-shirts, among other things.
So check out my Procreate YouTube playlist, or the Procreate category here on my blog- I think you’ll be amazed at what’s possible.
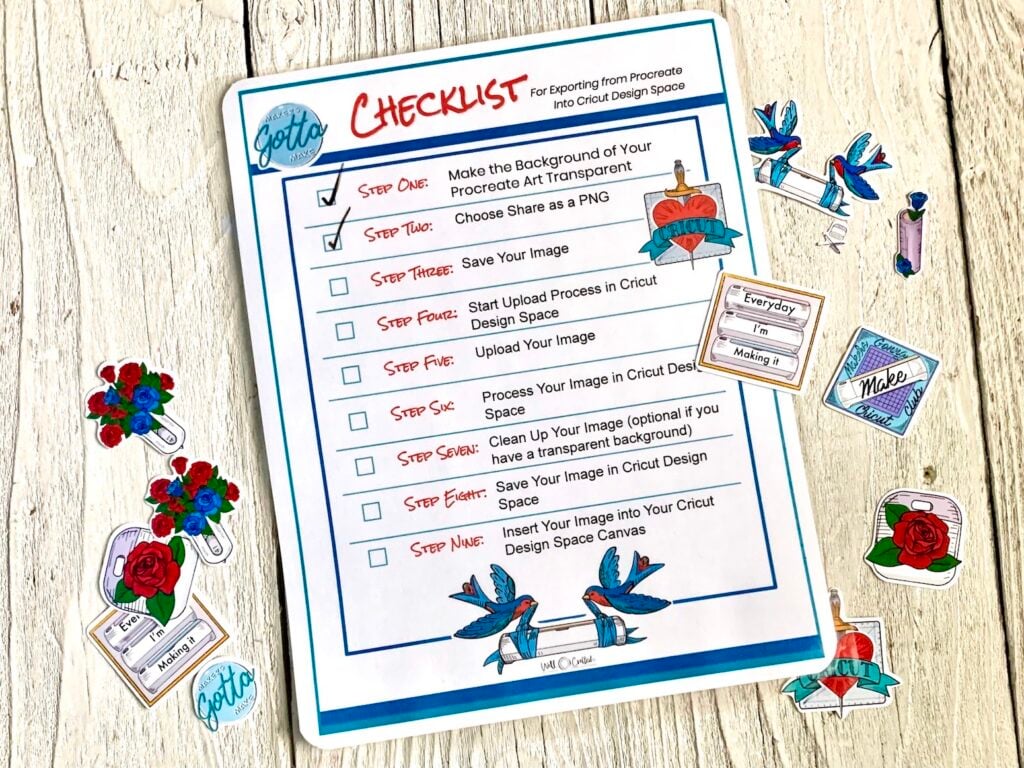
AND as a next step, be sure to visit my Free Library for free Procreate brushes, stamp sets, and color palettes. You can also find a printable Checklist for Uploading Procreate to Cricut!
Join the Procreate for Cricut + Silhouette Creators Facebook Group!
Looking for a community to learn and grow in? This Facebook group is amazing at encouraging its members to just try something. AND, I do a lot of teaching in it.
I’d love to have you join us- be sure to bring your questions!
Love This DIY Paint Party Canvas with Procreate + Cricut? Share It!
Finally, if you found this tutorial helpful, please like comment, or subscribe at any of the links below. I really appreciate your support!!!
Thanks for Reading,




This is amazing! I’ve been trying to figure this out… What kind of paper is needed? Is it just regular copy paper from like Staples??
It’s laser copy paper, not inkjet, but it is regular printer paper you can buy by the ream at Staples or anywhere. It’s just got a different coating than inkjet paper so it works better. I’m so glad you like this!!!
Love this project! It will be perfect for my granddaughter (she’s 7) when she’s here next week. I think I’ll even let her draw the design she wants to paint. Thanks for all the great projects so far!
This would be wonderful for a girls’ sleepover!