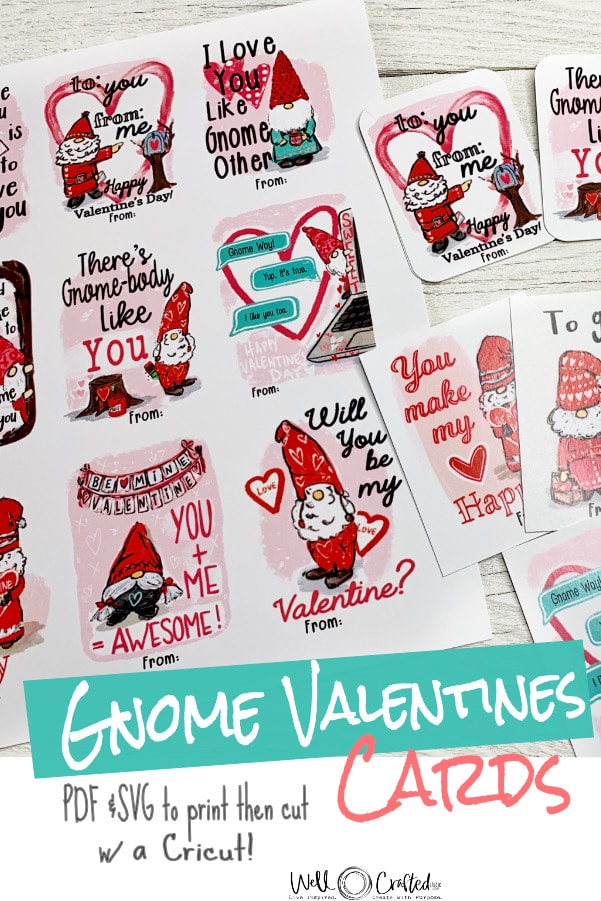
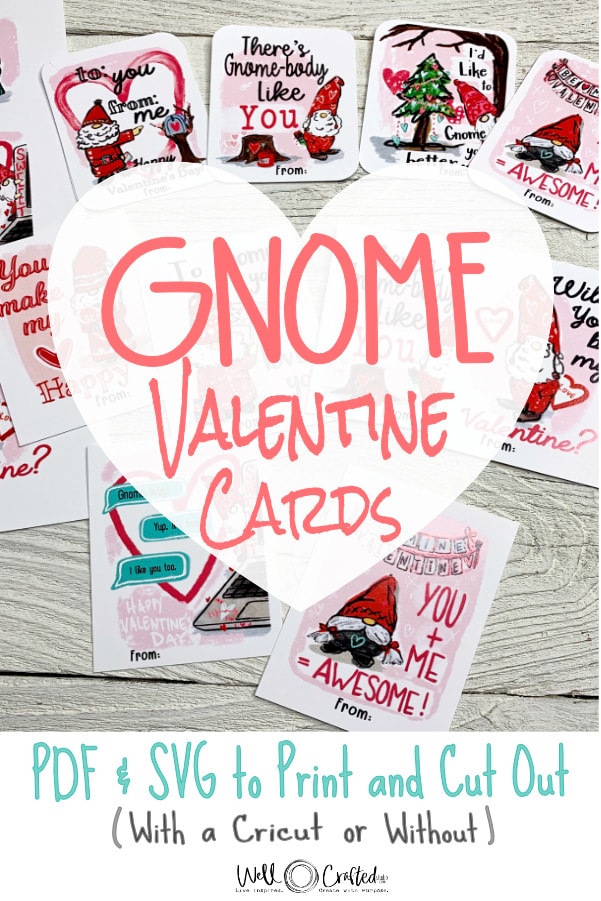
They’re JUST SO CUTE! I know, I said the same thing about the Cabbage Patch Kids and Care Bears in the ’80s. And I might have said it about Japanese Anime characters in the 2000s along with any and all baby animals. But, there’s just something about Gnomes right now. They’re cute and cuddly but just gruff enough that you want to hold them in your hand and squeeze them. (A little like Grumpy Smurf, now that I think about it.) So, when Valentine’s rolled around this year, I gave my Christmas Gnomes a Vday makeover. Last week I posted about my Valentine’s Gnome Stickers, and this week, I have this tutorial on how to make DIY Gnome Valentine Cards!
Two Ways to Cut the Deck
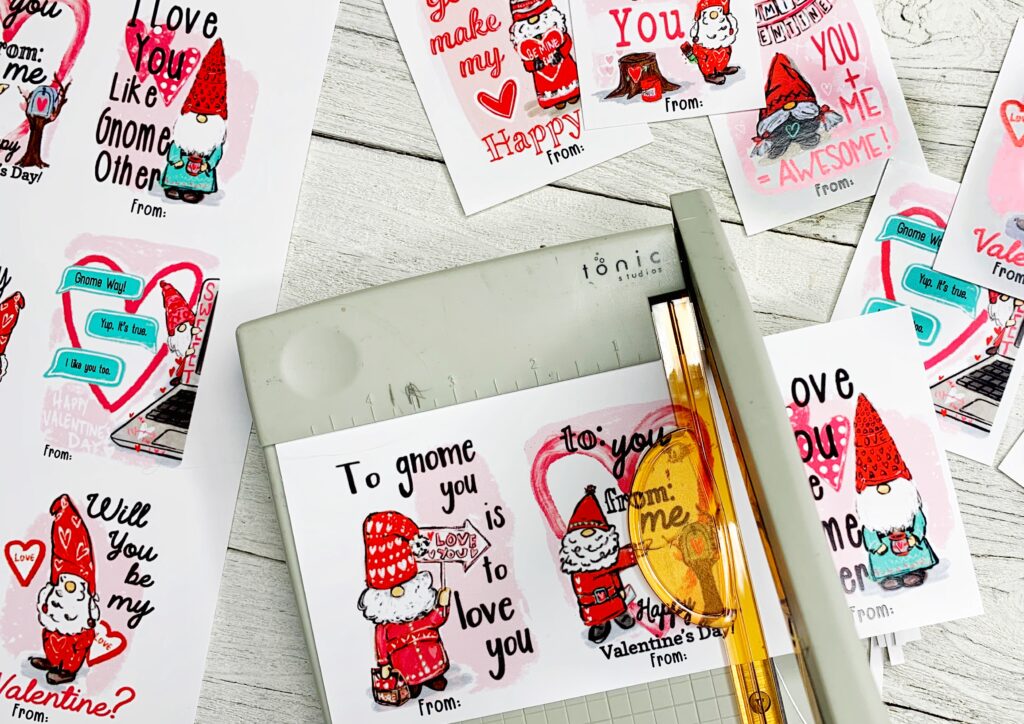
Like the stickers, you can (option #1) just print these cards at home and then cut them out with a scissor.
Or (option #2) if you have a cutting machine, using an SVG to cut the PDF into card shapes is easier than it looks. I’ll show you how below!
Why the PDF and SVG Combo
Cricut’s actual official print then cut feature won’t allow you to do a full-page print. The largest you can do is 6.75″ x 9.25″ So as a workaround of sorts, I use a PDF and an SVG combination. There are a few reasons this gets tricky.
For instance, no print and cut also meas there are no registration marks for your Cricut to read and adjust its alignment with. So you would have problems lining up the design and the cut.
The workaround is in the design. Cricut automatically aligns the SVG to the top left corner of its mat with a .25” margin at the top and side. So when I created the design, I gave it a .25 margin at the top and left side.
Then all I had to do is print the PDF and then place it in the upper left corner of my cutting mat!
Just to double and triple check though I usually do a practice cut on a plain sheet of cardstock. Then I use this as a template to place over my design. I’ll show you in the tutorial below.
How to Make DIY Gnome Valentine Cards
Supplies and Materials
• Gnome Vday Cards PDF from the Creative Resource Library (they’re under project templates and designs)
• Vday Card SVG file from the Creative Resource Library (if you plan to cut them with a Cricut + and that’s under project templates and designs too)
• Cardstock (I used a heavyweight glossy, but you don’t have to)
• Printer (or take the files to a print office like FedEx Office- I did this)
• Paper Cutter or you could use…
• Cricut Maker or Cricut Explore Air 2
• Light Grip (blue) Cricut Cutting Mat
• Computer or iPad w/ Cricut Design Space
Directions
Step One: Download Gnome Valentine Card PDF and the optional SVG file.
In my Creative Resource Library, under Project Templates and Designs, you’ll find the Gnome Vday Card PDF file. You’ll also see the Cards SVG file to cut them with your Cricut. Again, you only need the SVG if you plan to cut these out with a cutting machine. If you’re planning to cut them out by hand, then you do not need the SVG file.
Step Two: Print out the PDF’s
You can do this by opening the file and then sending it to your home printer, OR you can save the file and take it to a print office. I actually had mine printed at FedEx Office because our printer doesn’t play well with cardstock. I try to work with it, but there’s no love. ?
✂️If you plan to skip the Cricut and hand-cut these cards, then cut your cards and you’re done!
Step Three: Upload the SVG to Cricut Design Space
However, if you are planning to use the Cricut, then you’ll want to upload the SVG file into a new canvas in Cricut Design Space.
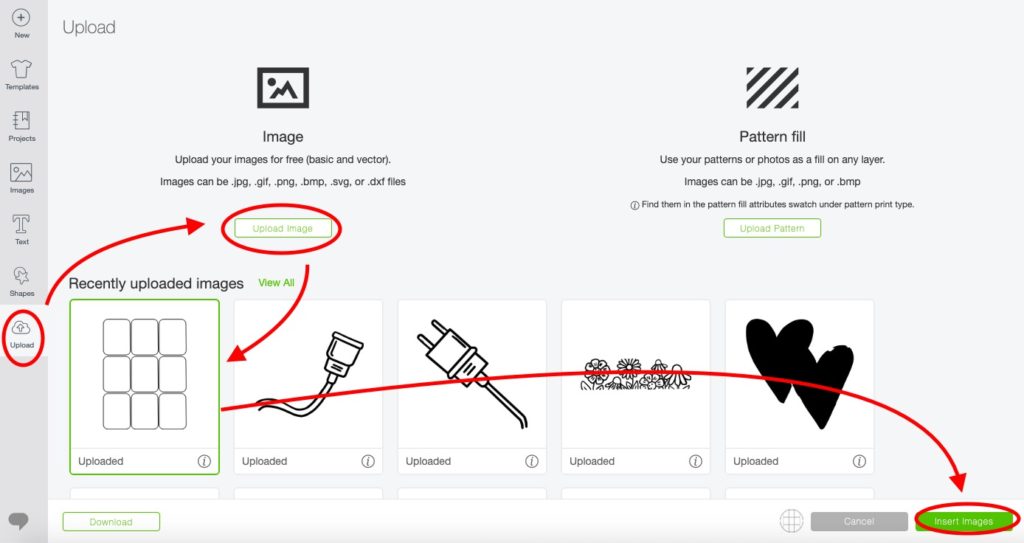
To do this, open up a new canvas in Cricut Design Space and select “Upload” from the side toolbar. Next, select “Browse” and grab your .svg file.
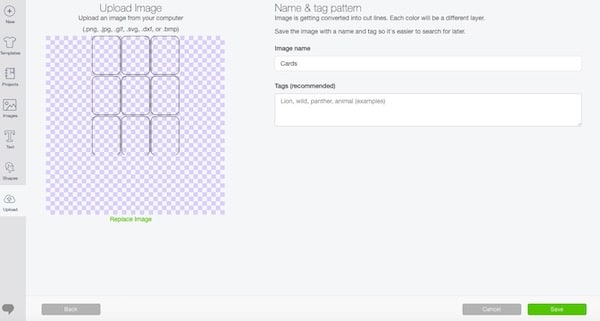
In your uploads, select the new file and click “Insert Image.”
Step Four: Select All and Make Adjustments
Next, in the top toolbar, change the height of the image to 10.4.” Because the proportions are locked this will adjust the width proportionally.
With all still selected click on the “Attach” option at the bottom right of your screen.
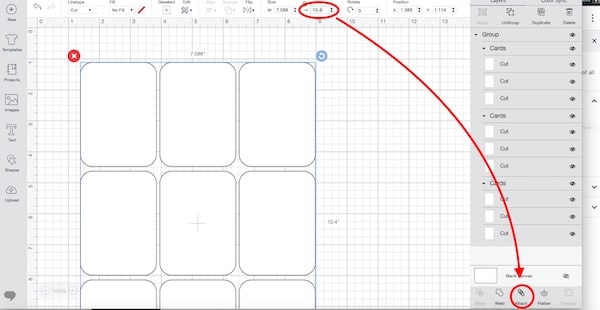
Then, click on the “Make It” in the top right corner of your screen!
Step Five: Cut a Sample Template first
Cricut will automatically place your SVG in the top left corner of the mat, allowing a 1/4″ margin at the left and top of the mat. Because I adjusted the PDF’s so that they are aligned to the top left corner as well. This means you don’t have to guess at how to get the SVG and your printed image to match up.
Now you’ll need to make sure your machine is connected. Then, under the materials setting, choose one of the material options that fit your material. I tested the cut with a piece of heavyweight cardstock (I had 110lb.-See note below).
FYI- because Cricut doesn’t have a 110 lb. setting, I added my own as a custom material and set the pressure to 305. Then I tested it to see if I needed to adjust the pressure further.
When it’s done cutting DON’T unload the mat. Instead, peel up the edge of the paper to check the cut. If it is not cut through then you can push the “C” and it will repeat the cut.
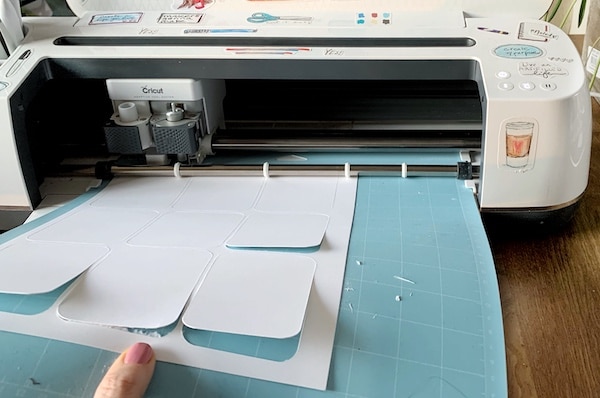
Once it’s cut through, unload your mat. To remove the cards in a way that doesn’t bend them, flip the mat upside down and gently peel the outline of the cards away from the mat without tearing it.
Use this outline as a template to check your design. You may need to adjust your paper placement slightly so that the images and the cuts align.
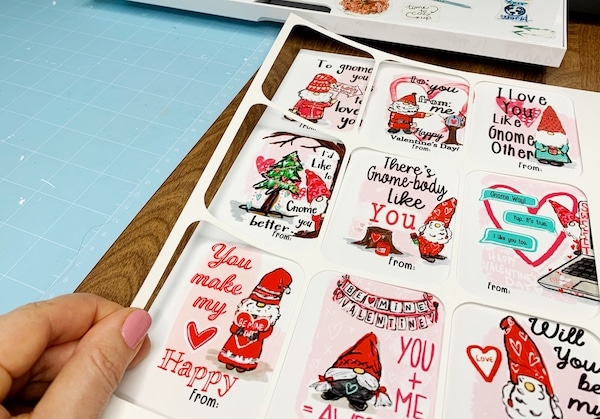
Step Six: Cut out your Card Designs
Follow the same steps as before, but if you are changing the type of paper be sure to change your Materials Settings before you cut. To do this, you click on the type of material you selected last. This will bring up your material options and you can select the new material.
Align your paper on the mat, and then press down and smooth your paper, so it adheres well to the mat. Load your mat into the machine, and then follow the prompts again on the screen to make the cut.
Step Seven: Check the Cut BEFORE you Unload the Mat
Again- this is super important. Before you unload the mat try to peel up a couple of the cards. IF they have not been entirely cut then stop, and press the “C” button again to repeat the cut. This makes sure that your alignment stays the same for the second cut.
Once you’ve cut cleanly through the paper, unload the mat.
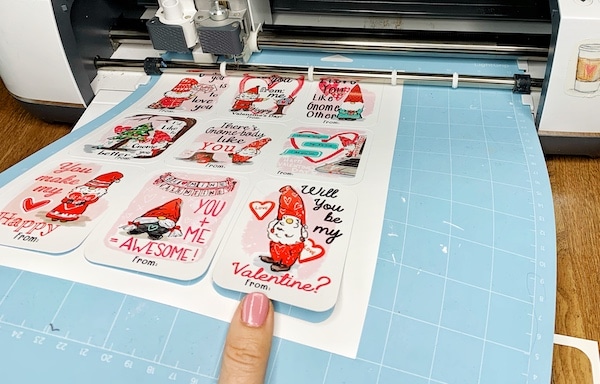
Step Eight: Finish the Project
And again, flip the mat upside down and gently peel off the cards and excess paper. This is an important tip because if you try to peel the cards off, they will probably curl.
And Done! You just Made Your OWN DIY Gnome Valentine Cards!
Because I’m giving these cards to my mom friends, I think I’m going to tie the card to a dark chocolate bar or tape it to a coffee gift card. It’s a little more grown-up than a box of Nerds. Or I may pair it with a tear-off memo pad and stickers!
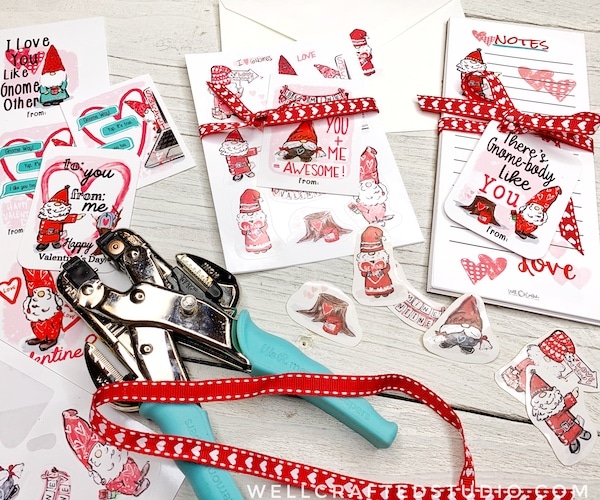
For More Inspiration…
If you loved this project, be sure to check out our other Gnome projects. If you LOVE the Valentine Gnome Memo Pad in the pic above ( the Vday option for this post), you can find the PDF’s for that project in the Creative Resource Library for a limited time! The matching Gnome stickers are available in the WCS Shop. And make sure you check back in a few weeks for some Leprechaun Gnomes!
Also, if you would like to know more about Procreate, I have a playlist of my Procreate tutorials on YouTube. I also have tutorial posts on this blog that teach you How to Draw Stickers in Procreate, How to Draw Snowflakes in Procreate, and How to Trace Photos to Make Stickers in Procreate.
Love this? Share it!
If you found the tutorial for How to Make DIY Gnome Valentine Cards helpful, please share it either on social media or by pinning the image below to Pinterest. I really appreciate your help with this!
Questions?
Also, if you have any questions about this project please ask by commenting on this post, through my contacts email, or by leaving a comment on my YouTube Channel. I’d love to help!

Want to Remember this post, DIY Gnome Valentine Cards? Pin the image below!


These are too cute! I am going to give them a try asap. Thank you for sharing!
Hi Fran! I’m so excited that YOU’RE excited to try these. It really is nice of you to take the time to comment. It really encourages me! Let me know if you have any questions-I’d love to help!
Jen
Brilliant work around for print then cut!! It always drives me crazy to waste so much material! I can see using this technique for sticker paper, waterslide paper, printable vinyl…oh, the possibilities!! Thanks for sharing!
Thanks Kay! I haven’t tried water slide decals yet but I totally agree! I love how there are constantly new things to discover!!! It’s so fun (rubbing hands together gleefully)!
I really loved your Advent cards so I was thrilled to see these for Valentine’s Day. I hope you keep it going with more holidays. These are so great and really easy to make. Thank you!
Thanks Maggie! It’s a lot of fun to make these. I was thinking it would be fun to make an inspiration deck but more holidays would be fun! I’m so glad you like them!