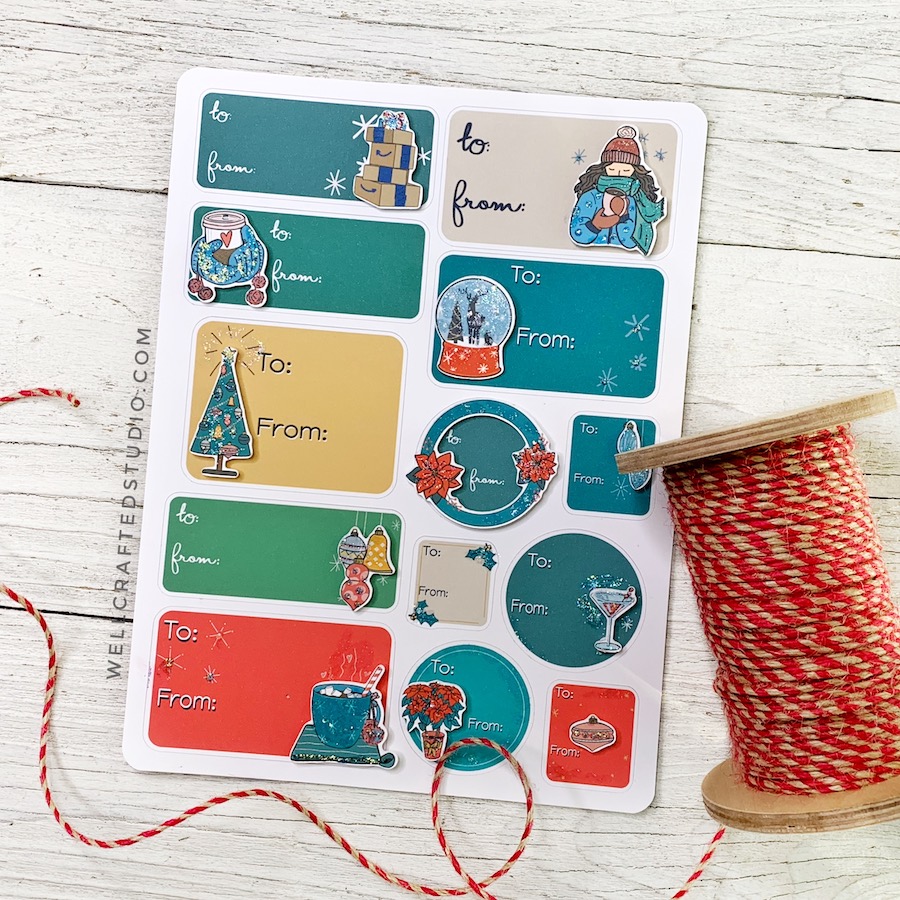
Merry Almost Christmas! No matter when you read this, these cute Christmas layered gift tag stickers will put you in the holiday mood. Hand-illustrated gift tag designs are stacked to create a fun 3-D effect that really stands out from other designs. And to really set these apart, we take it a step further by adding some easy (and no mess) sparkle with Stickles Glitter Gel. This is one of my absolute favorite types of design- the ones that look harder than they really are. In fact, you’ll be amazed at how simple these layered gift tag stickers with a Cricut are to make!
Get these FREE Holiday Layered Gift Tag Stickers!
Free! Yup! You don’t hear that much around Christmas time, but this sticker design is free to everyone who signs up with their email to get my weekly email newsletter (w/ freebies). You can subscribe at any time.
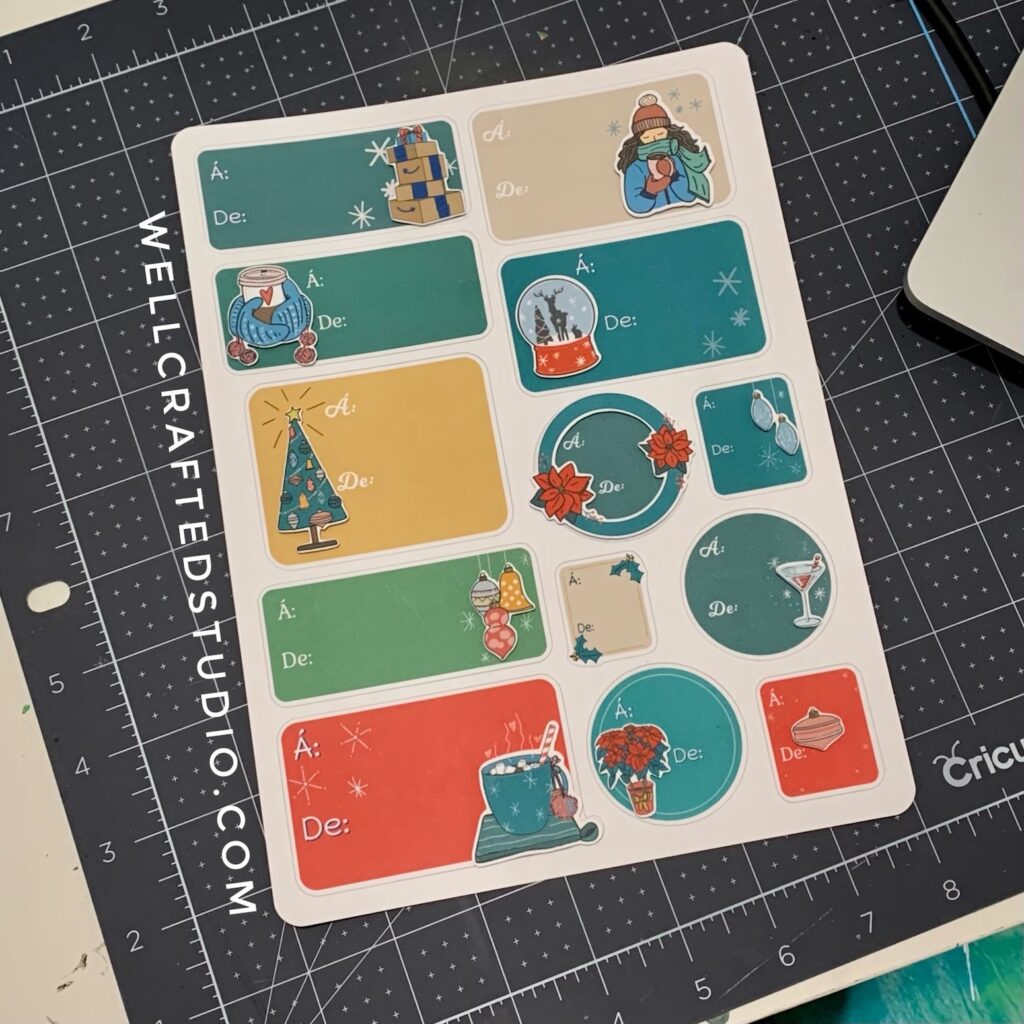
Available to download in both English and French. ❤️ Joyeux Noel!
Tutorial: How to Make Layered Holiday Gift Tag Stickers
Tools and Materials
- Printable Gift Tag Download from the Well Crafted Studio Resource Library
- Home Printer ( I LOVE my Canon Crafter’s Printer!)
- Cricut Explore, Explore 3, Maker, or Maker 3
- Computer or Mobile Device with Cricut Design Space
- Cricut Standard Cutting Mat
- Cricut Printable Sticker Paper (this is cardstock weight)
- Heavy Cardstock (white)
- Double-Sided Adhesive Foam Dots (I use my Cricut weeder with these!)
Optional:
- Stickles Gel, Stickles, glitter, or other sparkly adhesive accents
- Paper Trimmer
- Corner Punch
This post does include affiliate links. This means that if you purchase through one of these links I may get a small commission, at no additional cost to you. Thank you!
Directions
Step One: Upload Top and Bottom Layers into Cricut Design Space
Download the free layered stickers from my Free Library or create your own in Procreate. I show you how in this post. Open a new canvas and upload the top layer into Cricut Design Space.
Choose Complex.
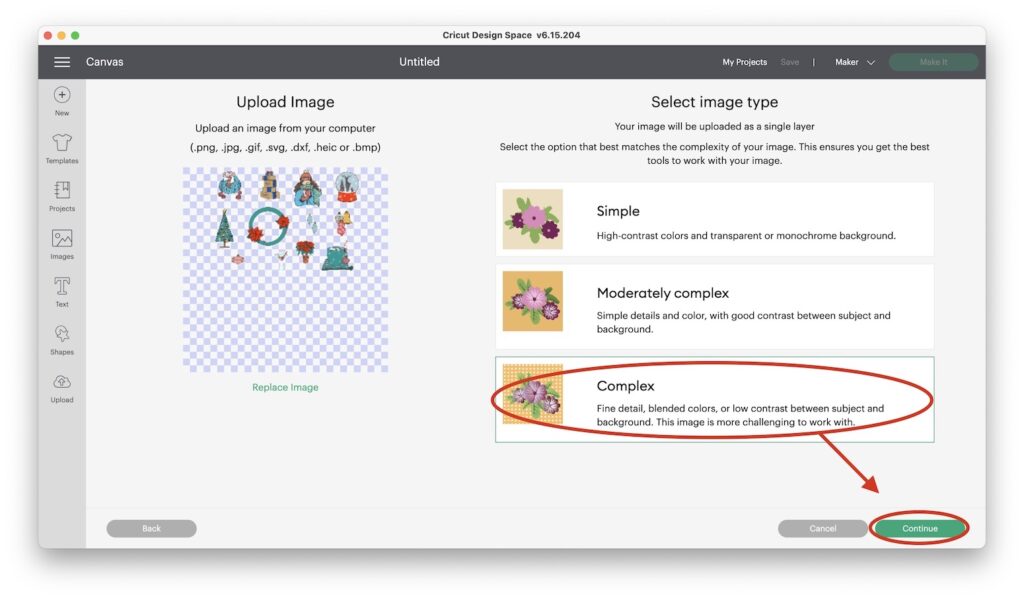
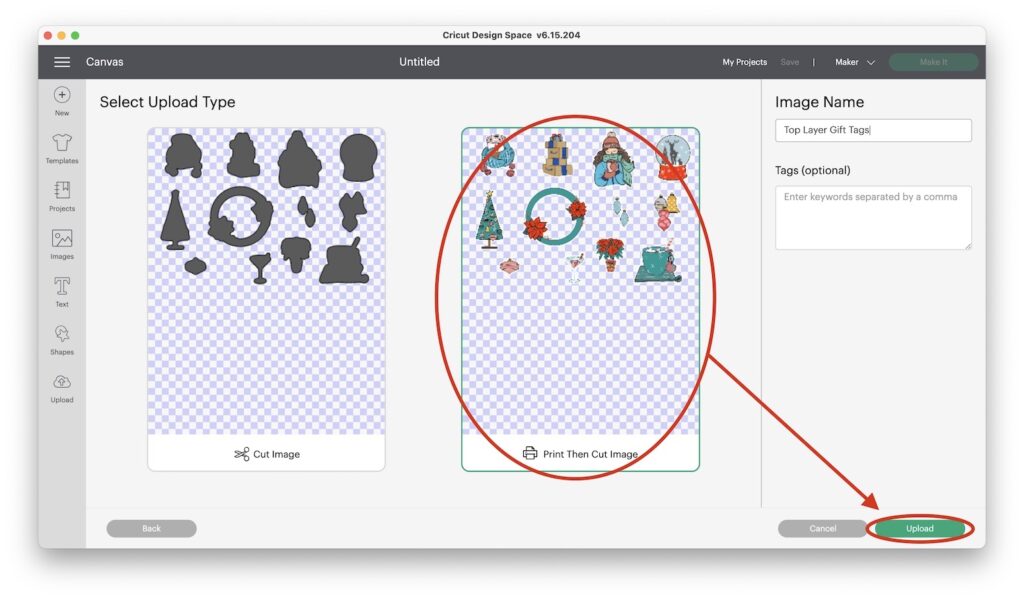
Next, Save as a Print then Cut and repeat with the bottom layer of the gift tags.
Step Two: Insert Image into Canvas and Size
On the Uploaded Images Gallery page click on both the top and bottom layer images to Select.
Then hit the Insert Image button in the lower right corner.
This will open up both designs in your new canvas. With both still Selected, go to the top toolbar, and in the Size section change the width of your images to 6.75.”
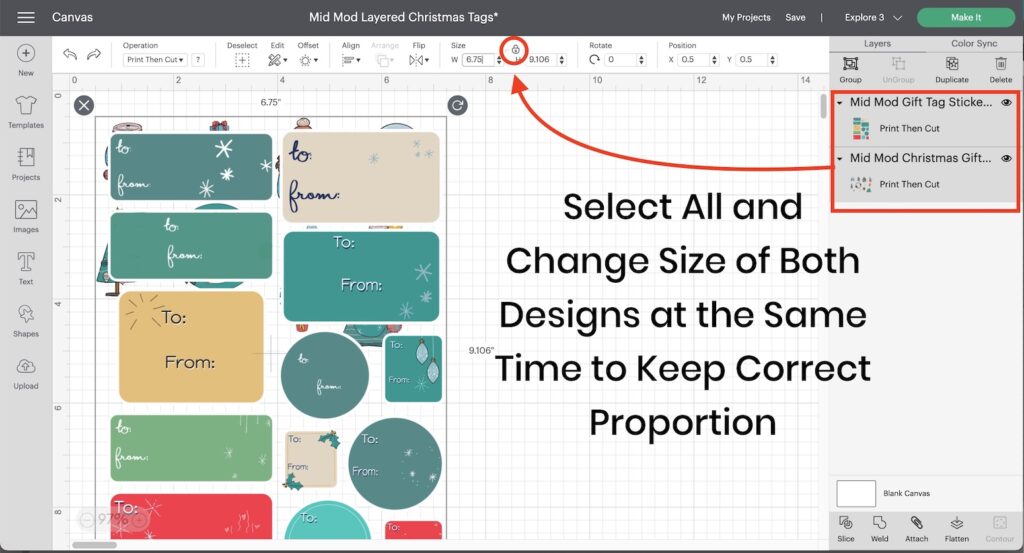
Because you have the constraints Lock on this will automatically change the height of the image to keep the proportions correct. Check to make sure that your images are sized to match.
You may have to use the Arrange in the top toolbar to send your bottom layer to the back if it is not. This overlap is just to help you see if both layers are the correct size in relation to each other.
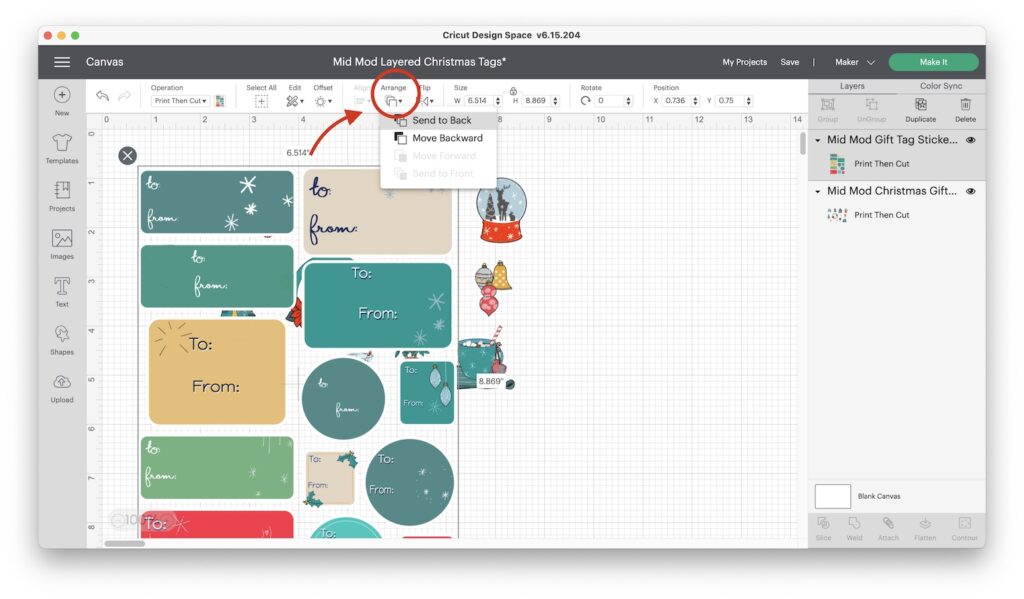
Note: Cricut Design Space will only allow you to make your print then cut images 6.75″ w. and 9.25″ high.
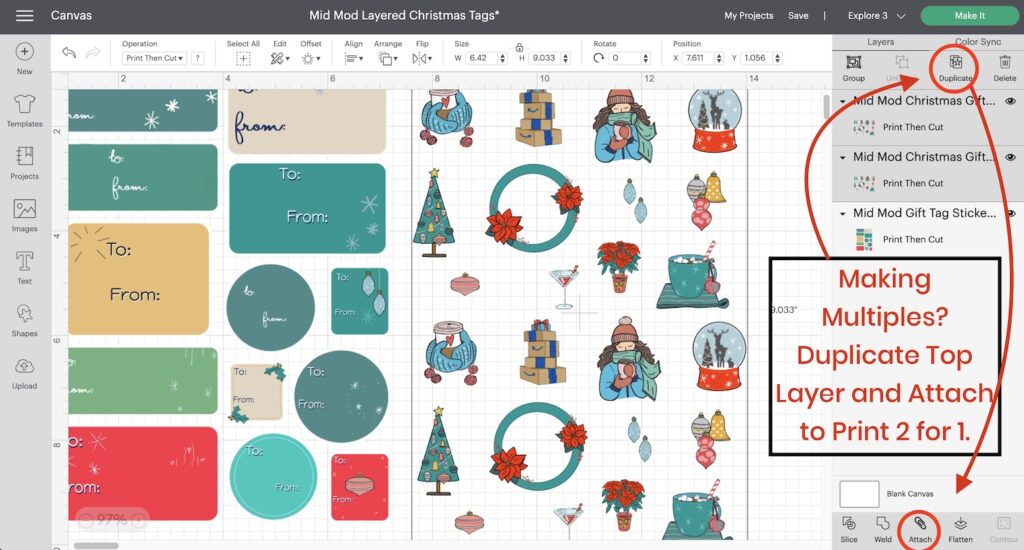
Step Three: Duplicate Your Top Layer (Optional)
Step Four: Save Your Project and Make it!
Once you’ve sized and saved your gift tags hit the Make it in the upper right corner of your screen.
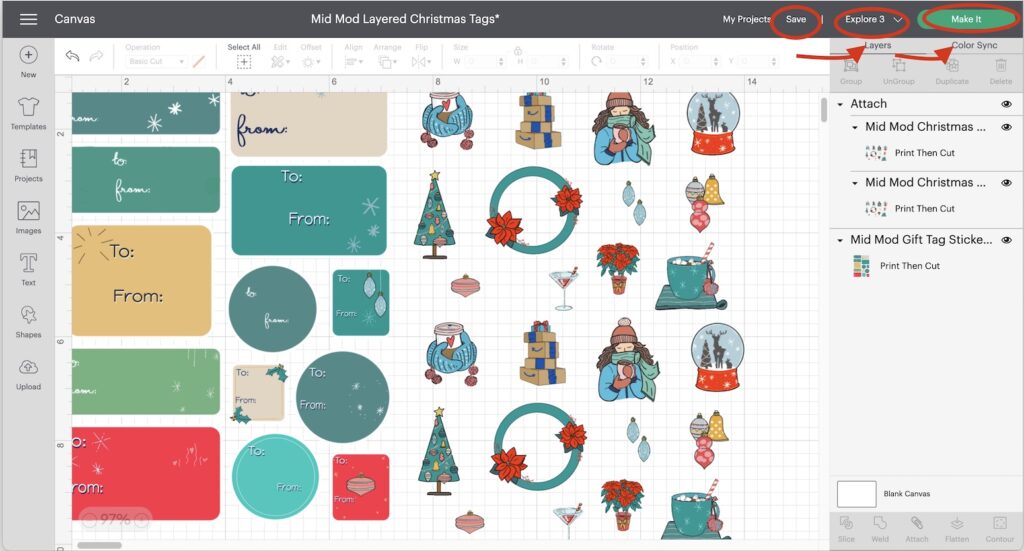
Continue from the Image Prep page (it has the mat image representations). Be sure that both the bottom and the top layer say Print then Cut.
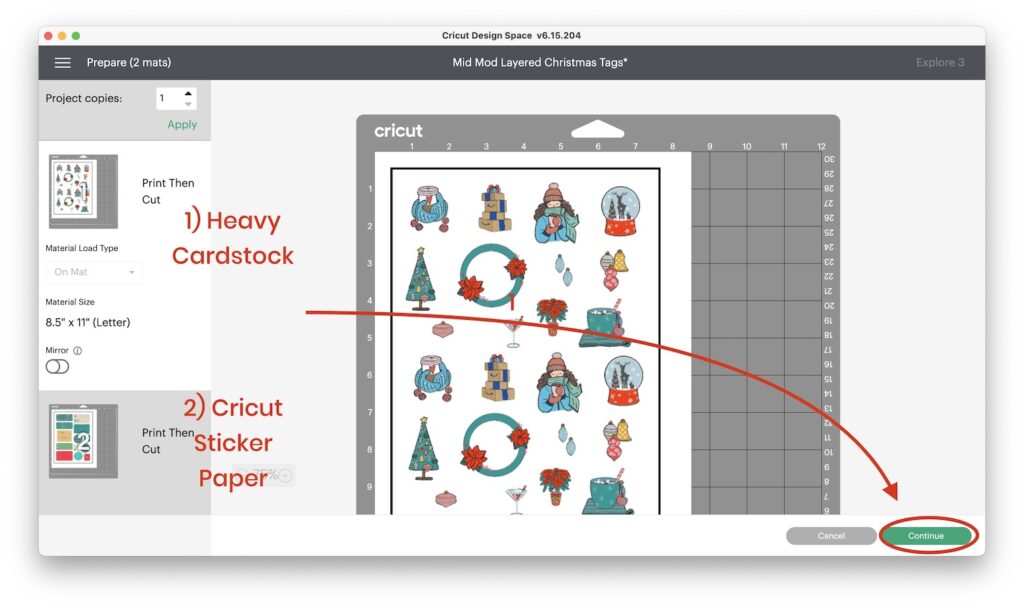
Step Five: Print and Cut the Bottom Layer
On the Material Settings Page, you’ll want to choose Print. This opens up the Cricut print box. Toggle off bleed, and Print.
Note: If you have a rear-feed printer, or want to access any of your printer’s other settings, then you would toggle on System Dialog and choose Rear-Feed. If you do have this option and are using cardstock then always use the rear-feed to avoid paper jams with the heavier paper.
Choose Printable Sticker Paper as your Material Setting.
This is Cricut’s setting for its printable sticker paper (cardstock weight) which we’re using for this project because it has the extra weight that we’ll need to support the foam adhesive and the little cut out decorations.
Once printed, place the paper on a green standard grip mat as shown on the mat preview page. Follow the prompts on the screen to print and cut your gift tags.
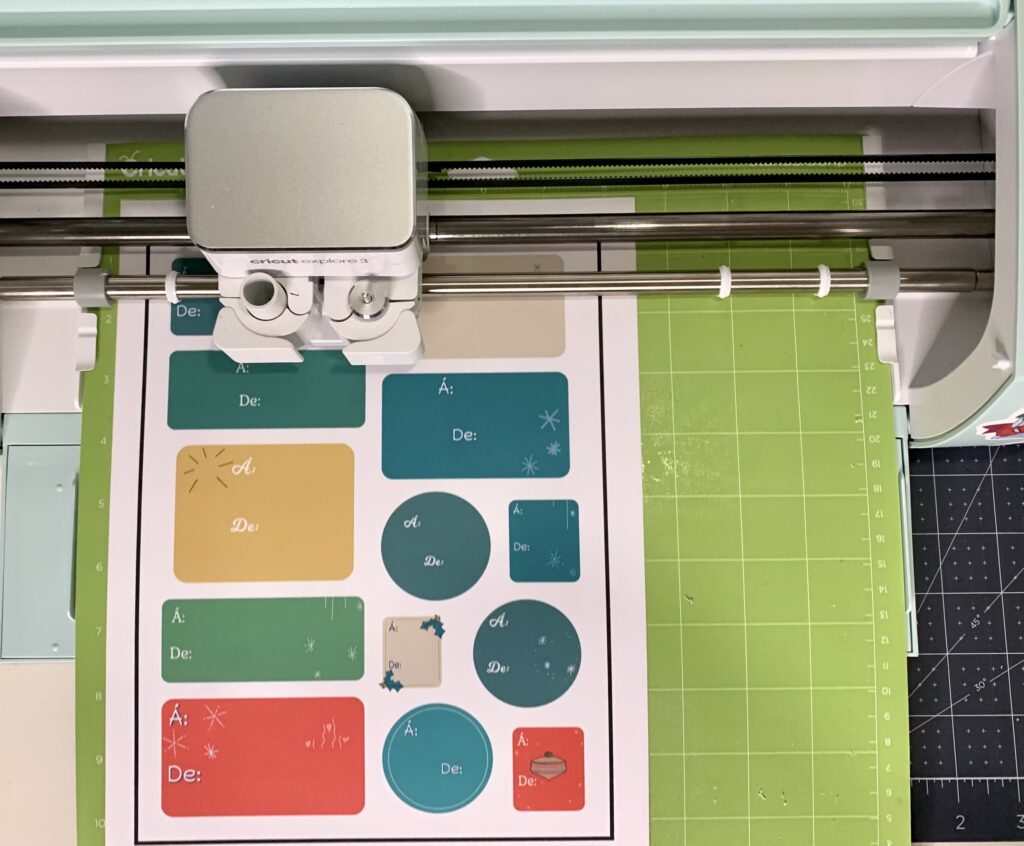
Step Six: Cut the Top Layer
Once you’ve finished printing and then cutting the bottom layer, it’s time to do the top!. For Material Setting choose the Heavy Cardstock setting and change the default to More if you’re using the 100 lb.- 110 lb. paper.
Place your printed top layer on your Cricut Standard Cutting mat as shown on the Mat Preview Page.
Then follow the prompts to cut your top layer with your electronic cutting machine.
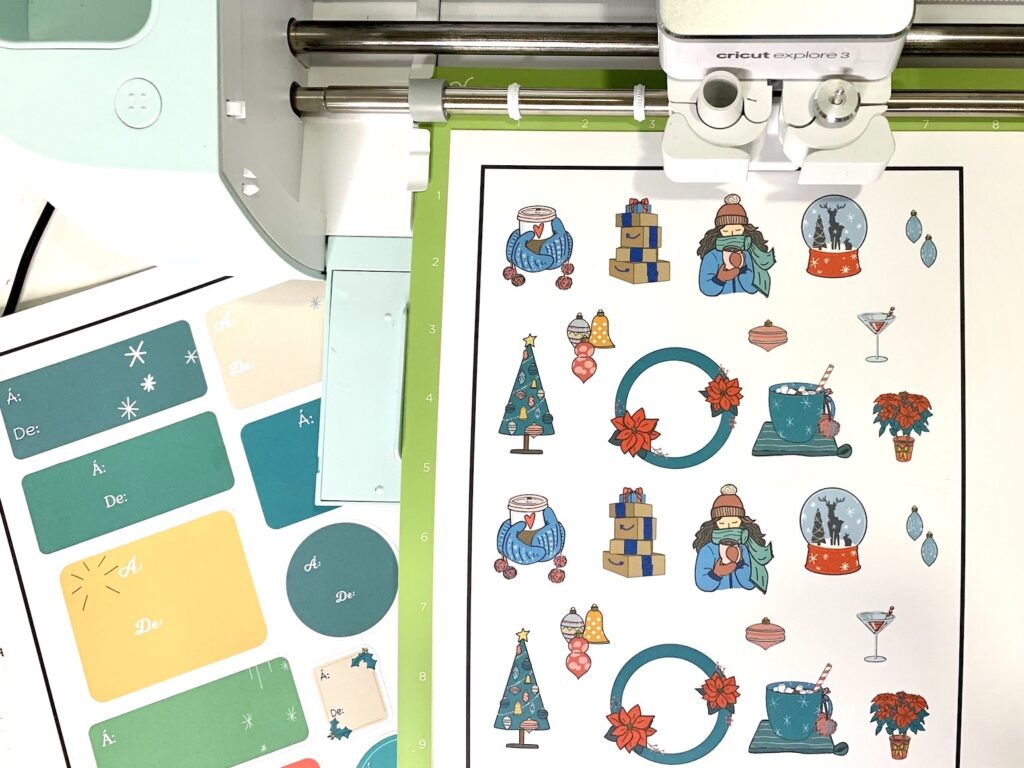
Step Seven: Assemble the Layers of the Layered Gift Tags
Use the foam adhesive dots to attach the pieces from the top layer to the bottom layer as shown.
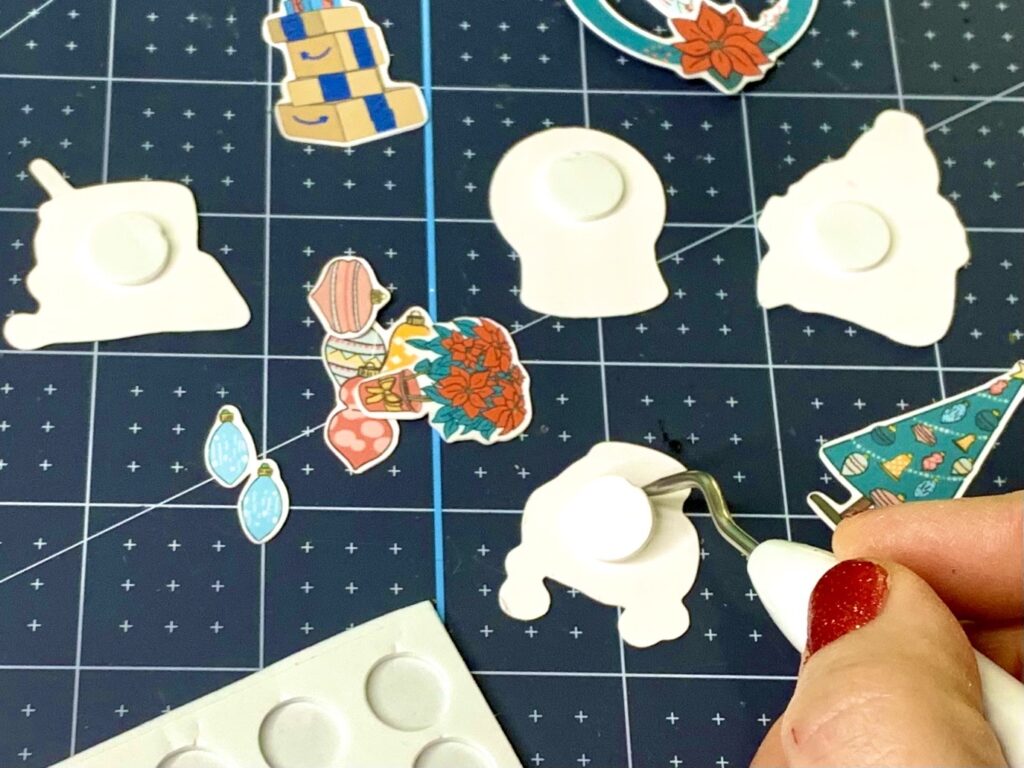
Carefully place the top layer of the cardstock pieces to adhere them to the bottom layer of printed sticker paper gift tags. .
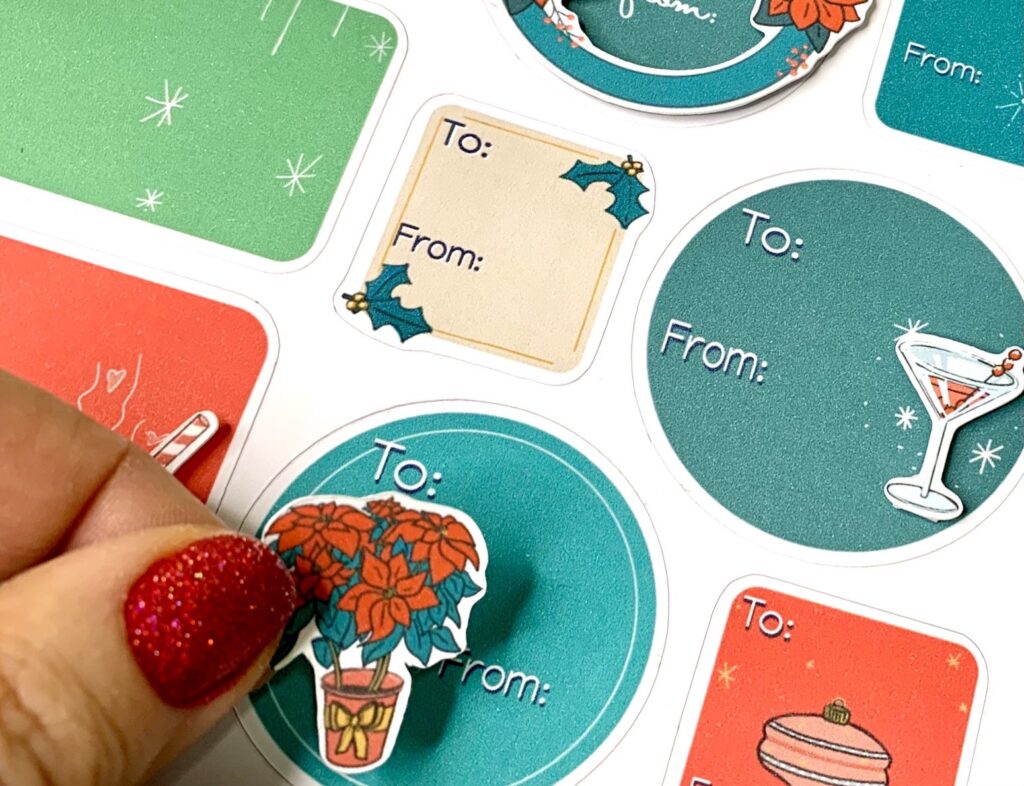
Design Note: You’ll maybe notice on a few of the smaller stickers I actually have the same image from the top layer as part of the bottom layer too. That’s because those pieces were super small and I thought if you lost them it wouldn’t matter. Or if you have vision issues, you don’t need to worry about trying to get the adhesive on those small pieces. One of the tags doesn’t even have a top layer because they would be too small and I didn’t want you to feel frustrated. This is fun!
Step Eight: Add Some Sparkle to Your Gift Tag Stickers!
It’s the holidays! This means glitter and sparkle are completely on the table for crafting!
If you love glitter but don’t want the mess you can use Stickles, which is a glitter adhesive. You can choose from regular Stickles in little bottles or the new Stickles Gel. I tried both below.
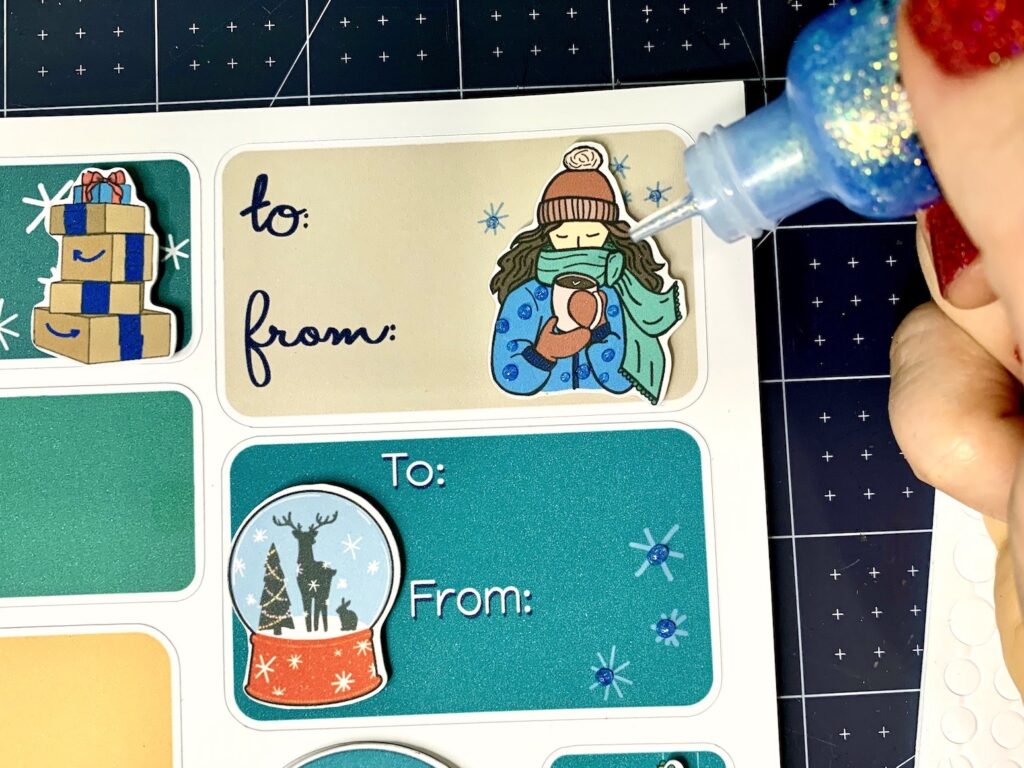
The regular Stickles comes in a small bottle which makes creating tiny little dots of glitter easy to do. You can maybe see that in the blue jacket of the girl’s design.
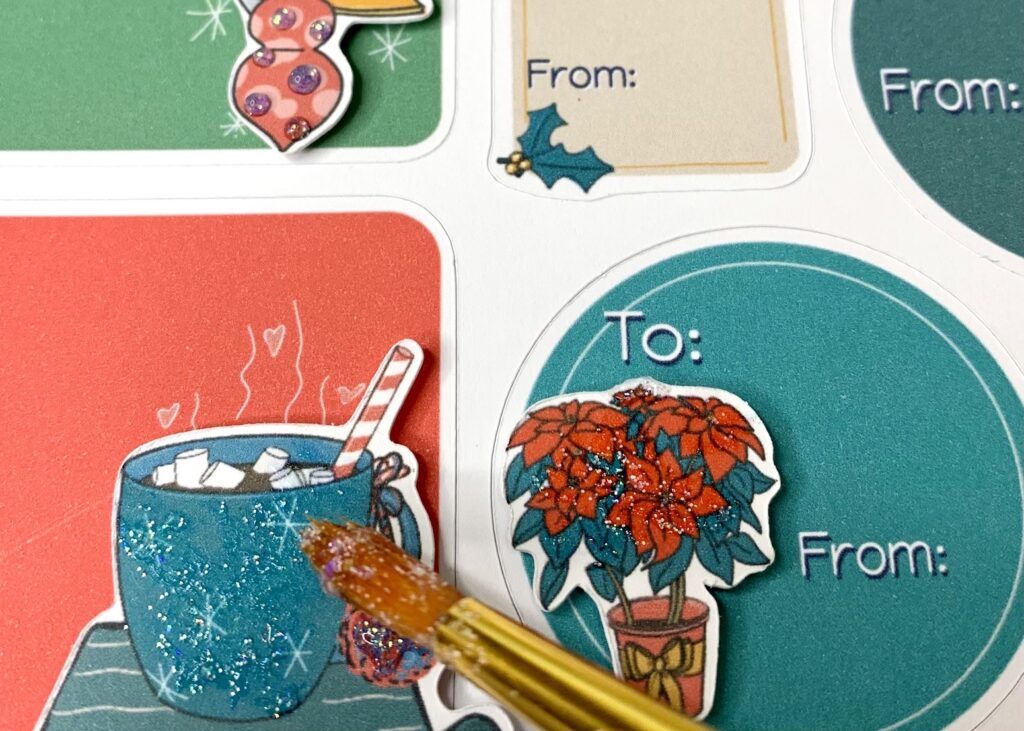
The Stickles Gel is easier to dab on larger areas with a brush. Just be aware that if you brush it on you may smear your ink a little. So dabbing is good!
Watch the YouTube Video on How to Make Layered Stickers with Cricut
Rather watch a video on how to make these stickers? The video below shows the process from Procreate to Cricut using some layered stickers that I designed last spring.
Just want to watch the Print then Cut part? Directions for print and cut start at timestamp 15:33.
Have Fun with a Mid-Century Twist on Modern Holiday Crafts All Week Long
This year I’ve chosen to go with the mid-century modern look you may have noticed on your Starbucks Cups, on holiday decorations at Target, and in other stores. It’s a fun, fresh look for 2021 that still has a bit of nostalgic color and graphic patterns, and imagery from the ’50s. And so easy to make in Procreate!
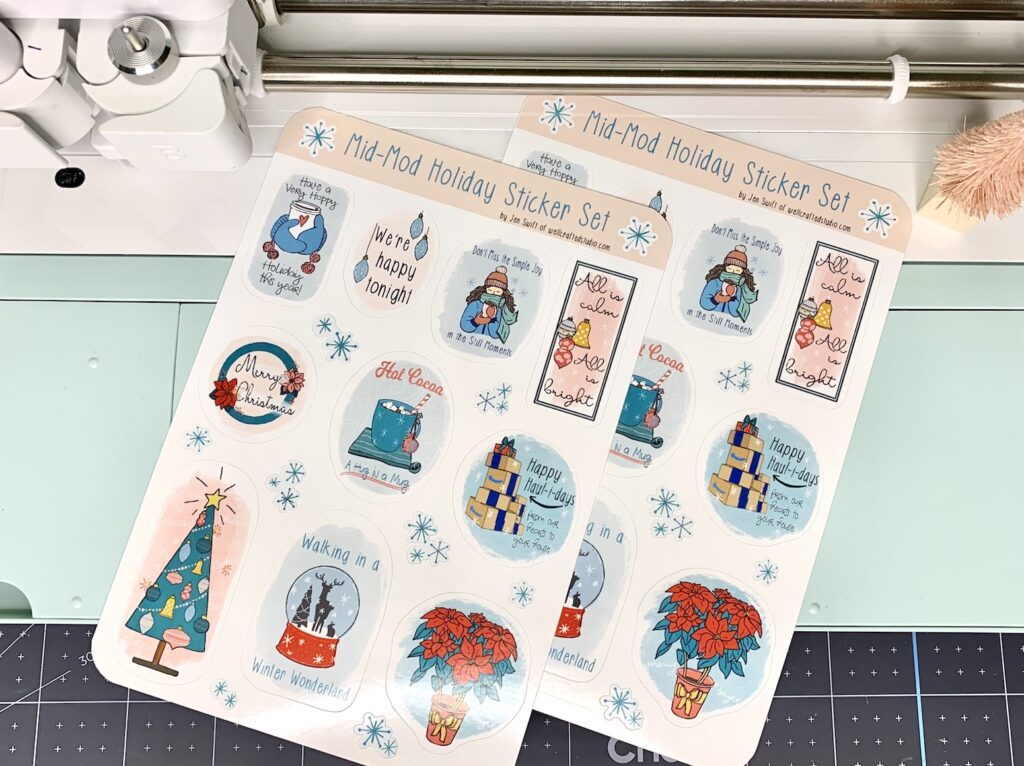
Not only do I have these gift tag stickers for you, but all week long I’ll be showing you how to use these same designs as sticker sheets, as sublimation designs, and more. If you haven’t tried designing in Procreate yet, I’d love to have you join my Facebook Group for our weekly Procreate Playdates and learn more!
Love it? Share it!
I hope you enjoyed this post! If you did, I’d love to have you share this on social media. Tag #wellcraftedstudio and show me what you’re making for holiday projects too!
Thanks for Reading,



I love these layered stickers! I may need to try my first print and cut project. Thanks for sharing Jen
lovely tags thank you
Hi Mary, I’m glad you like them! Thanks for leaving a comment- I really appreciate it!
I tried to sign up for email and couldn’t find how to do it 🙁
Hi Michelle, Sorry I didn’t see this right away- did you figure it out? There’s a sign up in the sidebar.
These layered stickers are so cute!
Thanks Nadine! I’m glad you like them and thanks for the comment! ❤️
I like how you use procreate. I plan on having fun using it. I love your daily email. There are so many inspirational projects. These layered are a nice way to present gifts. Thanks for this.
Hi Kathryn, Oh I’m so glad you like the projects! And my emails- I’m a little self-conscious about sending so many. So thanks for telling me. I really appreciate the encouragement! ❤️❤️❤️