To get a visible design with the Cricut Maker machines, it helps to add a line fill to fill-in the outline of your design. This looks like a solid filled-in shape to the eye and makes your design much easier to see. It’s kind of the secret sauce for Cricut projects like engraving, foiling, or drawing. In this tutorial, I will show you how easy it is to use Offset to add line fill in Cricut Design Space. AND I even have a fun new SVG that you can personalize and add to a pie server design.
Note: Offset is currently only available on Cricut Design Space for desktop. The Cricut engraving tool is only available as part of the Cricut Maker’s adaptive tool system and can not be used with the Cricut Explore machines.
❤️ Thanks to my super creative friend Karen Lentz, for sharing this Cricut Design Space Offset Method for adding fill to your engraving designs. It’s so simple and so genius- you guys are going to love it!
If you’d like to know more about other methods for adding a fill to make your engraving designs more visible, check out the link for the Engraving Metals with Your Maker Facebook Group at the bottom of this post!
Download the Free Engraving Designs!
(and get a bonus Pi Day design too!)
If you’d like to follow along with this tutorial, I have the design I’m using in my Free Library along with lots of other pre-filled engraving svg designs for the Cricut Maker Engraving Tool. This is a perk for my subscribers, and you’ll find the design under Engraving Designs.
Adding your own name, as I did in the tutorial below, is an awesome way to create a lasting impression- especially if you’re giving this as a gift!
Need the password? Just sign up for my email list, and you’ll get the password emailed directly to you!
How to Use Offset to Add Line Fill in Cricut Design Space
This post contains affiliate links. Thank you for supporting my small business.
Tools and Materials
- Cricut Maker or Cricut Maker 3
- Cricut Engraving Tool (w/ Quick Swap housing) or just the Cricut Engraving Tip (if you already have the quickswap housing)
- Purple Strong Grip Mat
- Blue Painter’s Tape
- Stainless Steel Server (I’m demoing with one from the Dollar Store) but prefer this server from Amazon.
About affiliate links- This small commission is at no additional cost to you and helps me continue to provide you with this great content. Thank you for your support!
Instructions for How to Use Offset to Add Line Fill to Your Engraving Designs
Step One: Download the Free SVG Design (optional)
If you’d like to try this using my Piece Out design, you can find it in my Free Library. You’ll find the link in the post above. Click on the link to download the design. Then open the zip archive to extract the file.

The pie design for this project comes with a “Piece Out” text, but I also made it easy to remove that saying and insert your own personalized text, or favorite quotes. You’ll see how in the tutorial below!
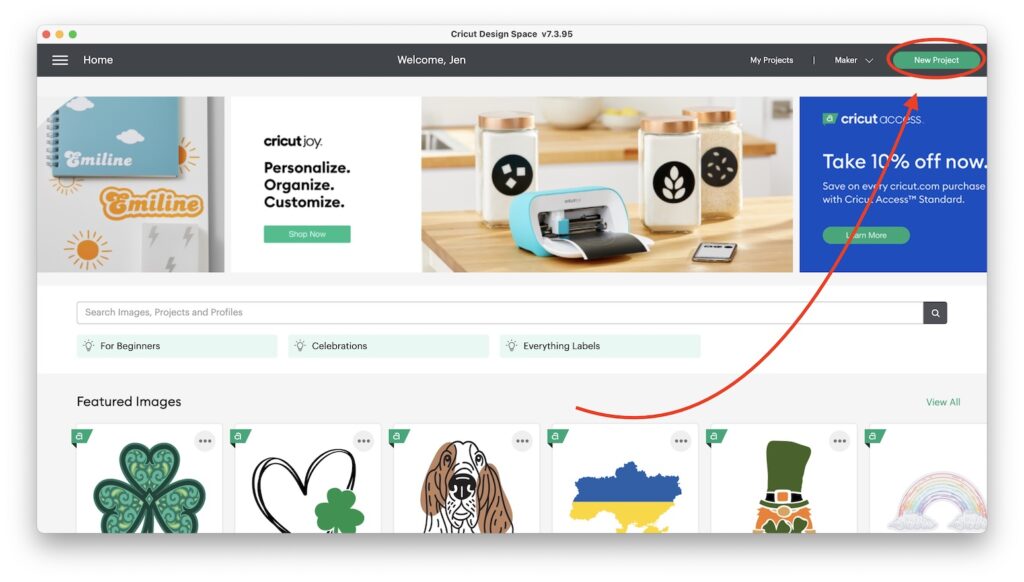
Step Two: Open a New Cricut Design Space Project Canvas
Open Cricut Design Space on your desktop computer and go to the green New Project button in the upper right corner to open a new canvas.
Step Three: Upload the Design into Cricut Design Space
In your new canvas, click on the Upload option in the left-side import toolbar. This opens the Uploaded Images Gallery. Then, click the Upload Image and then click Browse to fetch your design.
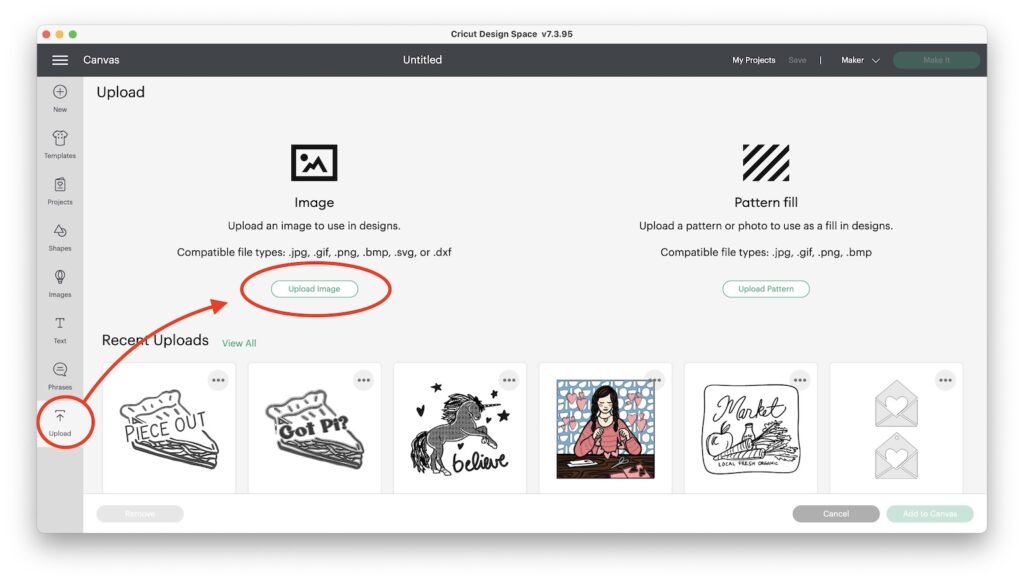
Next, select your uploaded design by clicking on it and then click on the Add to Canvas in the bottom left corner of the screen.

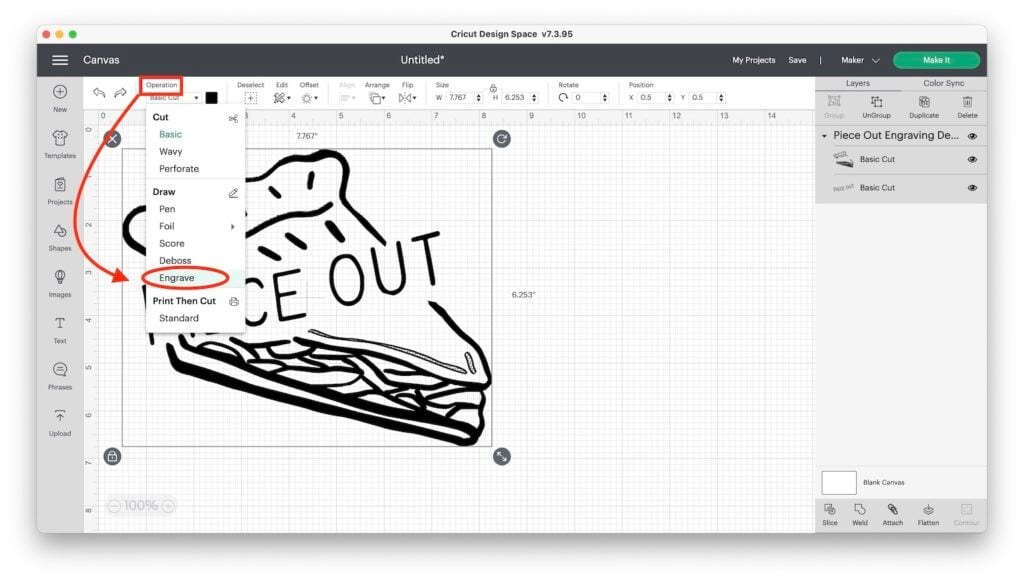
Step Four: Change Operation to Engrave
To change the operation, you first have to select the image by clicking on it. The Operation menu is at the left of the top toolbar. Choose Engrave.
Note: If you don’t see Engrave in your drop-down menu you may not have Maker selected as your machine choice. You can check that in the upper right corner by the Make It button.
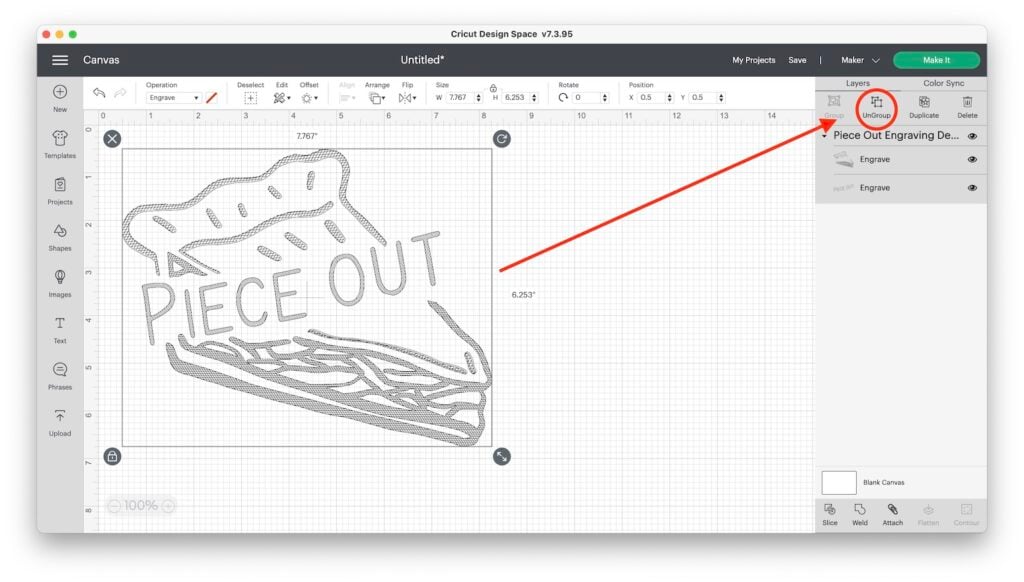
Step Five: Ungroup the Design and Seperate Images
Next, hit the Ungroup button at the top of the Layers panel. And move aside the “Piece Out”. If you want, you can either hide the layer (by clicking the eye icon on the layer) or delete the text if you won’t be using it.
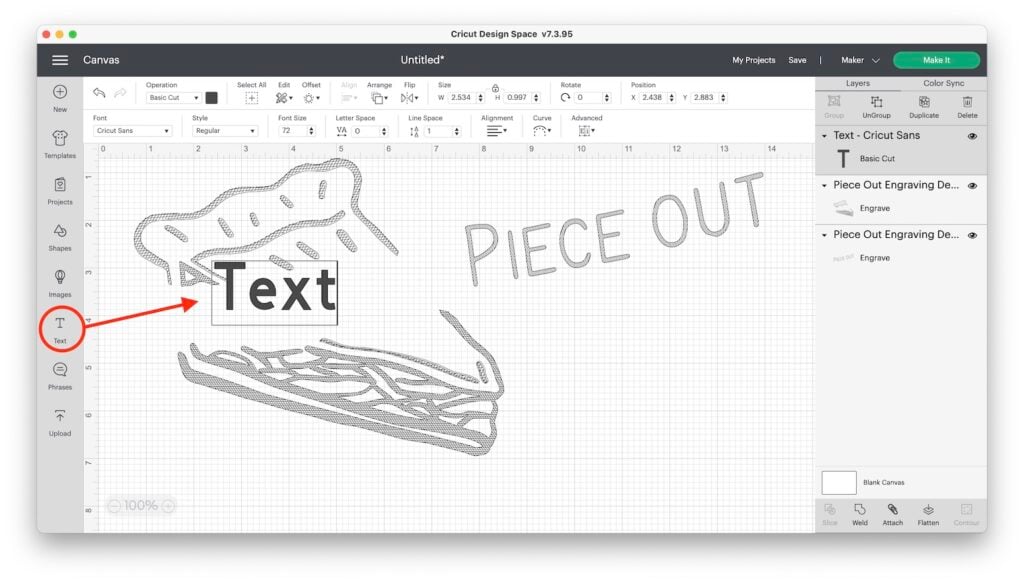
Step Six: Add Text
This is where we customize the server design! To do this, click the Text button in the side toolbar. This opens a text box on your canvas and the Text Panel at the top of your screen.
Type in your text. Then, in the text panel, you can play with different fonts, by scrolling through the options in the drop-down menu.
Note: When you click on System fonts it only shows you those fonts you’ve downloaded to your computer. If you’ve purchased fonts that are commercial license, this is the easiest way to find them.
Choosing a Font that’s Good for Using Line Fill-
For this tutorial, choose a font that isn’t too compact, and avoid a writing font. You want to have a nice space that can be filled in with the offset technique.
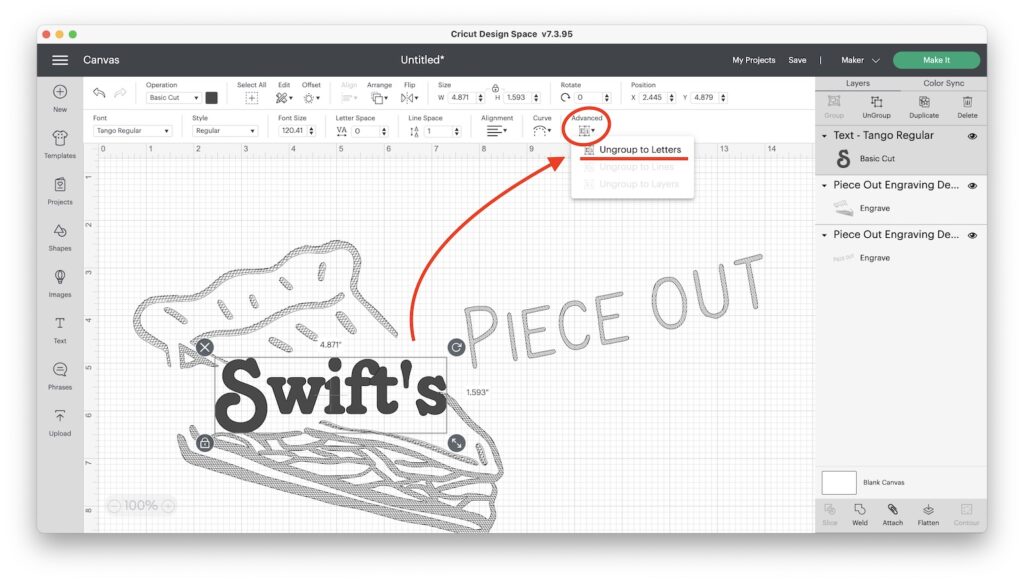
You can make adjustments, however. For instance, the font I liked had the letters spaced a little too tightly. So I used the Advanced option in the Text Panel to Ungroup to Letters. This allows me to move each letter to where I want it to be.
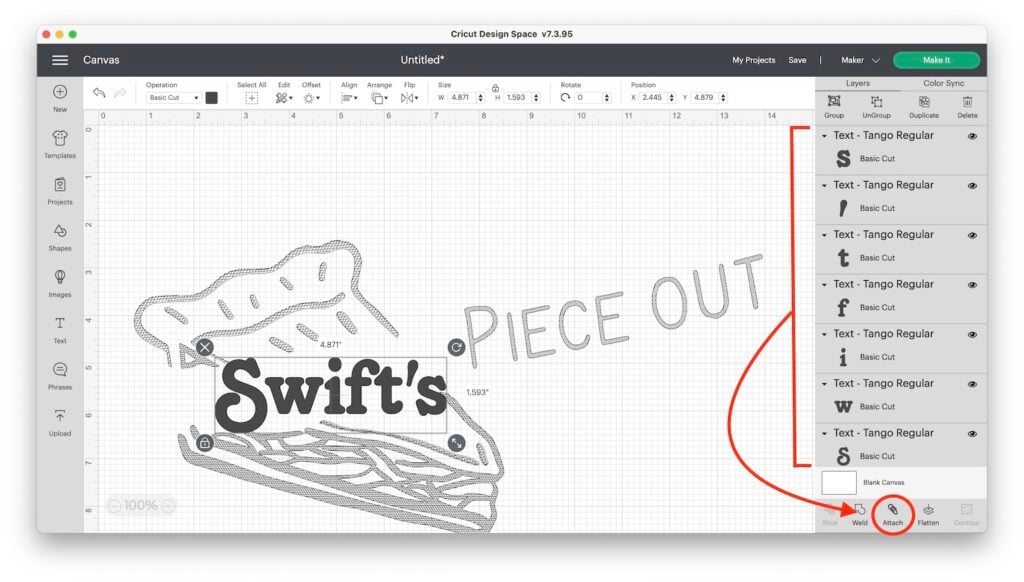
Next, Select all the letters at the bottom of the Layers Panel and Attach.
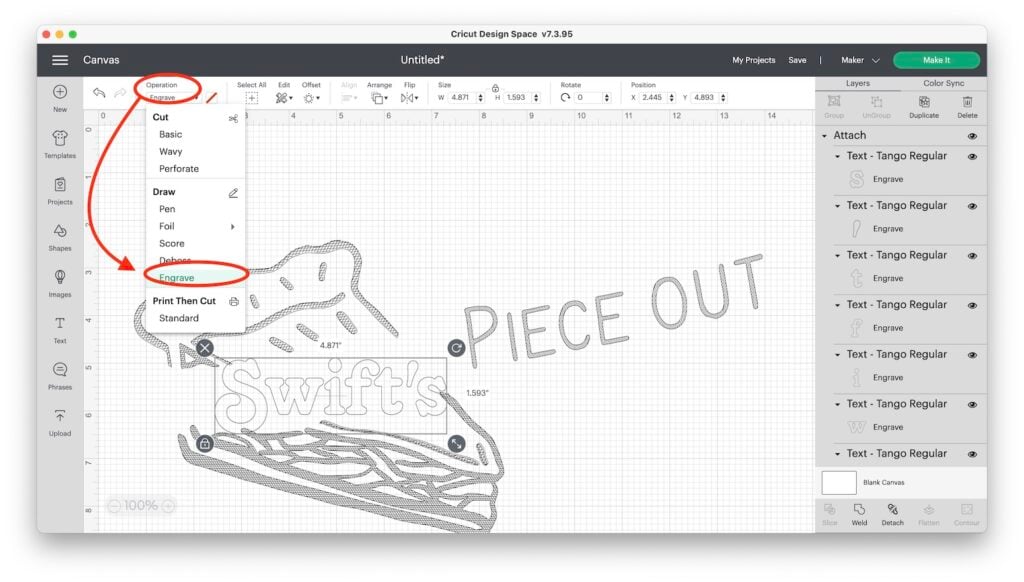
Step Seven: Change Operation of Text to Engrave
Time to change the linetype action of your text to Engrave. Again, you can do this by clicking the Operation menu in the top left of the toolbar and clicking on the Engrave option.
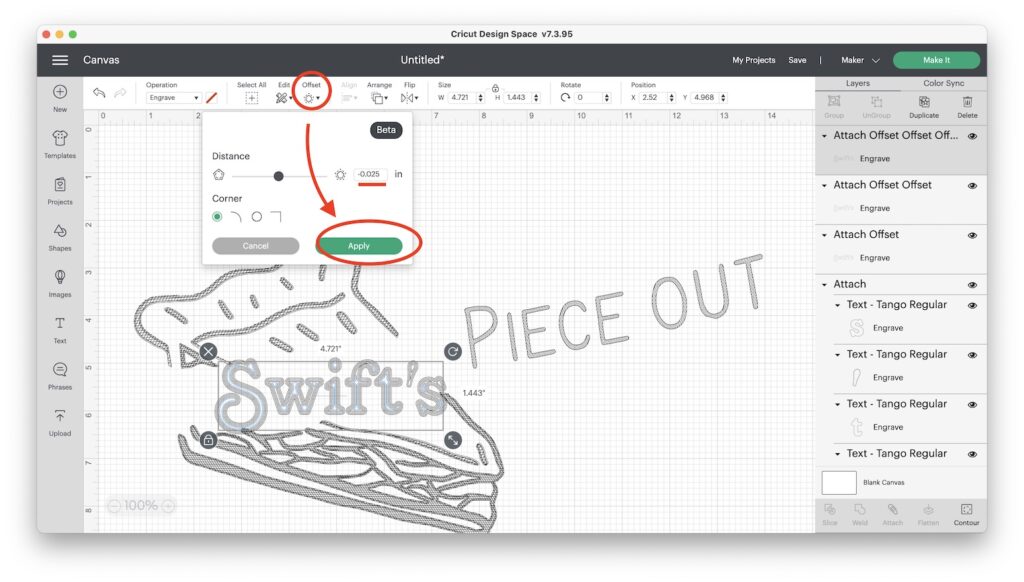
Step Eight: Use the Offset Feature to Add Line Fill
In the top edit toolbar, you’ll see the Offset Feature. Click on it to open, and then change the size to -0.025. This creates an inset (or a negative offset).
Once the blue lines appear, click the Apply button.
Note: I liked this spacing for my inset. However, you can make it any size that you want, and it may be fun to test different sizes for a different effect.
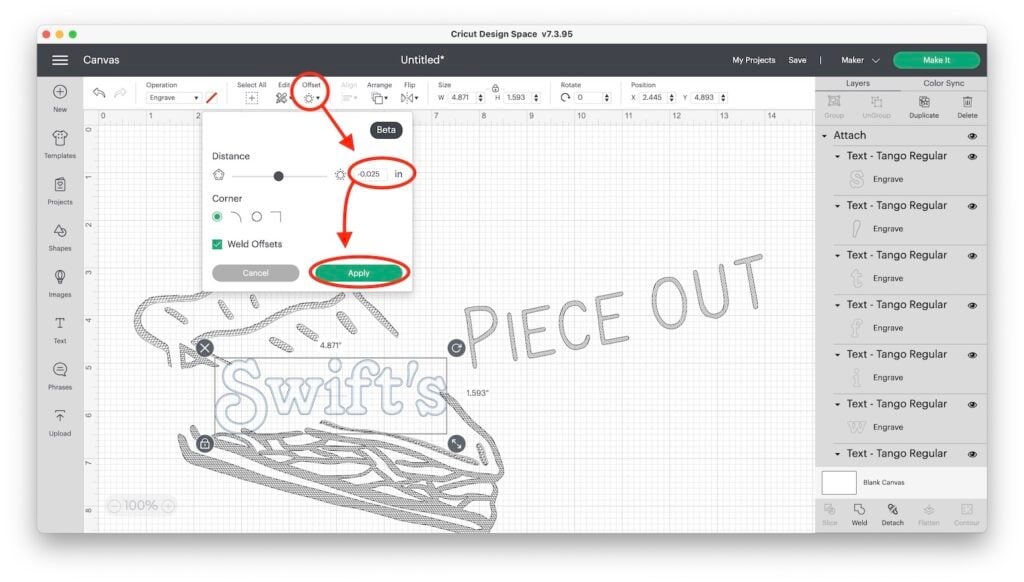
This creates a new layer at the top of your layers panel that says Attach Offset and will be selected. Do not unselect anything. Just go right back up to the Offset and click it again.
This repeats the action of adding an offset. Continue until your image is filled in.
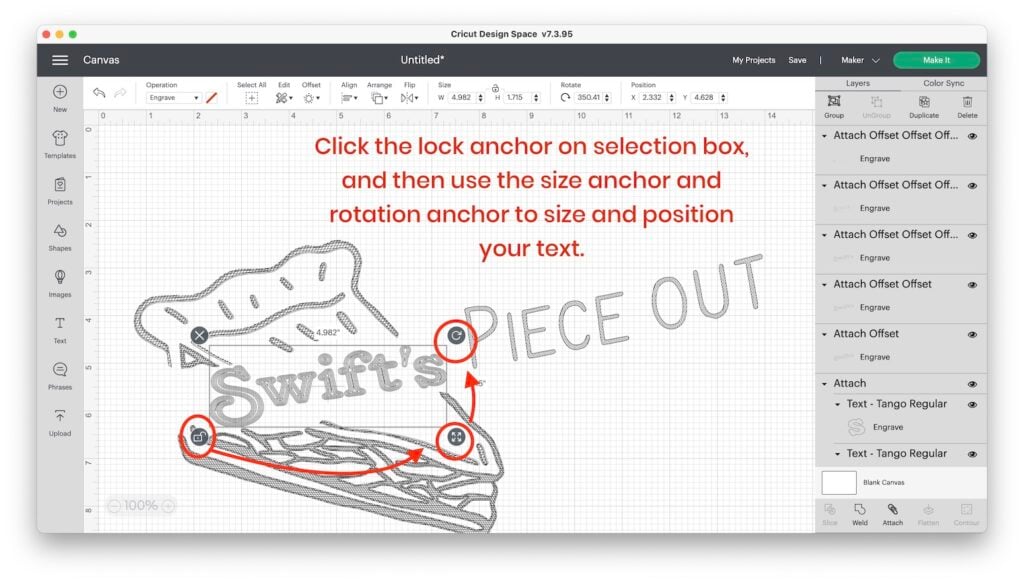
Step Nine: Rotate and Size the Text to Fit the Design
Time to fit your text into your design! This may mean unlocking the constraints so that you can change the height and width of your text. Or you may need to rotate the design to get your placement correct.
You can do all of these actions using the anchor points on the selection box (see pic below).
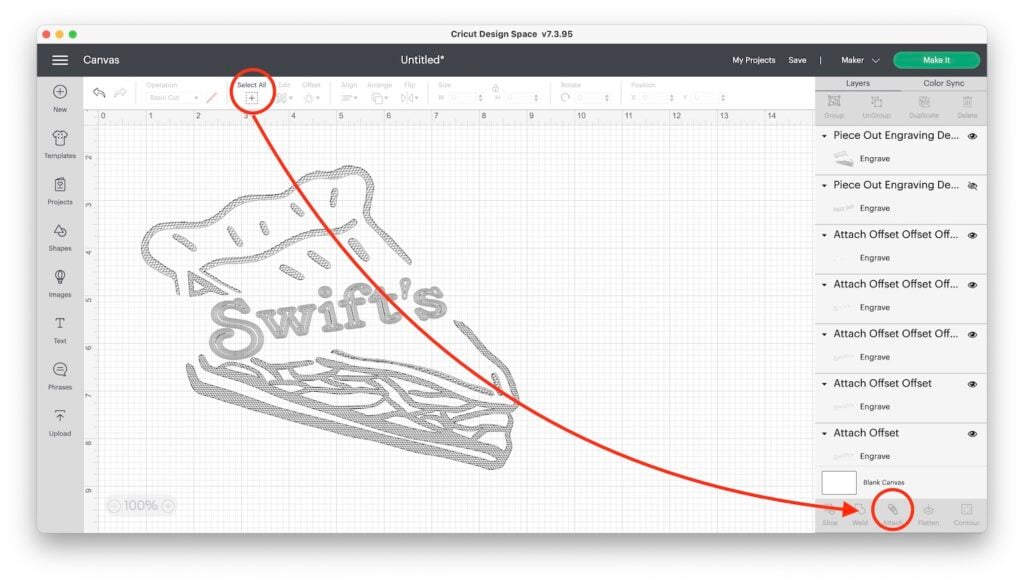
Step Ten: Select All and Attach
Once you have everything on your design sized and positioned correctly, it’s time to click the Select All button in the top toolbar.
Then, with everything selected, click the Attach button at the bottom of your Layers Panel (at the right side of your canvas).
You are now done with your design!!! Time to create a template and get ready to engrave!
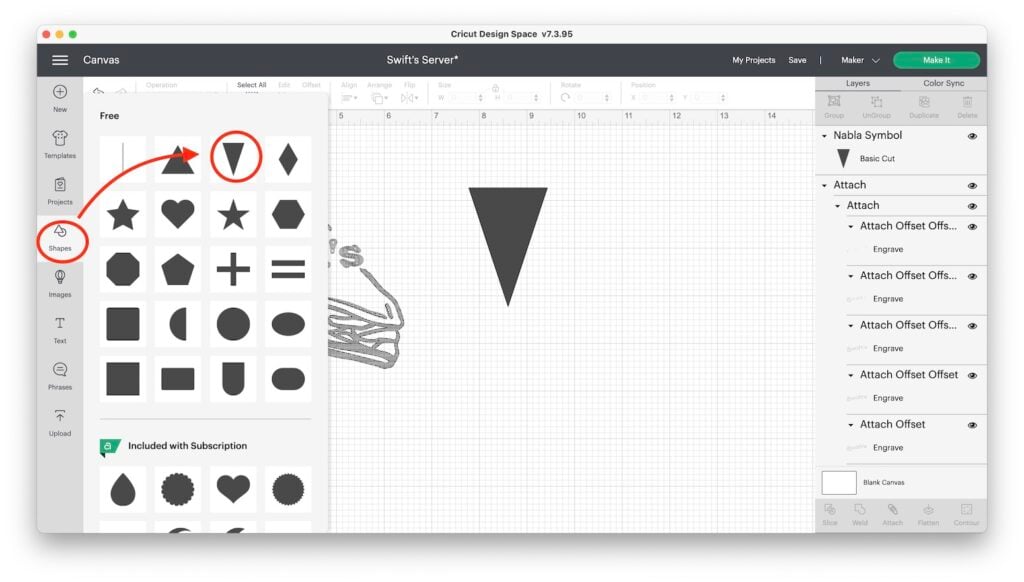
Step Eleven: Create a Simple Shape Template
To do this, click the basic Shapes icon in the left-side toolbar and click to select a Triangle.
Unlock the constraints of the triangle by clicking the lock icon. Then enter the measurements of your server in height and width.
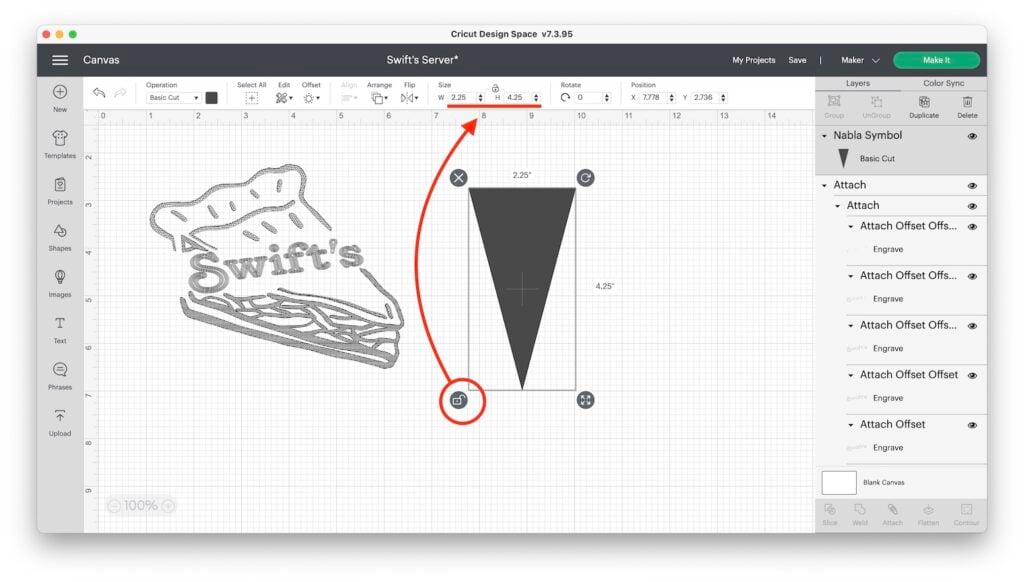
Note on Sizing Template: Because there is a .05″ border at the bottom of the mat preview page where Cricut won’t allow you to place your server, you may want to subtract from your triangle that .05″ plus the .05″ that is the distance from the bottom of the grid (where you put the bend of your server to avoid the rollers). For the Maker 3 that is a full inch as we need to put that at the VERY bottom of the mat.
At this point if you change the Operation of the triangle shape to Pen it will help you position the design and size it correctly.
Step Twelve: Size the Engraving Design to Fit Triangle and Duplicate the Design
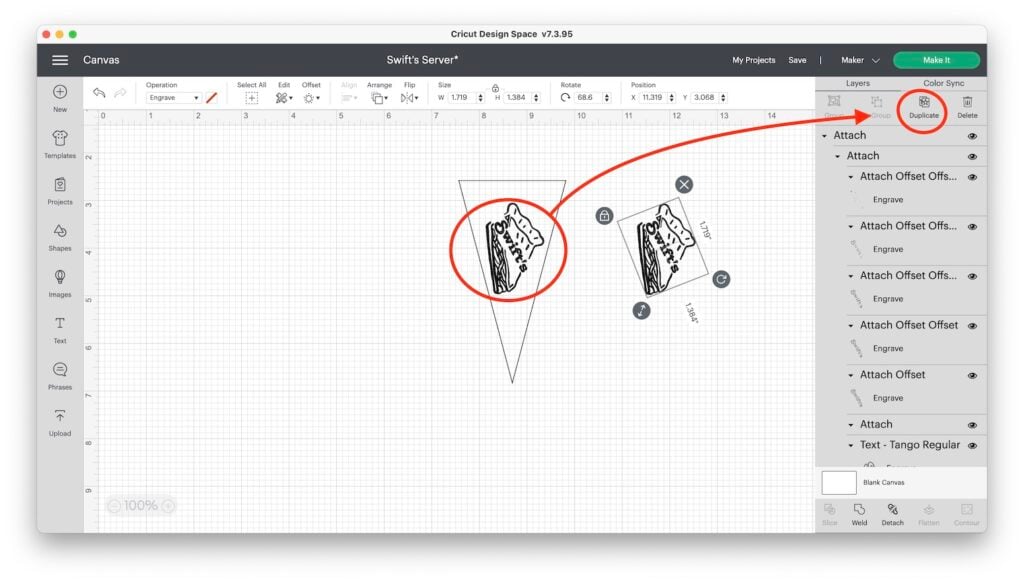
Select the design and use the selection box anchors to move, rotate, and size the design to fit the triangle. (See Step Nine.)
Next, Duplicate the design with the Duplicate button at the top of the Layers Panel.
Move the duplicate engraving design off to the side.
Step Thirteen: Complete the Simple Shape Template
To finish your template, Select the triangle and the design and under Operation make them both Pen. Then, change the color of the template to something visible and contrasting, like red.
Attach both by clicking the Attach at the bottom of the Layers Panel again.

Note: At this point, I would also usually encourage you to Duplicate> Align Center> Attach trick on your engraving design to make multiple passes. However, because of the fill added, you really don’t need the engraving to go deeper to see it. And because this is a serving utensil you probably don’t want the surface to be too rough either.
Step Fourteen: Save as a Project and Make it!
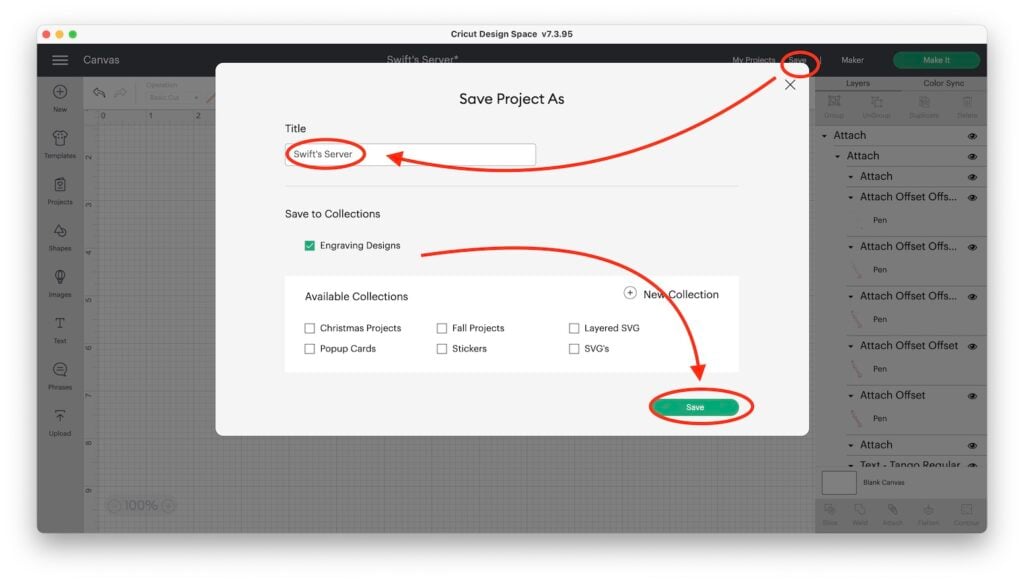
And you’re done with the template and ready to Save!
To do this, click the Save button in the top right of your screen. Then, name your project, and choose a collection if you want to. The, hit the green Save button to finish.
Finally- hit the green Make It button in the top right corner of your screen!
Step Fifteen: Position Your Template and Design for Engraving on the Mat Preview Page
The next screen is the Mat Preview Screen. This is your opportunity to position your design and template so they match the position of your engraver on the mat.
Move your template to the bottom center of the mat and rotate it so that its tip is pointing up and it is as far down on the mat as it can go.
Move the engraving design so it fits over the template perfectly. You should NOT be able to see any red behind the design.
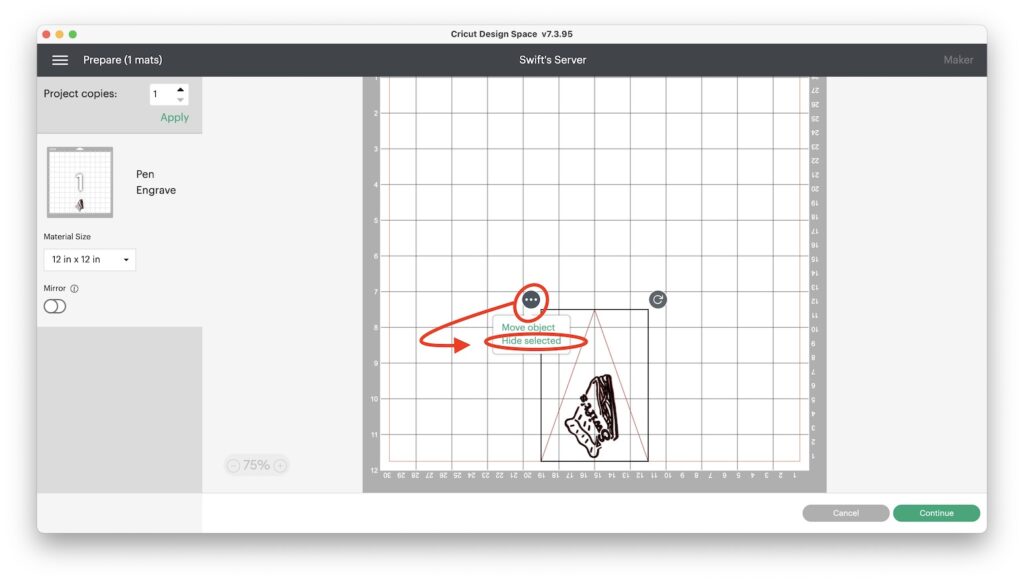
Then, click the three dots on the template and choose Hide Selected.
Next, hit the green Continue button at the bottom of the screen to move on to the engraving!.
Note: Because there is that .05″ “no go” area or border, you may have to make adjustments to your placement if you didn’t subtract that .05″ from your template.
Step Sixteen: Prep Your Mat for the Engraving Process
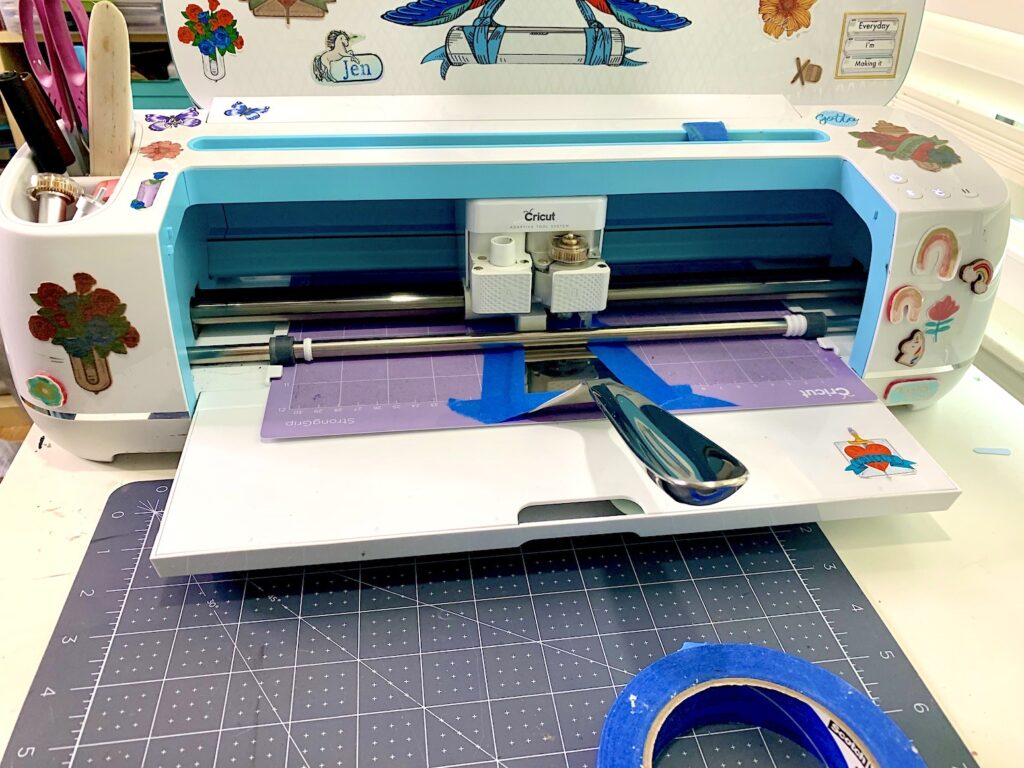
The most important thing here is to properly position your server so that it does not hit the rollers of your machine. The other important thing is to make sure that your server does not move as you engrave.
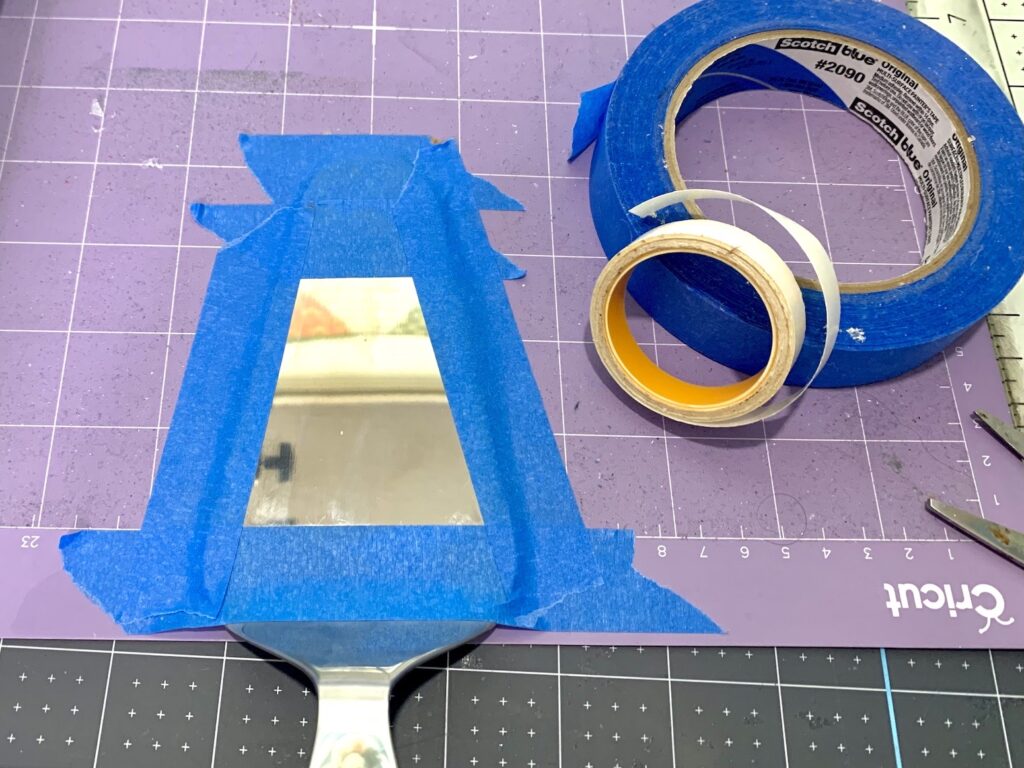
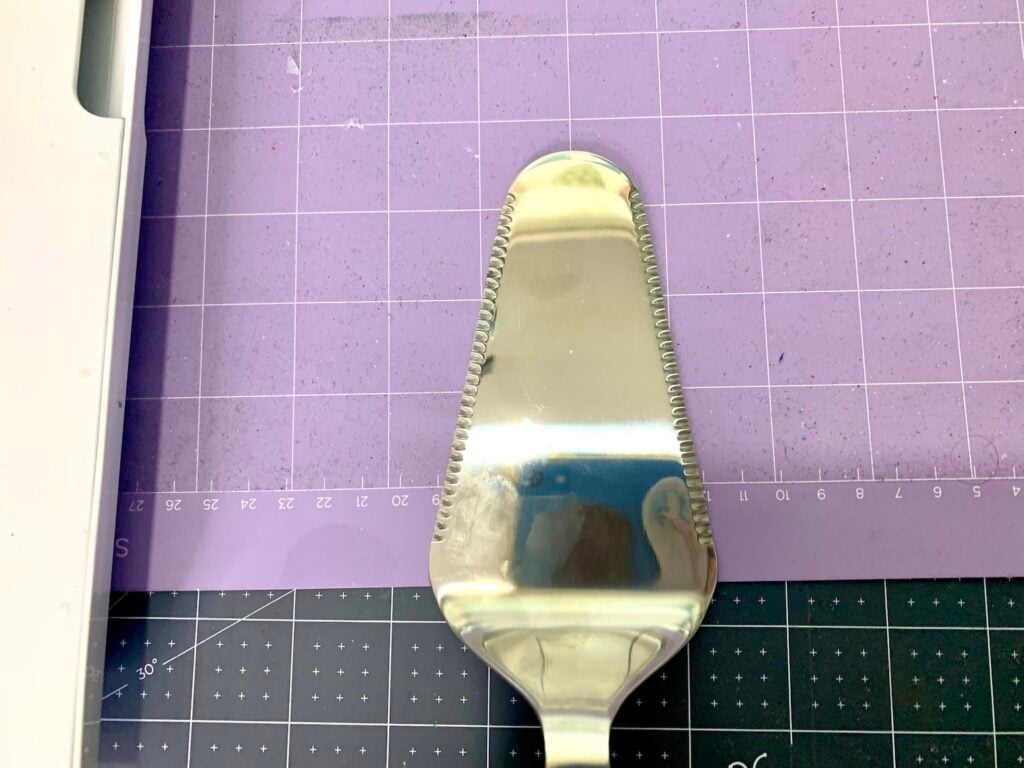
Place your server at the bottom of your mat in the center (so it corresponds with the mat preview page). Then, press it firmly to the mat and use blue masking tape to tape it securely in place.
Note: Be sure to press the tape so it’s snug to the server and the server won’t be able to wiggle around as you engrave. If your strong grip mat isn’t super strong anymore, you may want to add a piece of double-stick tape under the server.
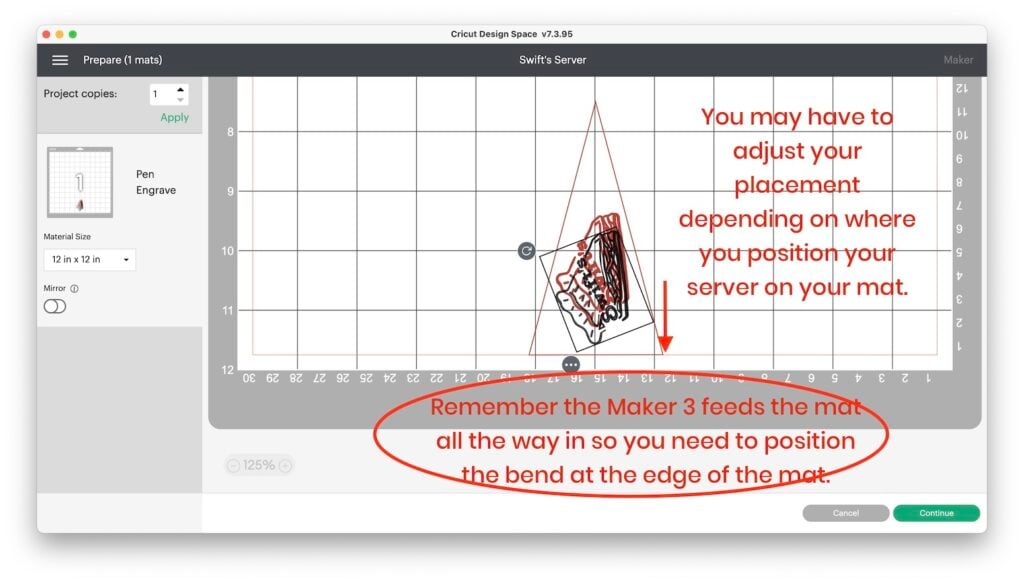
IMPORTANT Info about the Maker 3:
Because the Maker 3 feeds the ENTIRE mat into the machine, you need to position your server’s bend at the very bottom of the mat to avoid the rollers. Which may require you to prop up the mat by placing a roll of tape, or a roll of vinyl under the mat. SEE BELOW!
Want to Do Test Runs?
You can! If you’re the type that wants to be sure of your design before you commit to engraving your server blank, you can test the design and placement using some aluminum flashing. You can find small aluminum flashing sheets for under $1 a piece at your local home improvement store or online @ Amazon.
Step Sixteen: Get Ready to Engrave!
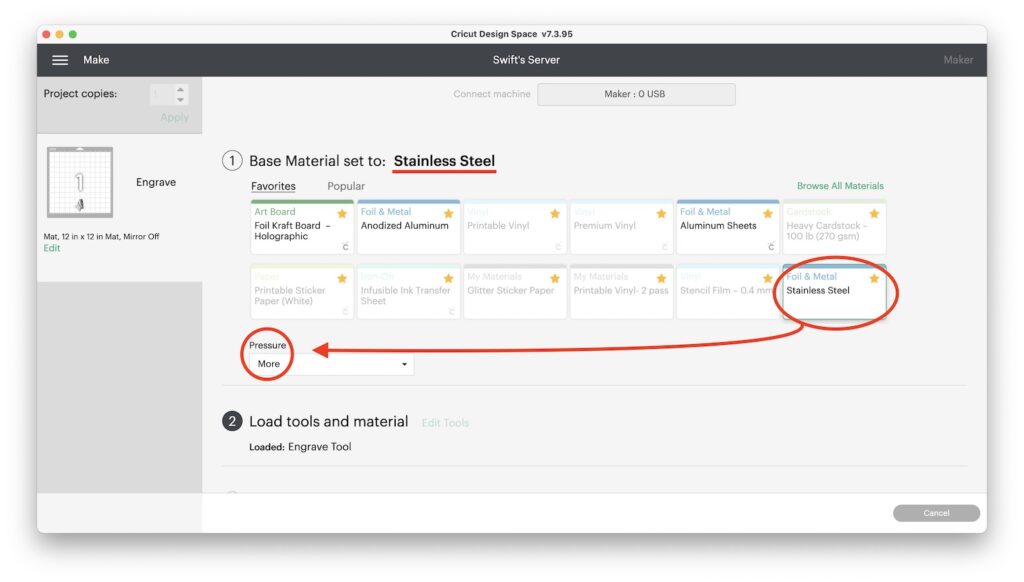
On the next page, you’ll be asked to choose your Material Settings options. Click on Stainless Steel and adjust the pressure to More.
Did you know? Stainless Steel is the hardest metal so the pressure is higher than if you chose a material setting for one of the soft metals.
Open clamp B and place your Engraving Tool in your Maker.
Move the white star wheels all the way over to the left of your roller.
Step Seventeen: Load your Mat and Press Go!
Next, using the Load/Unload Button on the Cricut Maker, load your mat into your machine.
When the light flashes on the Go button on your machine, press the button to start the engraving.
You’ll be able to see on your screen how much progress you’re making.
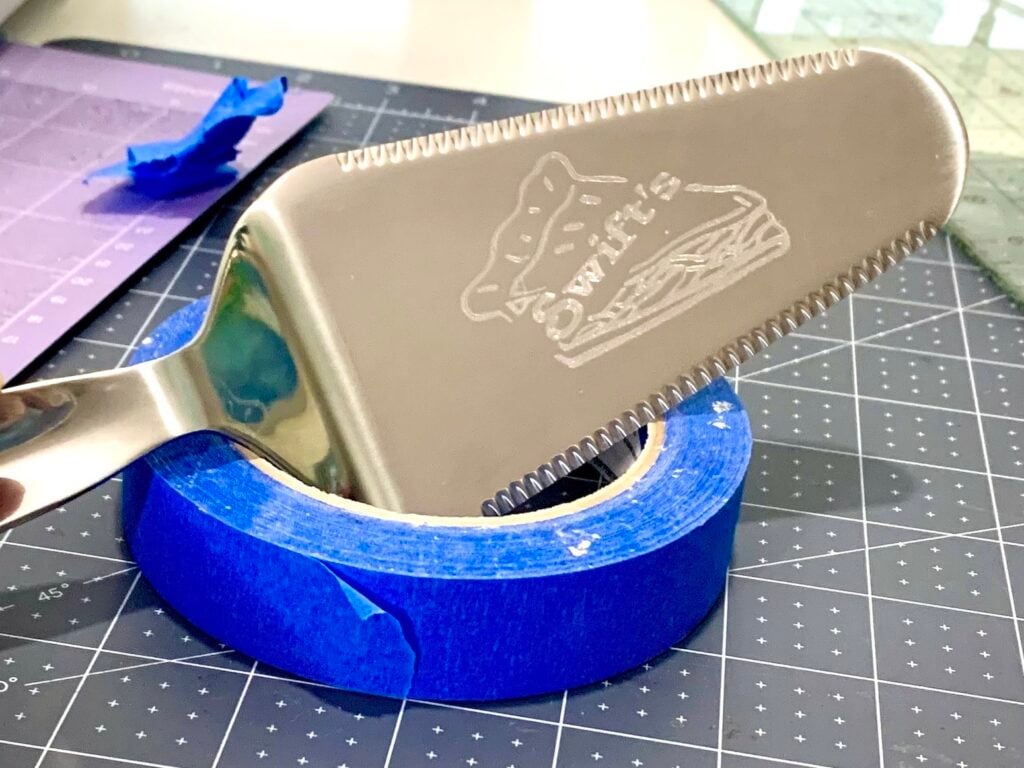
Step Eighteen: Finish Your Engraving
Once the engraving is done, the first thing to do is to Unload your mat by pressing the Load/Unload Button on your machine.
Use the tape to pick up any of the metal filings and then wash your server before use.
Looking For Engraving Blanks?
I do have a great post on the Best Tools and Materials for Engraving that gives you a ton of engraving blanks options. There are so many more than just dog tags! You can find aluminum or brass ring blanks, pewter pendants, sublimation-ready keychains, and more in a wide variety of materials to play with!
And if you’d like to know what material settings to use for your different blanks, I have a post 14 Surprising Metals you Can Engrave with Your Cricut Machine.
For More Inspiration
Want to know more about engraving with a Cricut? I have a ton of posts and YouTube videos that show you how to do all kinds of cool things. I also have a great post that answers common questions beginners to engraving with a Cricut want to ask- How to Start Engraving Metals with a Cricut in 2022.
Ready for an easy beginner-level challenge? One of my favorite tutorials is How to Engrave Infusible Ink on Cricut Aluminum Sheets.
Join the Engraving Metals with Your Maker Facebook Group!
Looking for a creative community? The Engraving Metals with Your Cricut Maker Facebook group has fun people, community challenges, and lots of creative engraving inspiration!
Love this Tutorial on How to Use Offset to Add Line Fill? Share it!
If you found this tutorial helpful, take a minute to save it to your Pinterest page with the image below, or to share it on social media. This helps me create even more great content for you!
Thanks for Reading,